DIY New Rear Struts on a 2015 Subaru Legacy

Most Subaru vehicles are similar, so this could apply to any Outback or Legacy in the 2015-2019 range.

According to most Google searches struts should be replaced every 50-100K miles. I tend to wait until I think I notice a difference in the car’s performance. This can be a hard thing considering struts wear down over years so the subtle changes in performance may not be noticeable. One key item to notice on a Subaru is a saggy butt. When the rear struts are worn that back end of the car really sags …especially noticeable on an Outback if you put any weight in the back or use a hitch rack of any sort.

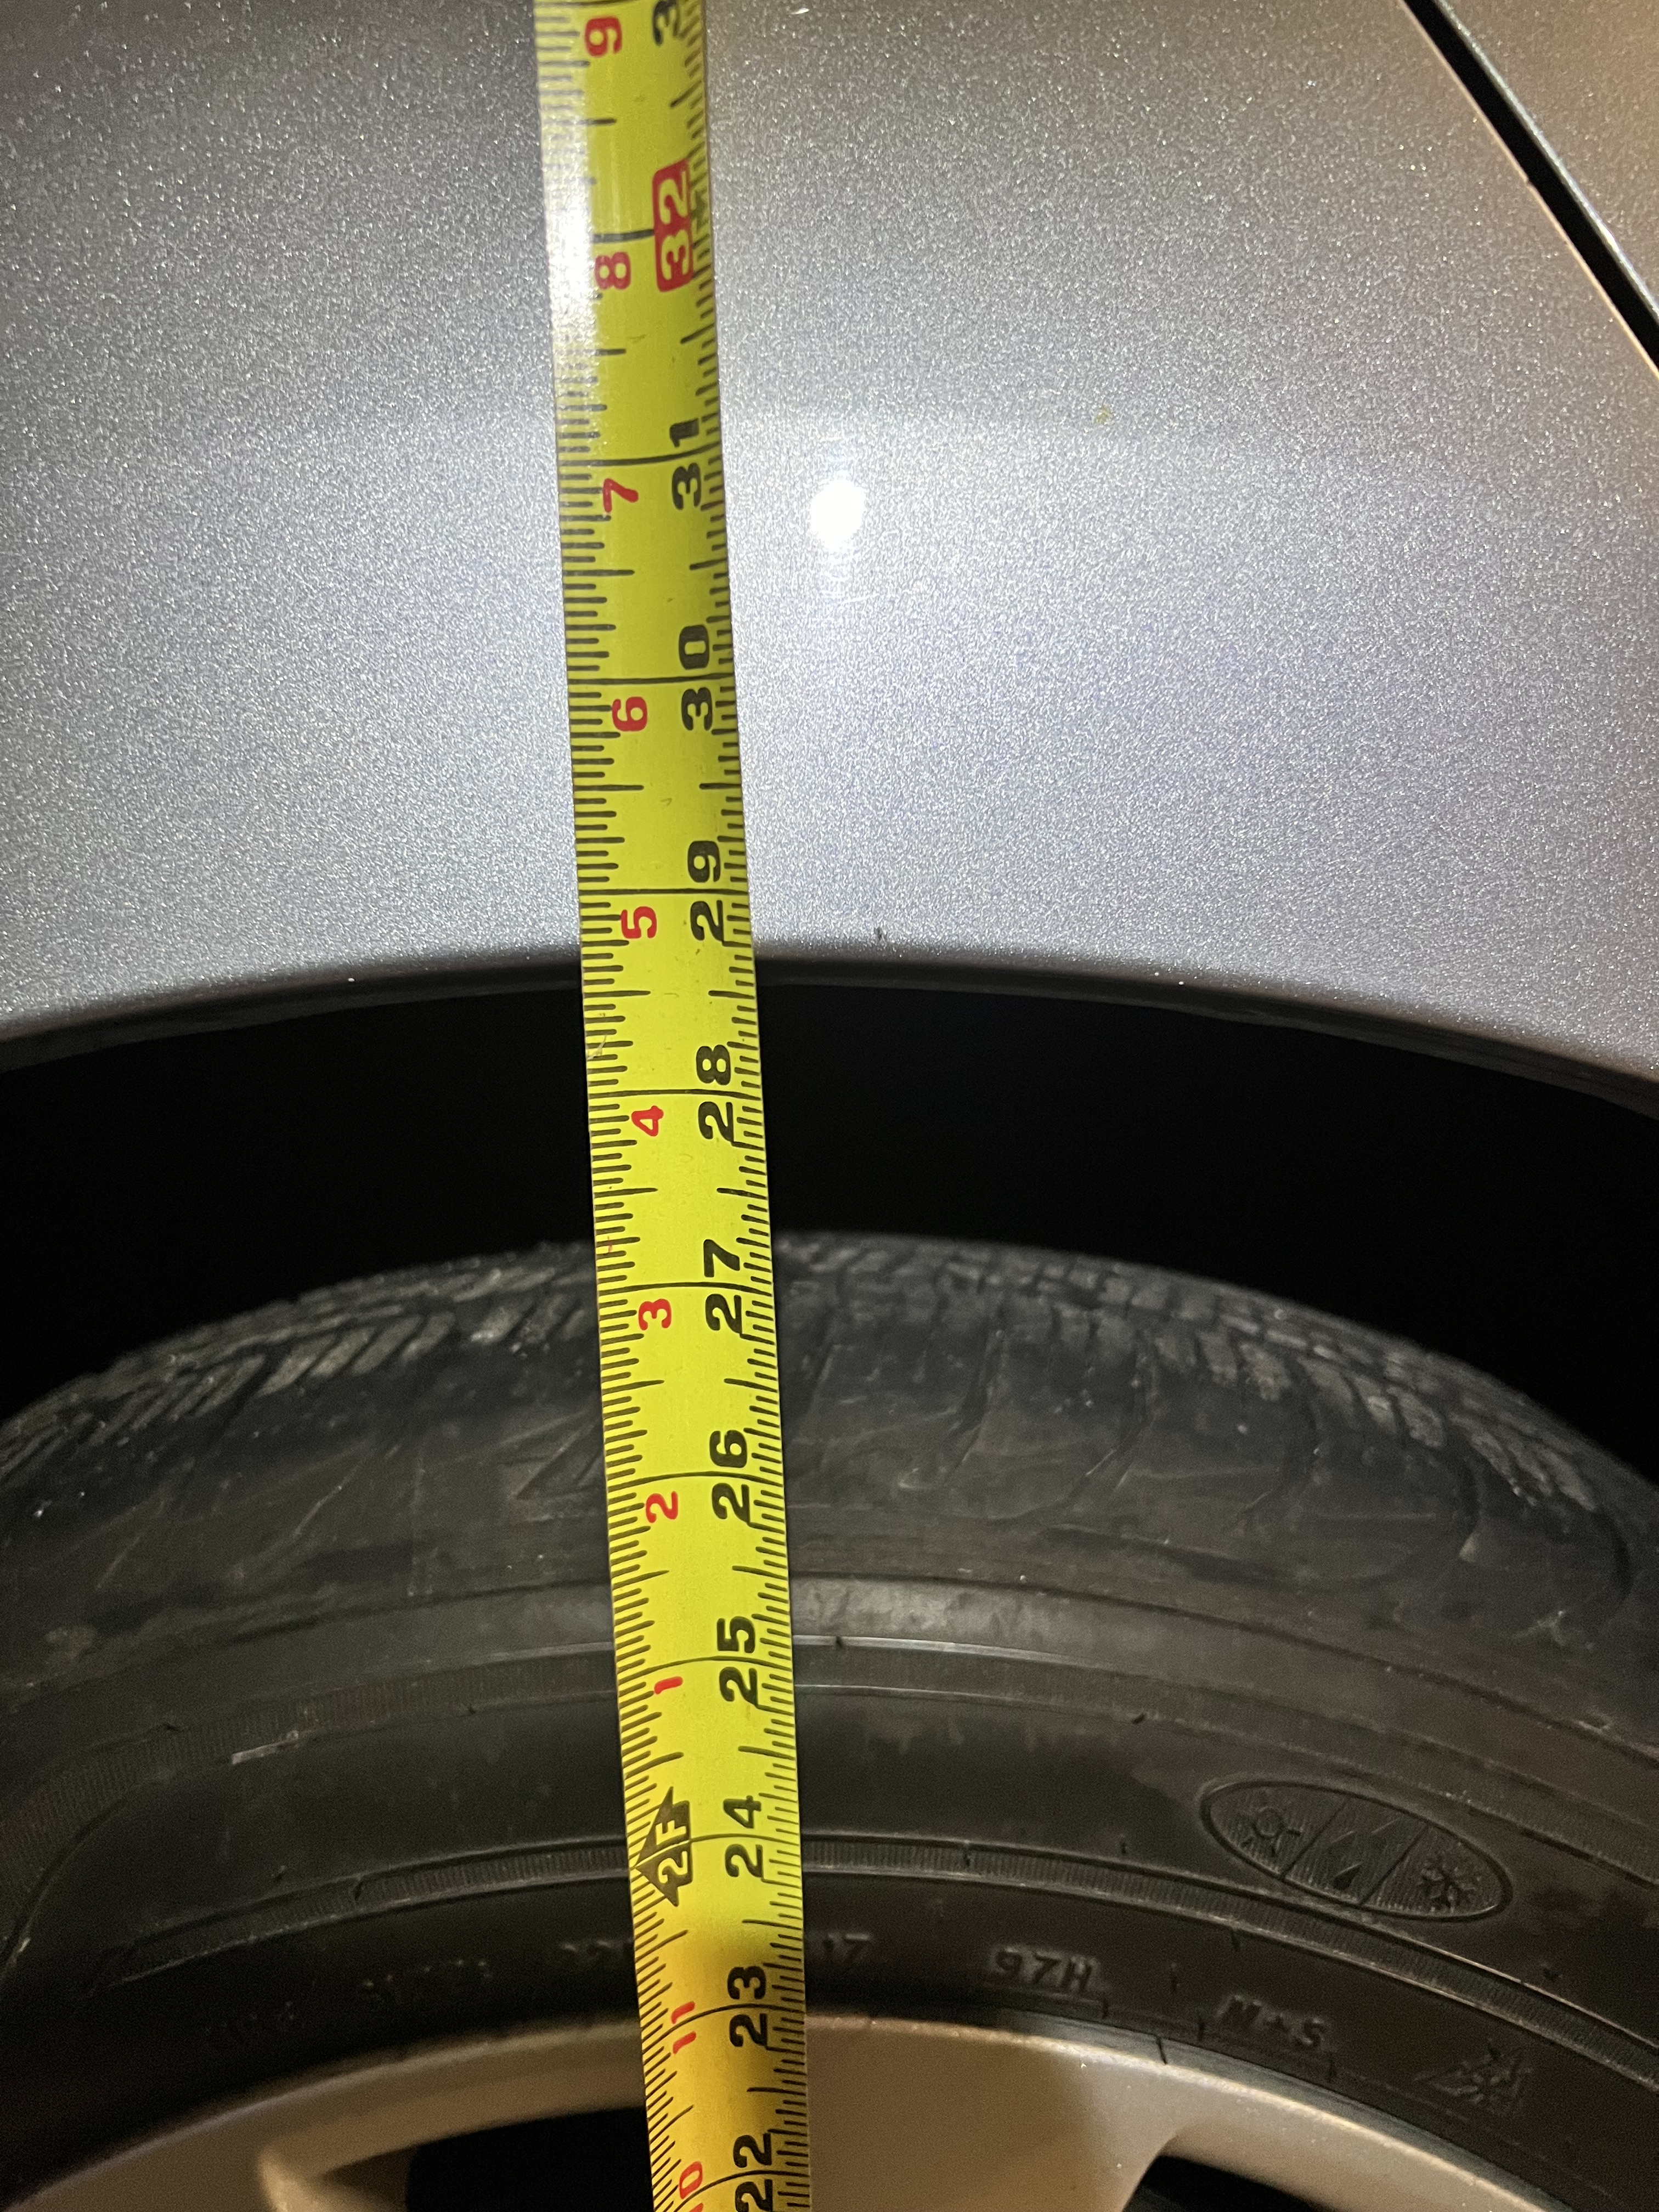
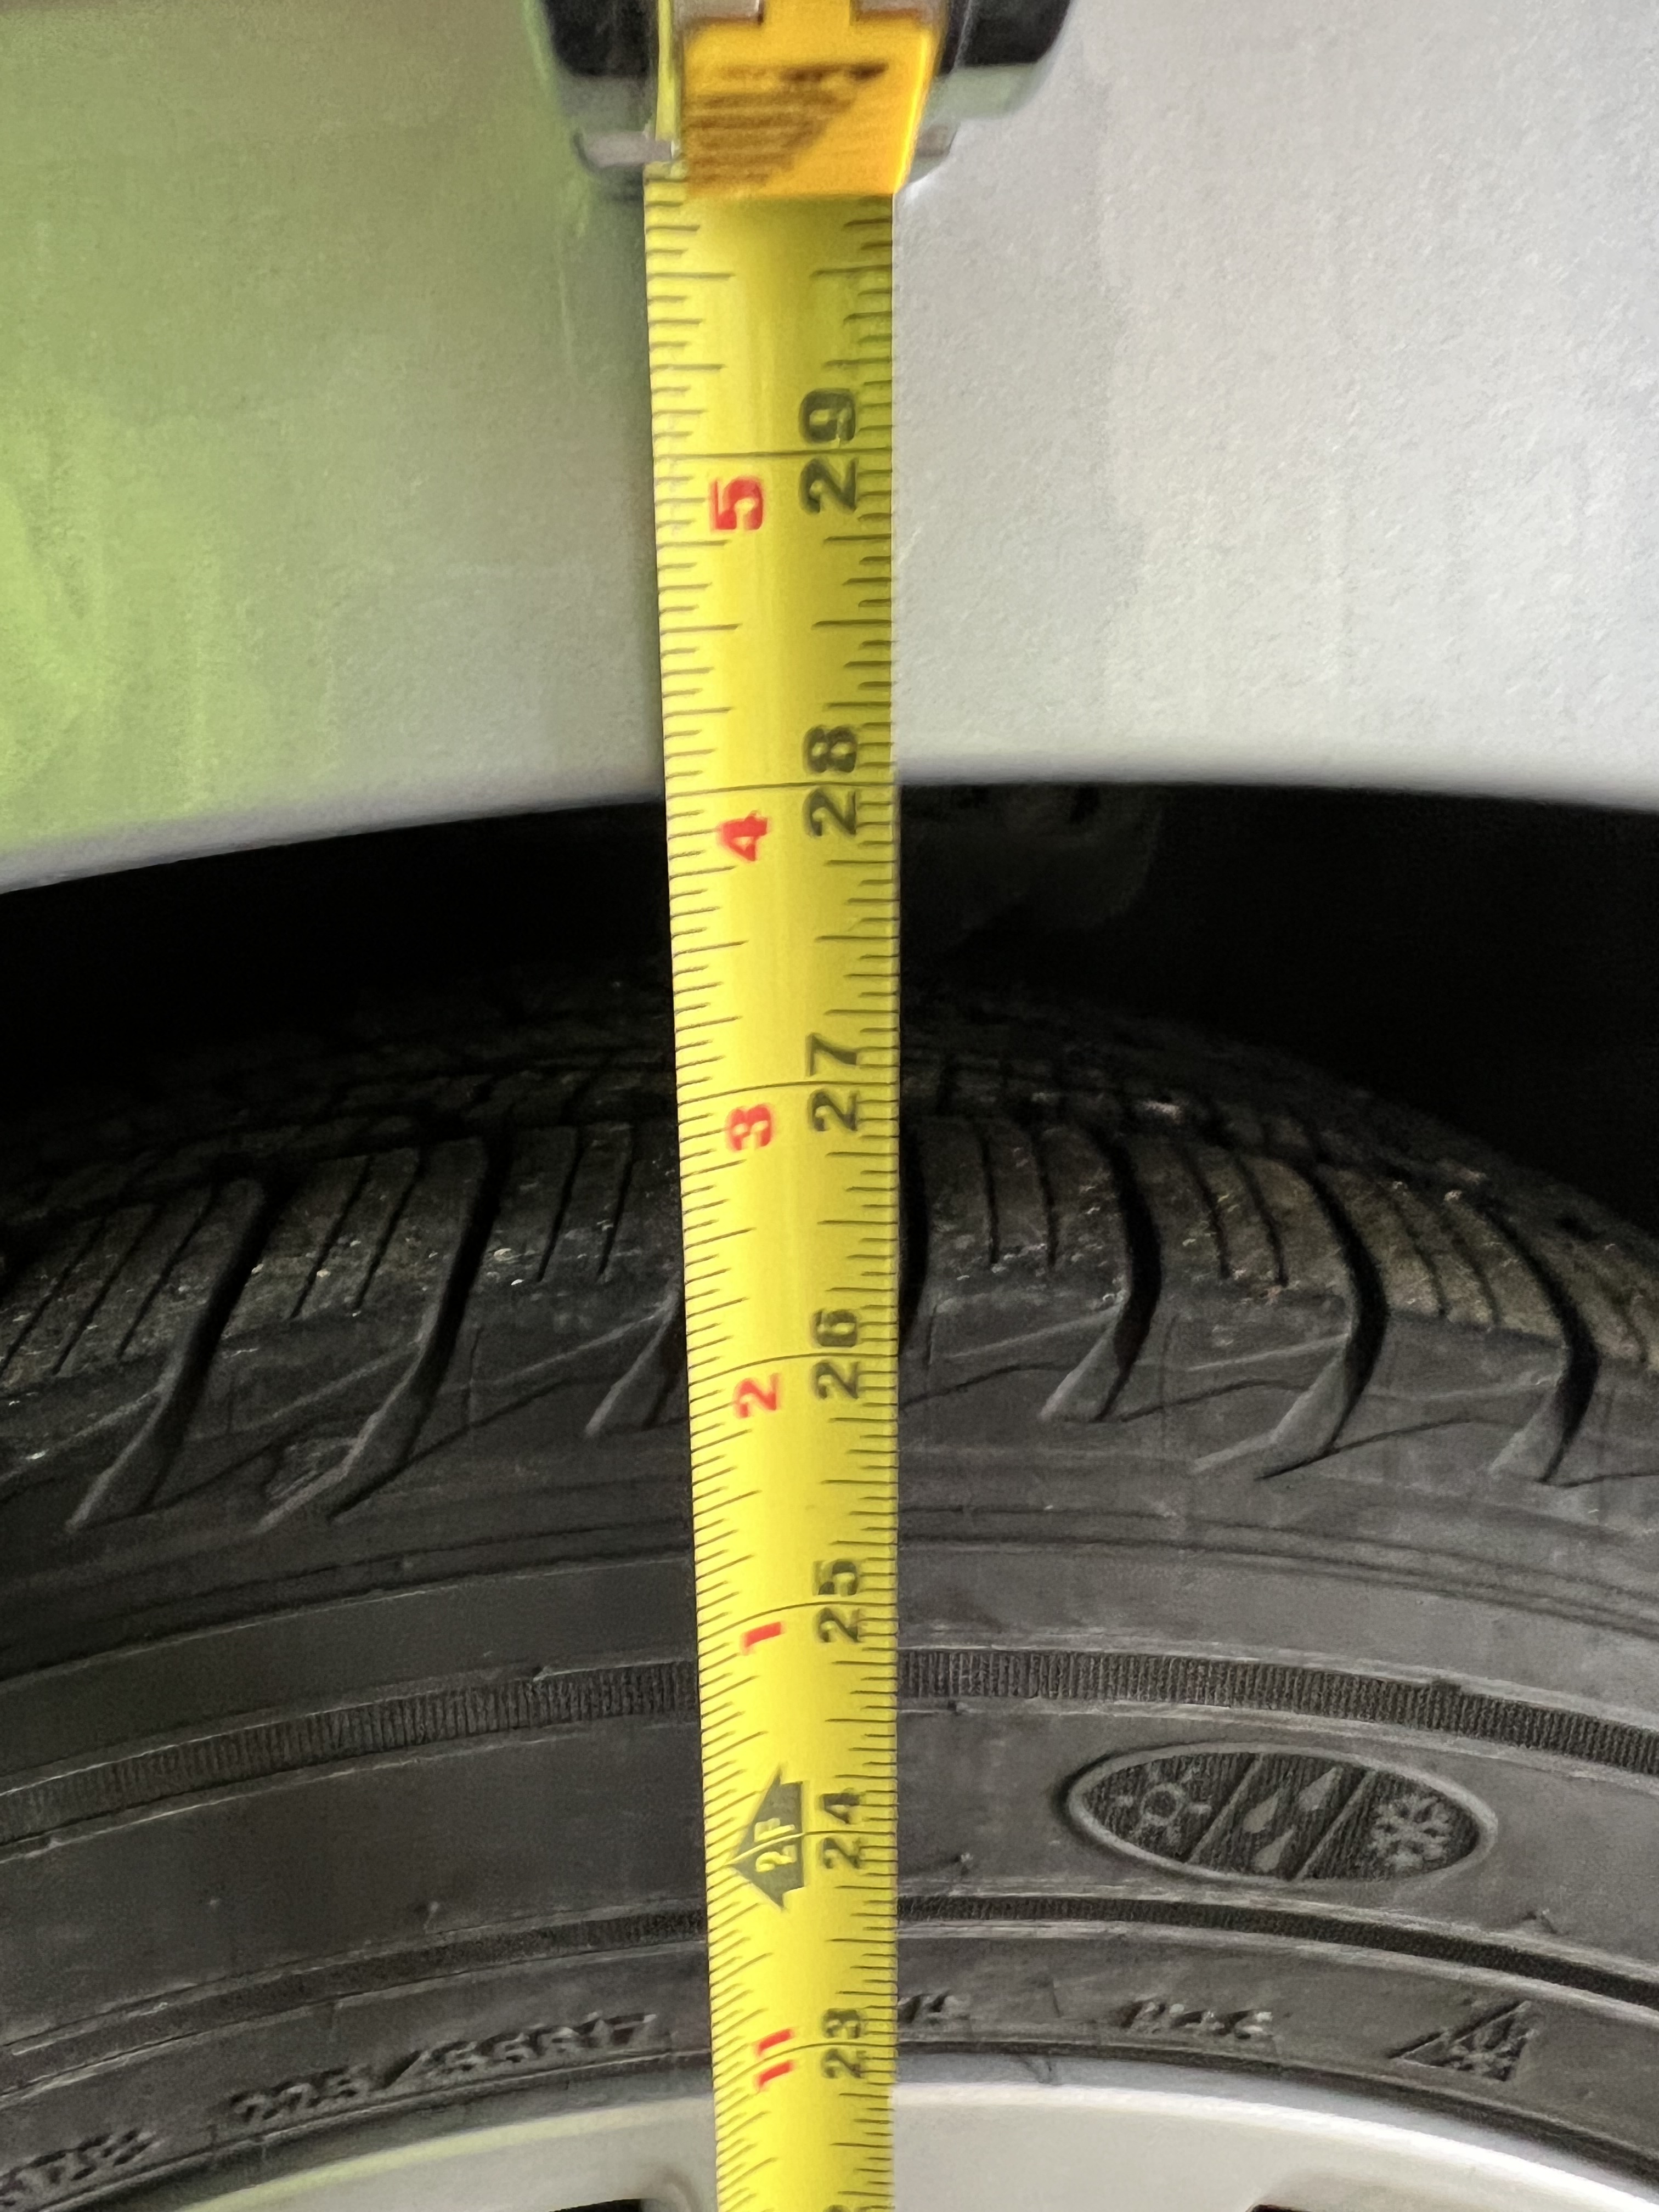
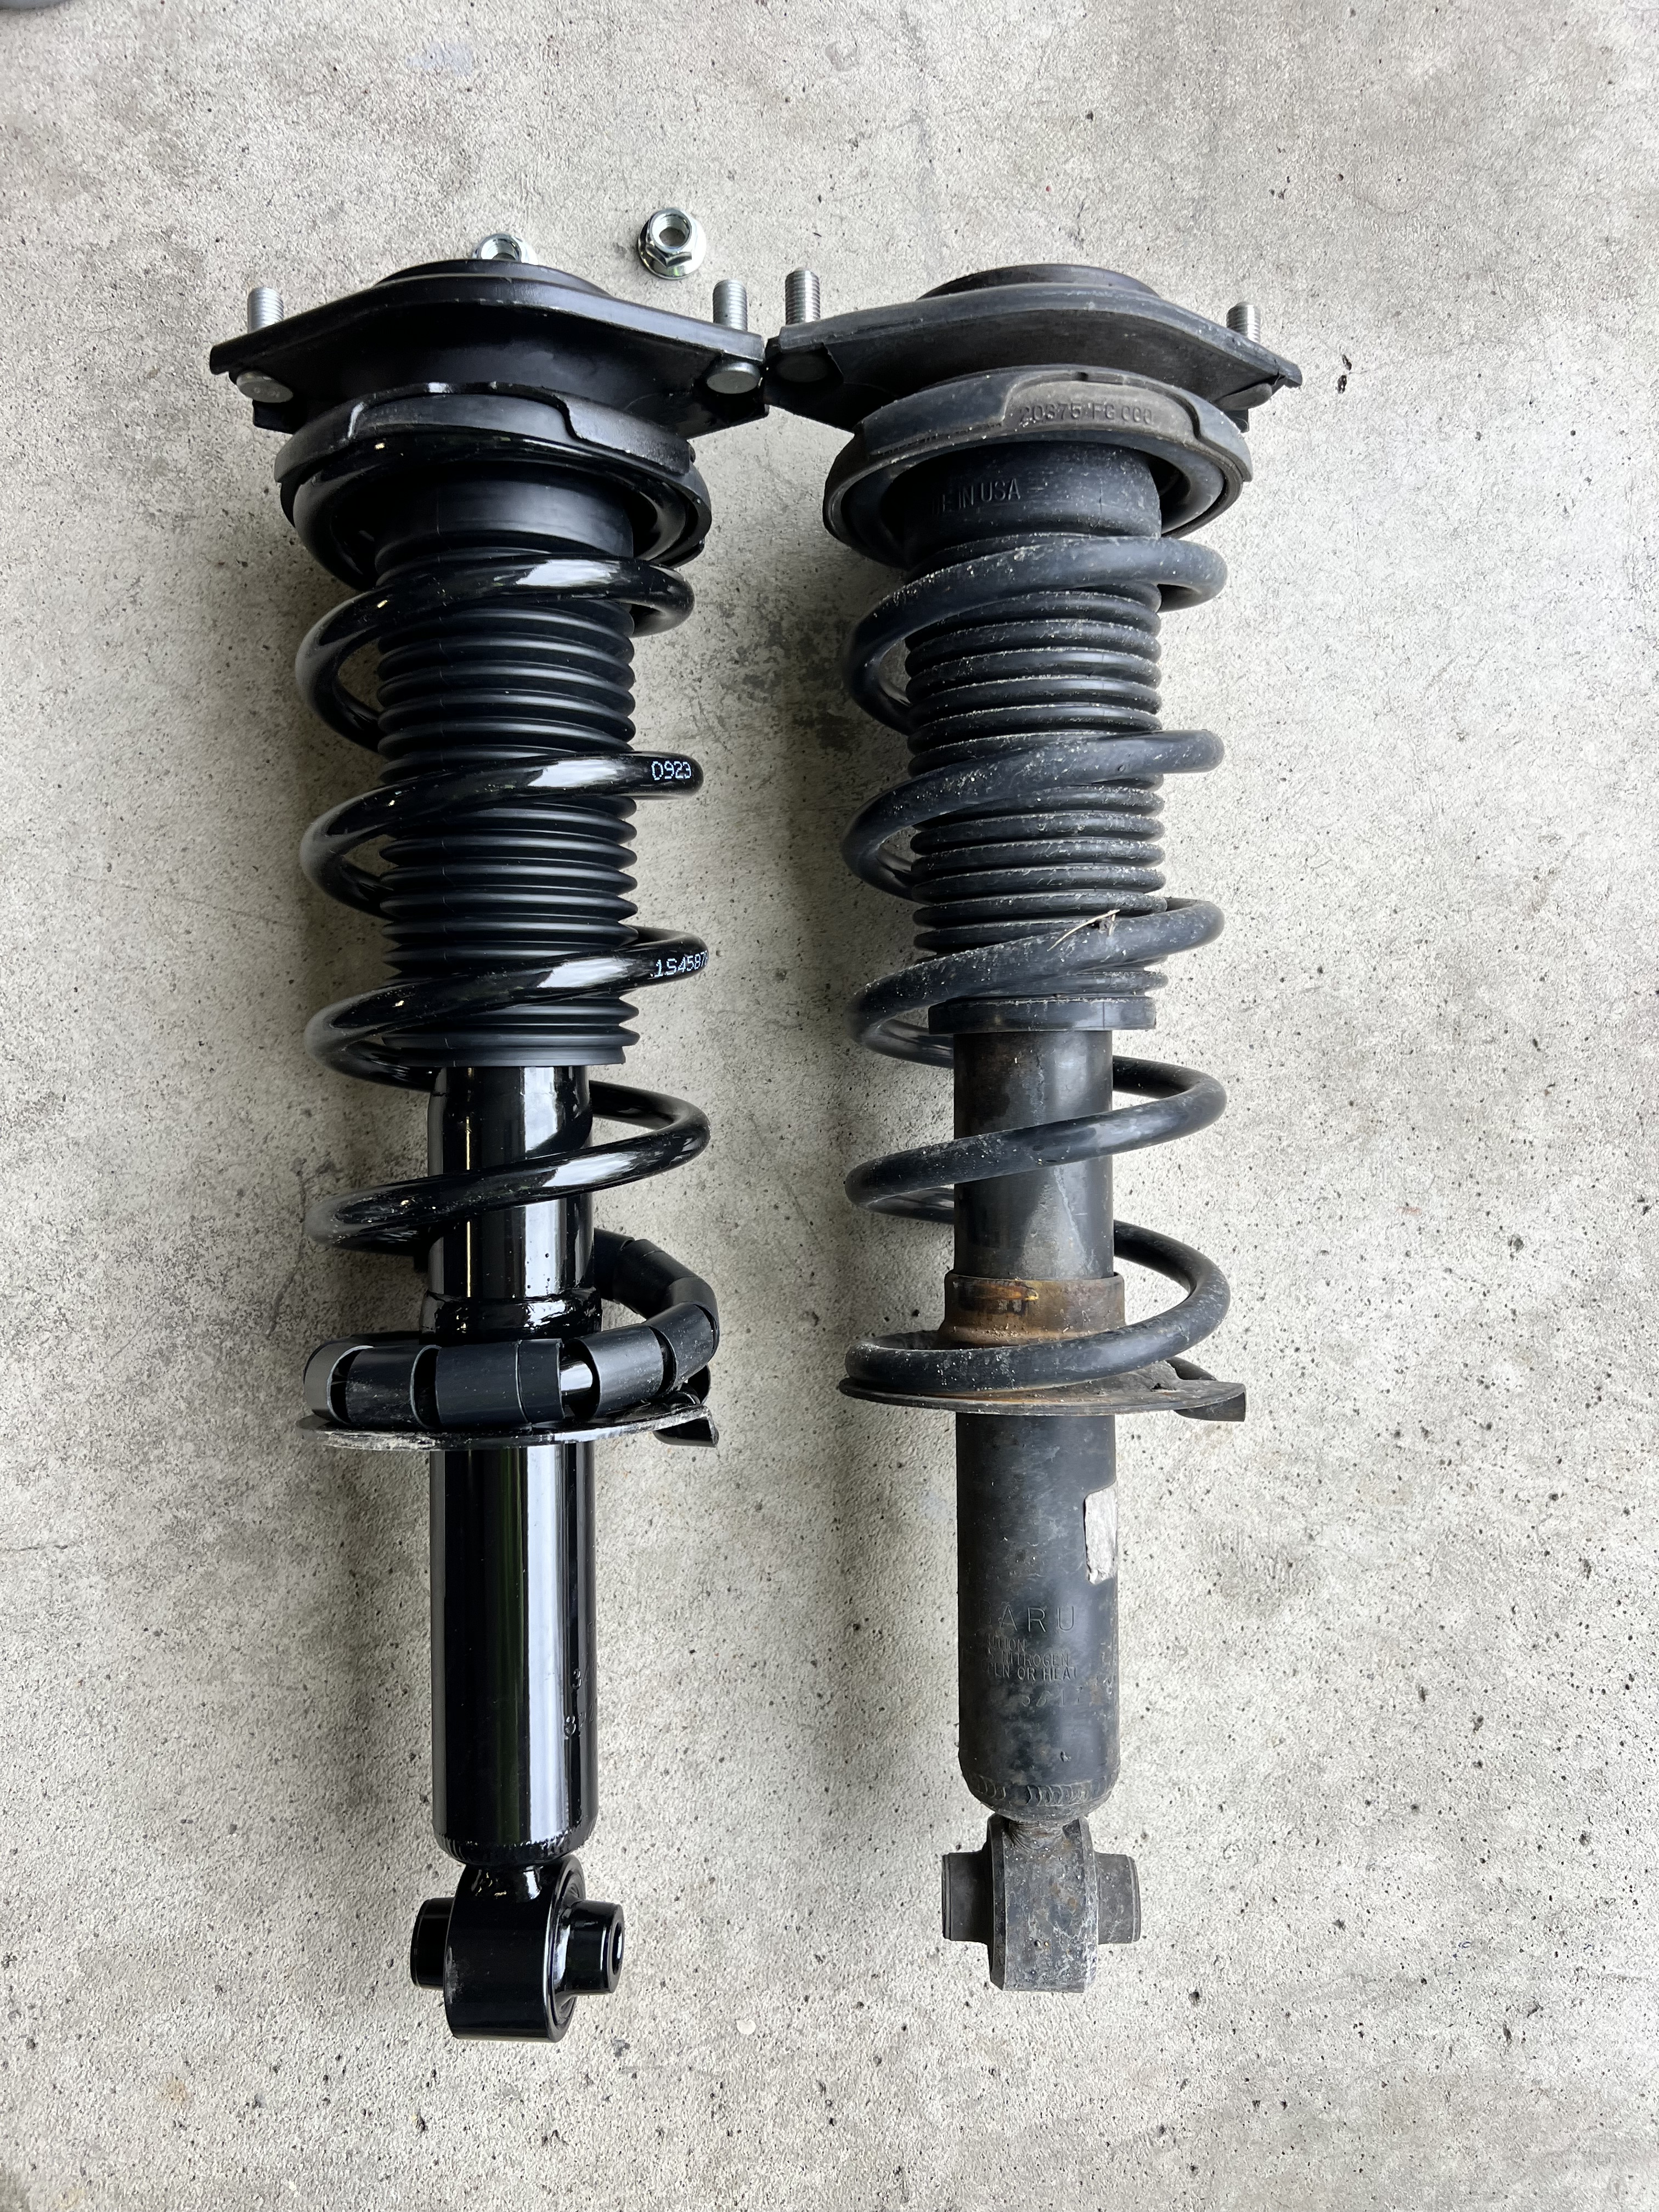
This car is currently at 139K which is well overdue. I have noticed the back end sagging a little for a while and decided to finally get the work done.

The average height of the wheel wells before replacement is 28″. After photo at the bottom.

This project took me 1-1/2 Hours including cleanup. I mention torque values that I found for my car. Do not rely on my torque values. Make sure you know the values for your car.

This is a tutorial through photos. I know most people watch videos now but some of us prefer a quick reference blog so that is what I am doing here. I will have a separate blog for the front struts.

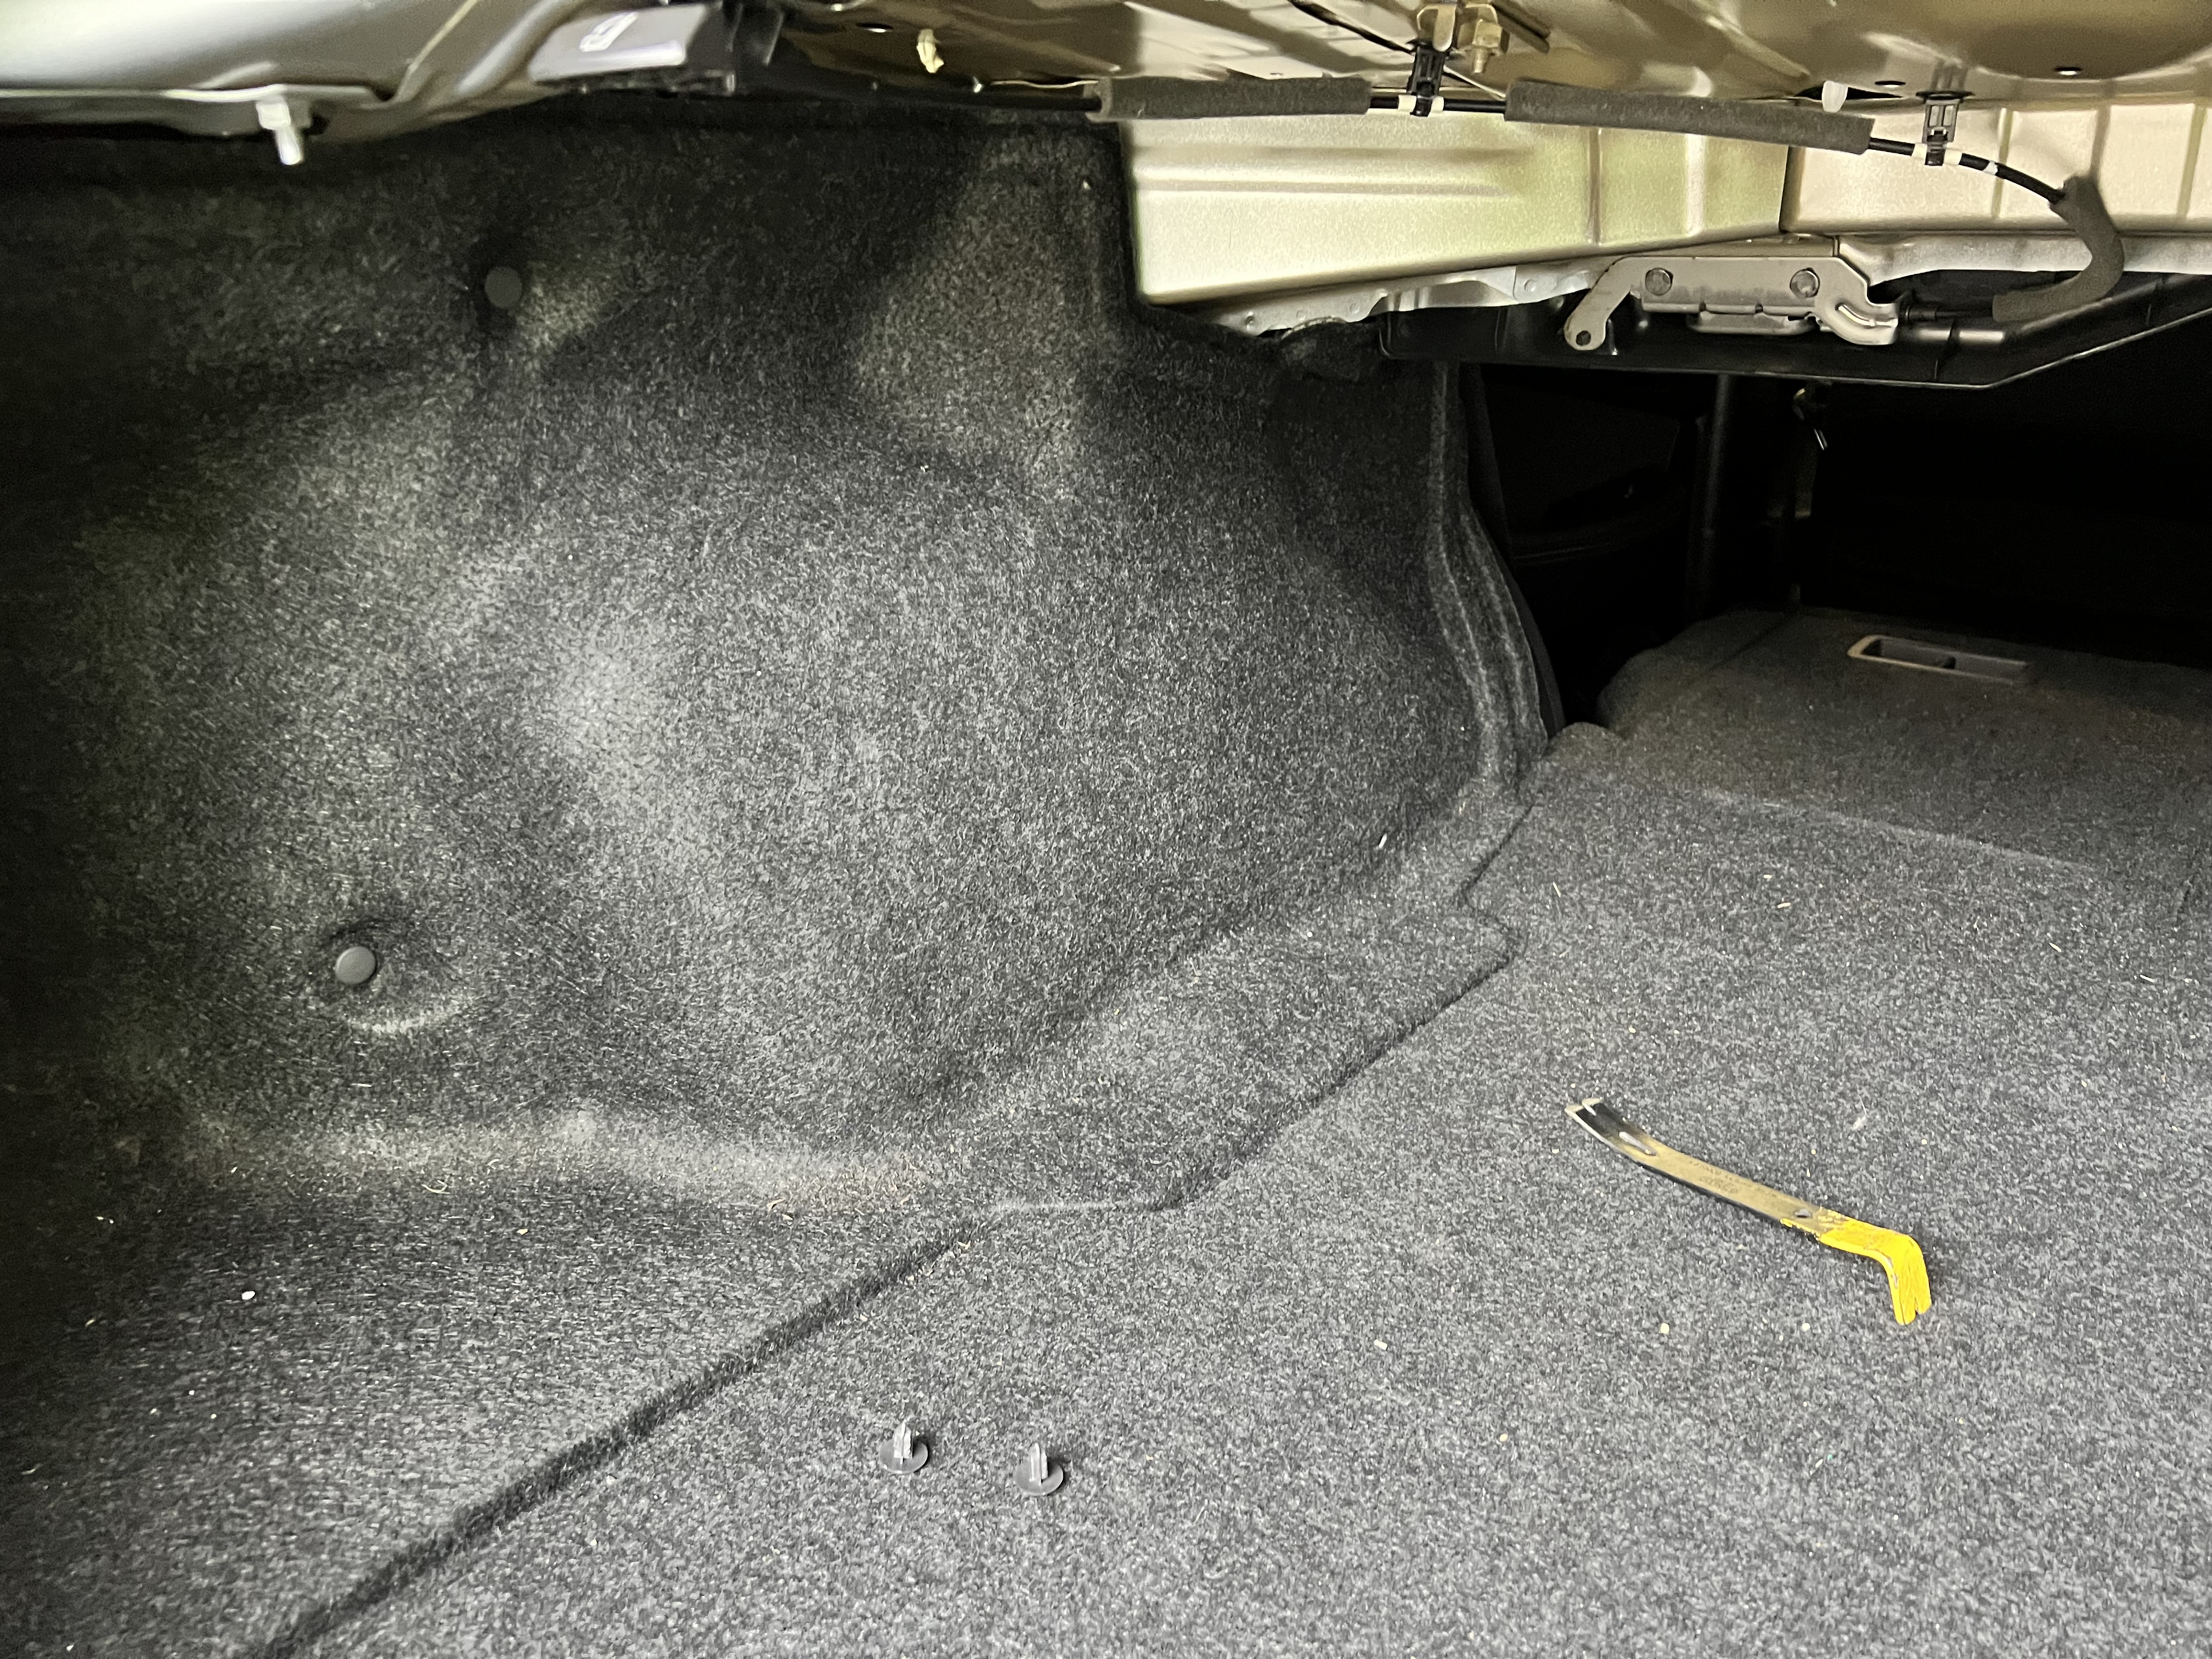
The photos appear in the order the work needs done …or at least the order I did it and it worked out fine.

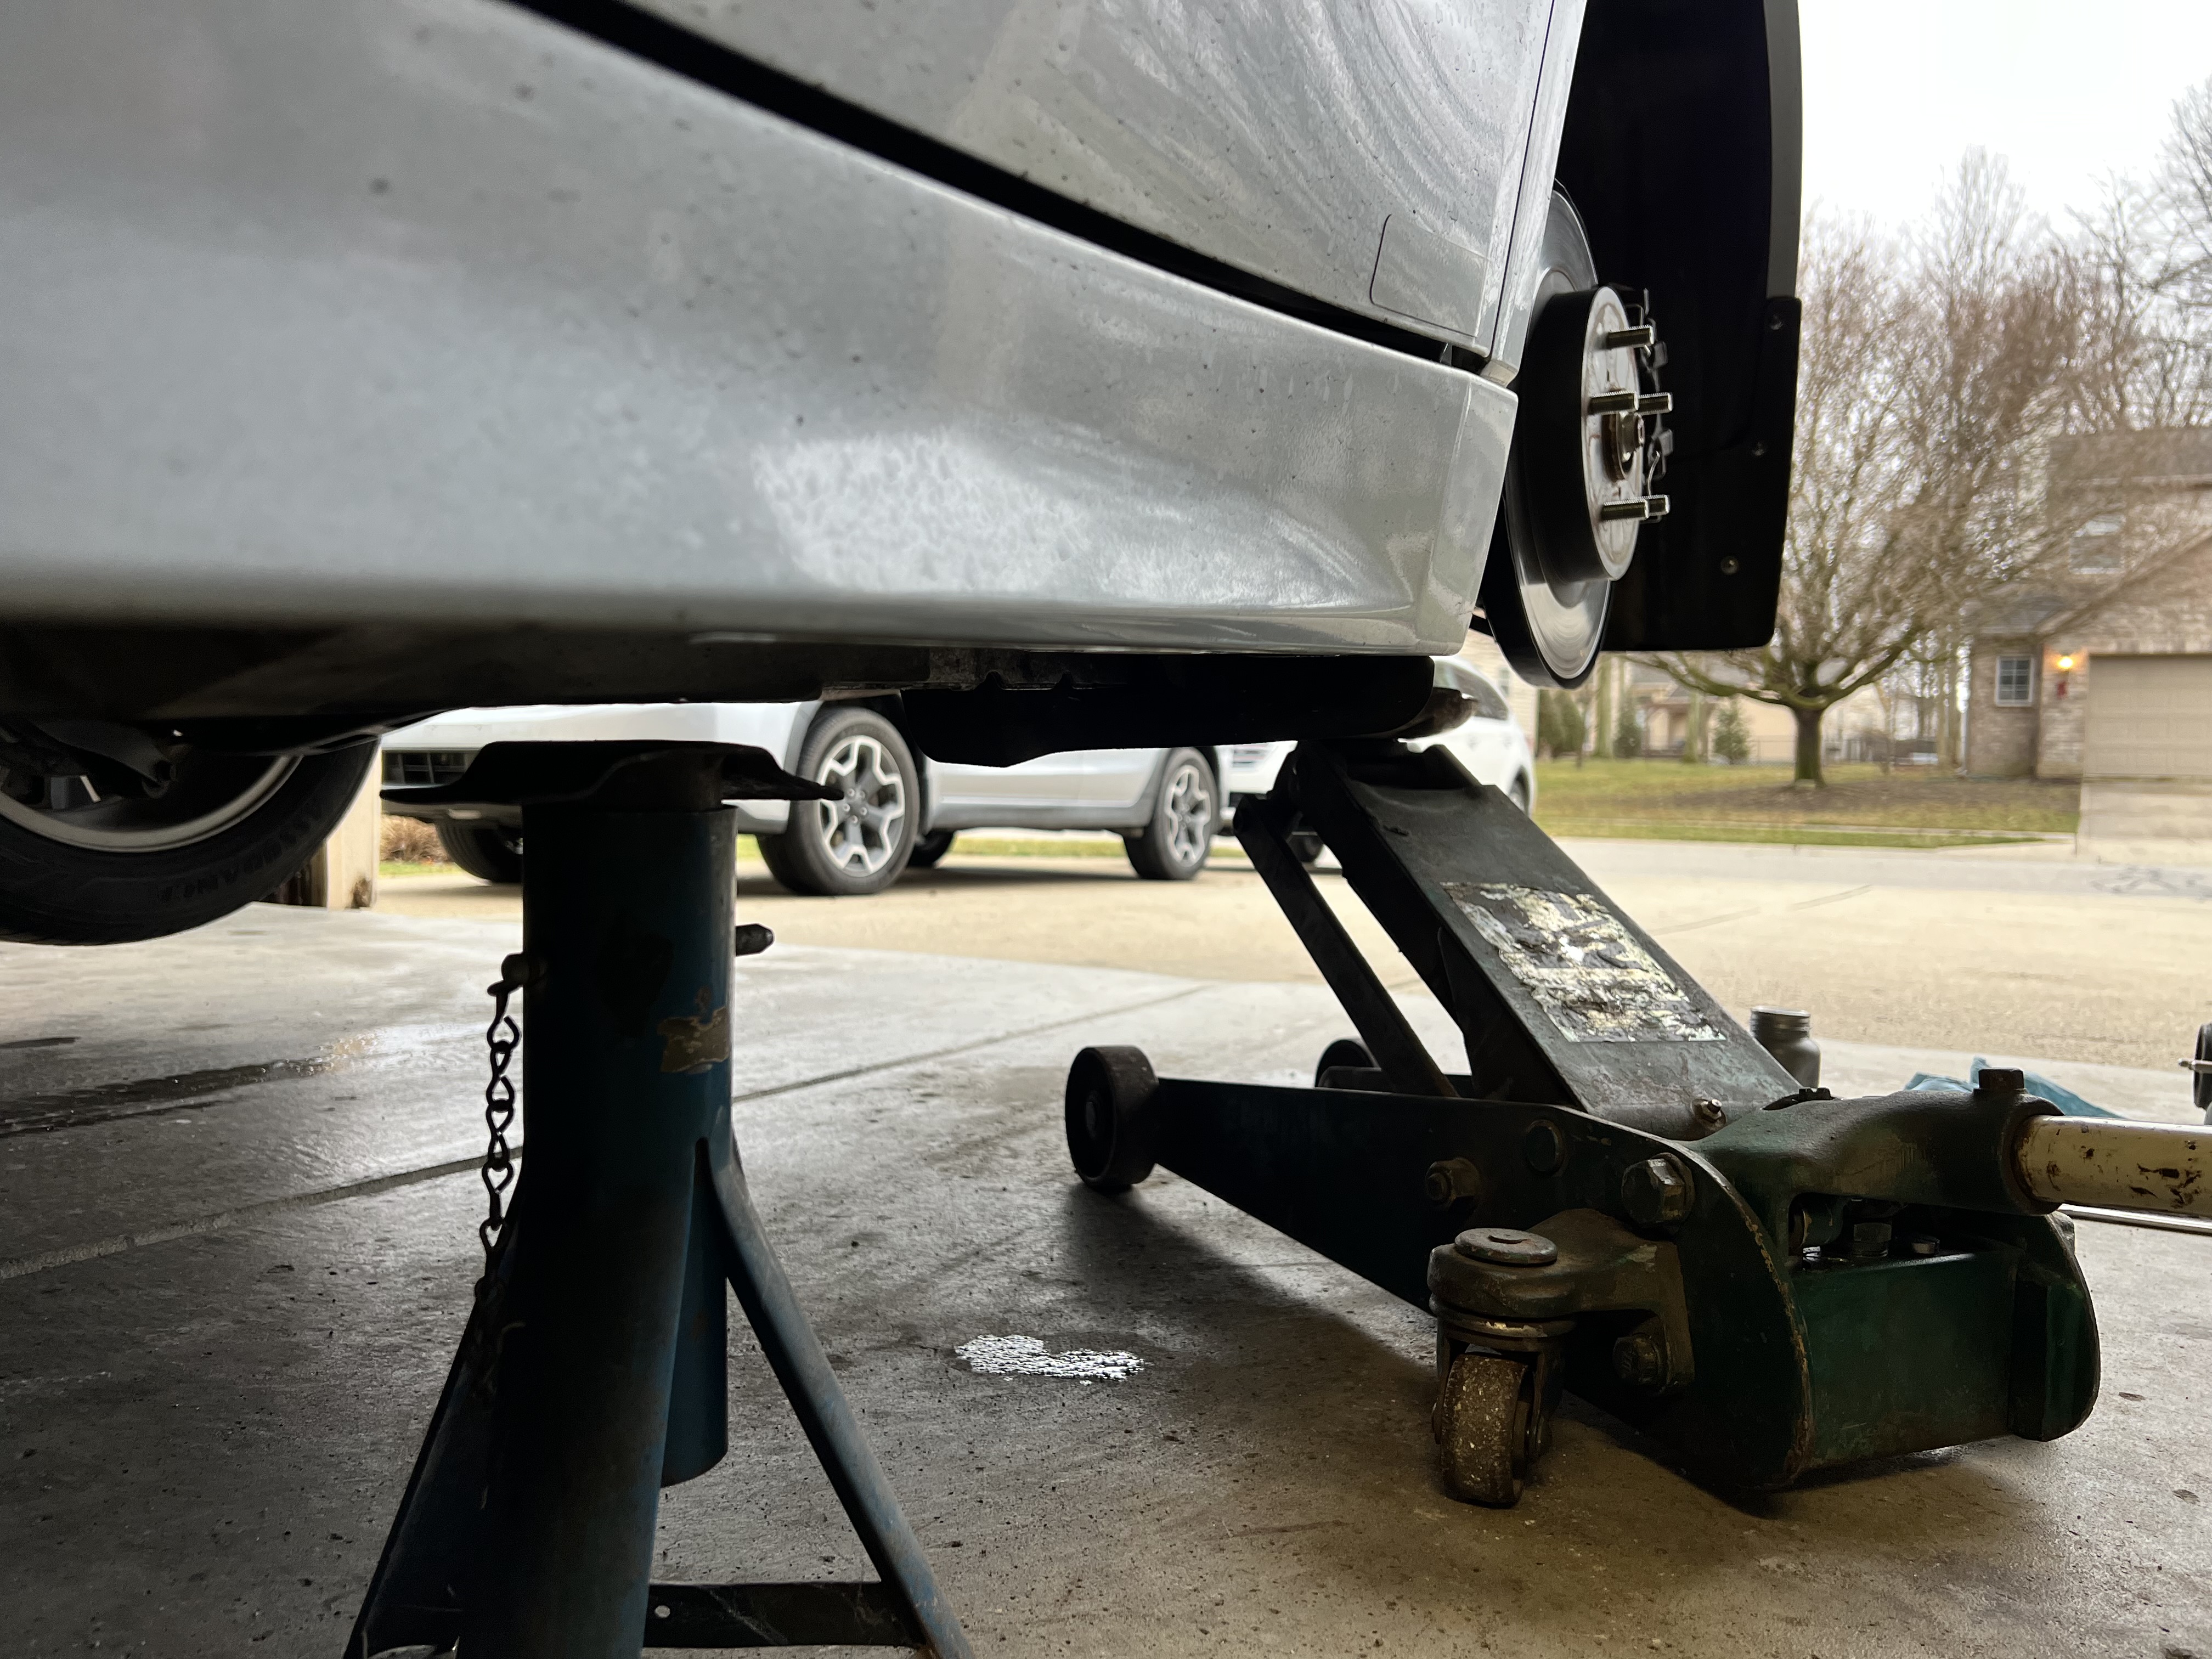
Start by parking your car on a level surface. Mine was in the garage. Block the front wheels for safety.

Don’t jack the car up yet.

Break loose your lug nuts while the car is on the ground. DON’T take them off or loosen them …you just want to break them loose while you have the friction of the ground to hold the wheel. I assume you are replacing both struts so go ahead and break loose the lug nuts on both sides
Remove these plastic anchors in the trunk while the car is still on the ground.
Pull the carpet panel loose from where it is tucked at the back seat and under the floor. You don’t need to completely remove this section of carpet panel from the car. Repeat for the other side while the car is still on the ground.

Now you can jack up the car and work one side at a time. It is best to lift both sides and use jack stands at the lift points on the body just in front of the rear wheels. It is important to lift both sides due to the stress it puts on the rear sway bar …this will not harm the car of course …but it makes it harder to work on suspension components when the car is twisted like that.

Loosen and remove the strut to control arm nut with a 17mm wrench and socket/ratchet/breaker bar on the back side to hold the bolt. Go ahead and take off the nut. No need to remove the bolt yet.
Now remove the nut from the sway bar link to control arm with a 14mm wrench and socket/ratchet/breaker bar on the back side. This is the part that will be under unusual tension if you don’t jack both sides of the car and makes the job a lot more difficult or impossible without lifting the other side.
Now remove the last nut holding the knuckle to the control arm with a 17mm wrench and socket/wrench/breaker bar.
I used the screw driver to tap the bolt out …it hits the stabilizer arm and you cannot get it out without removing the stabilizer arm. I tried various options and none worked. Removing the stabilizer arm is quick and easy.
Remove the bolt holding the stabilizer arm with a 17mm wrench and socket/ratchet/breaker bar as needed.
Hold down the stabilizer bar and remove the bolt from the knuckle. Reinstall the stabilizer bar. The information I found indicates this should be torqued to 30ft-lbs.
Remove the nuts from both bolts on top of the strut in the trunk.

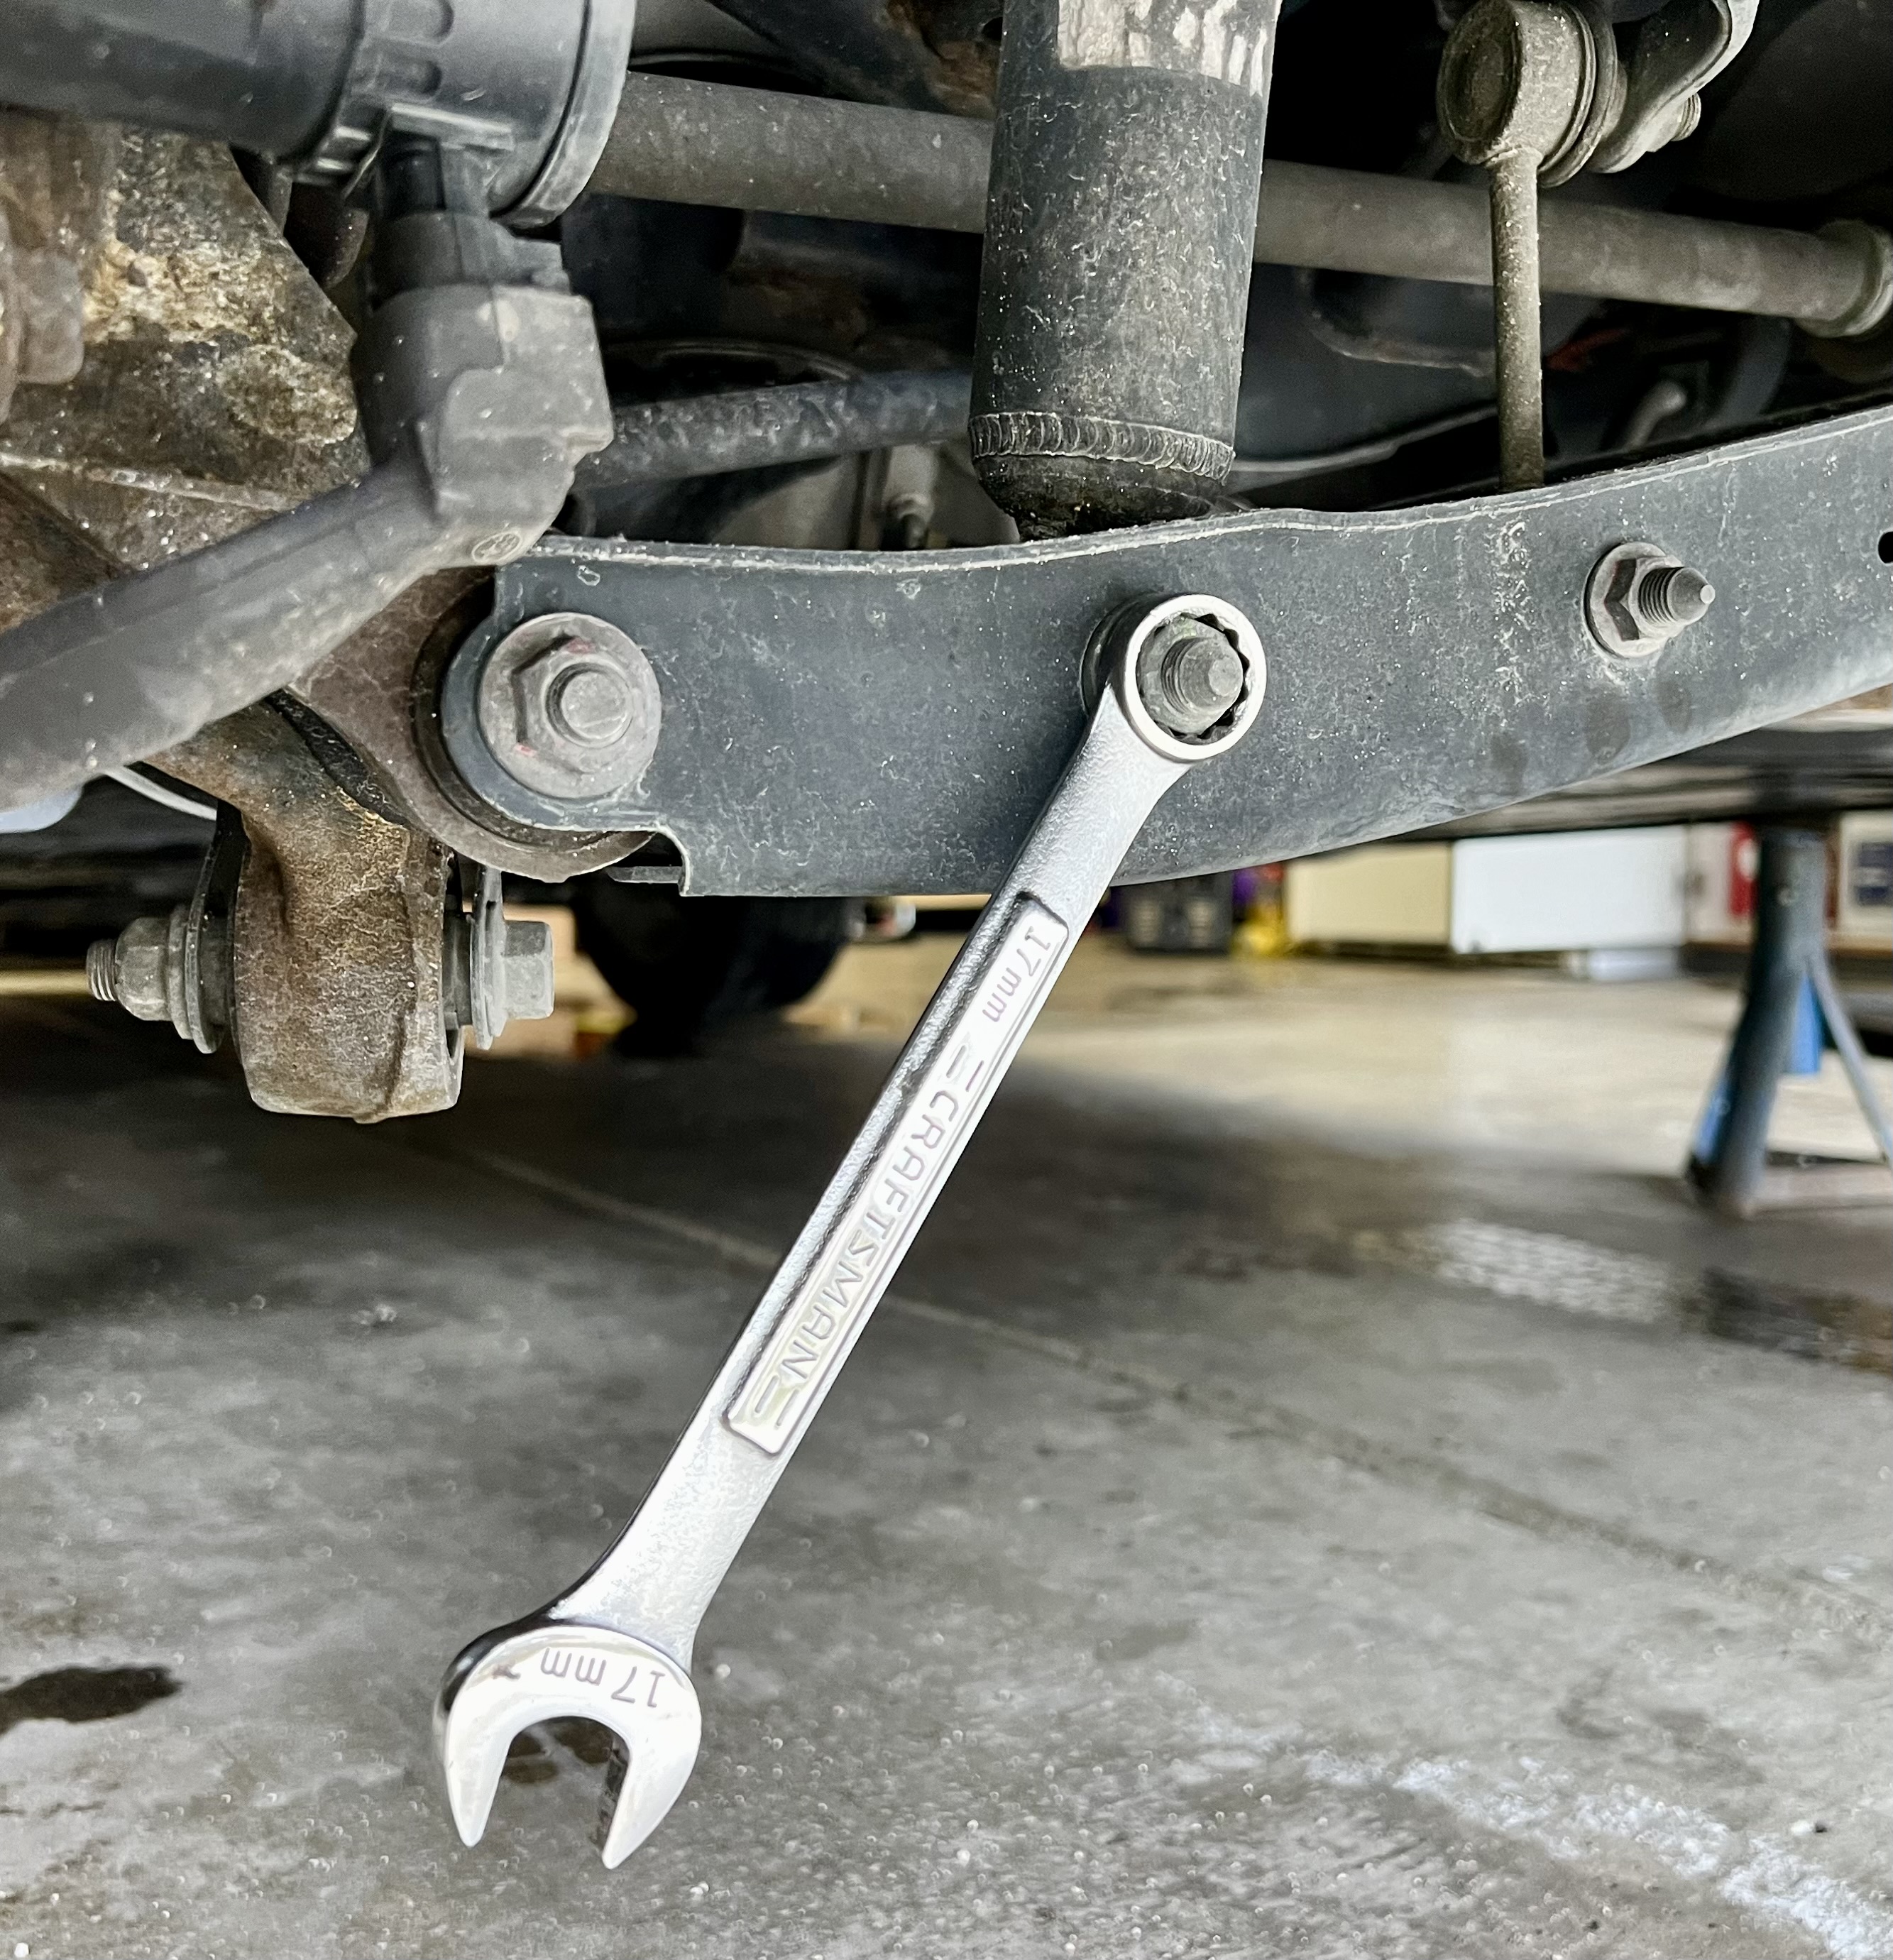
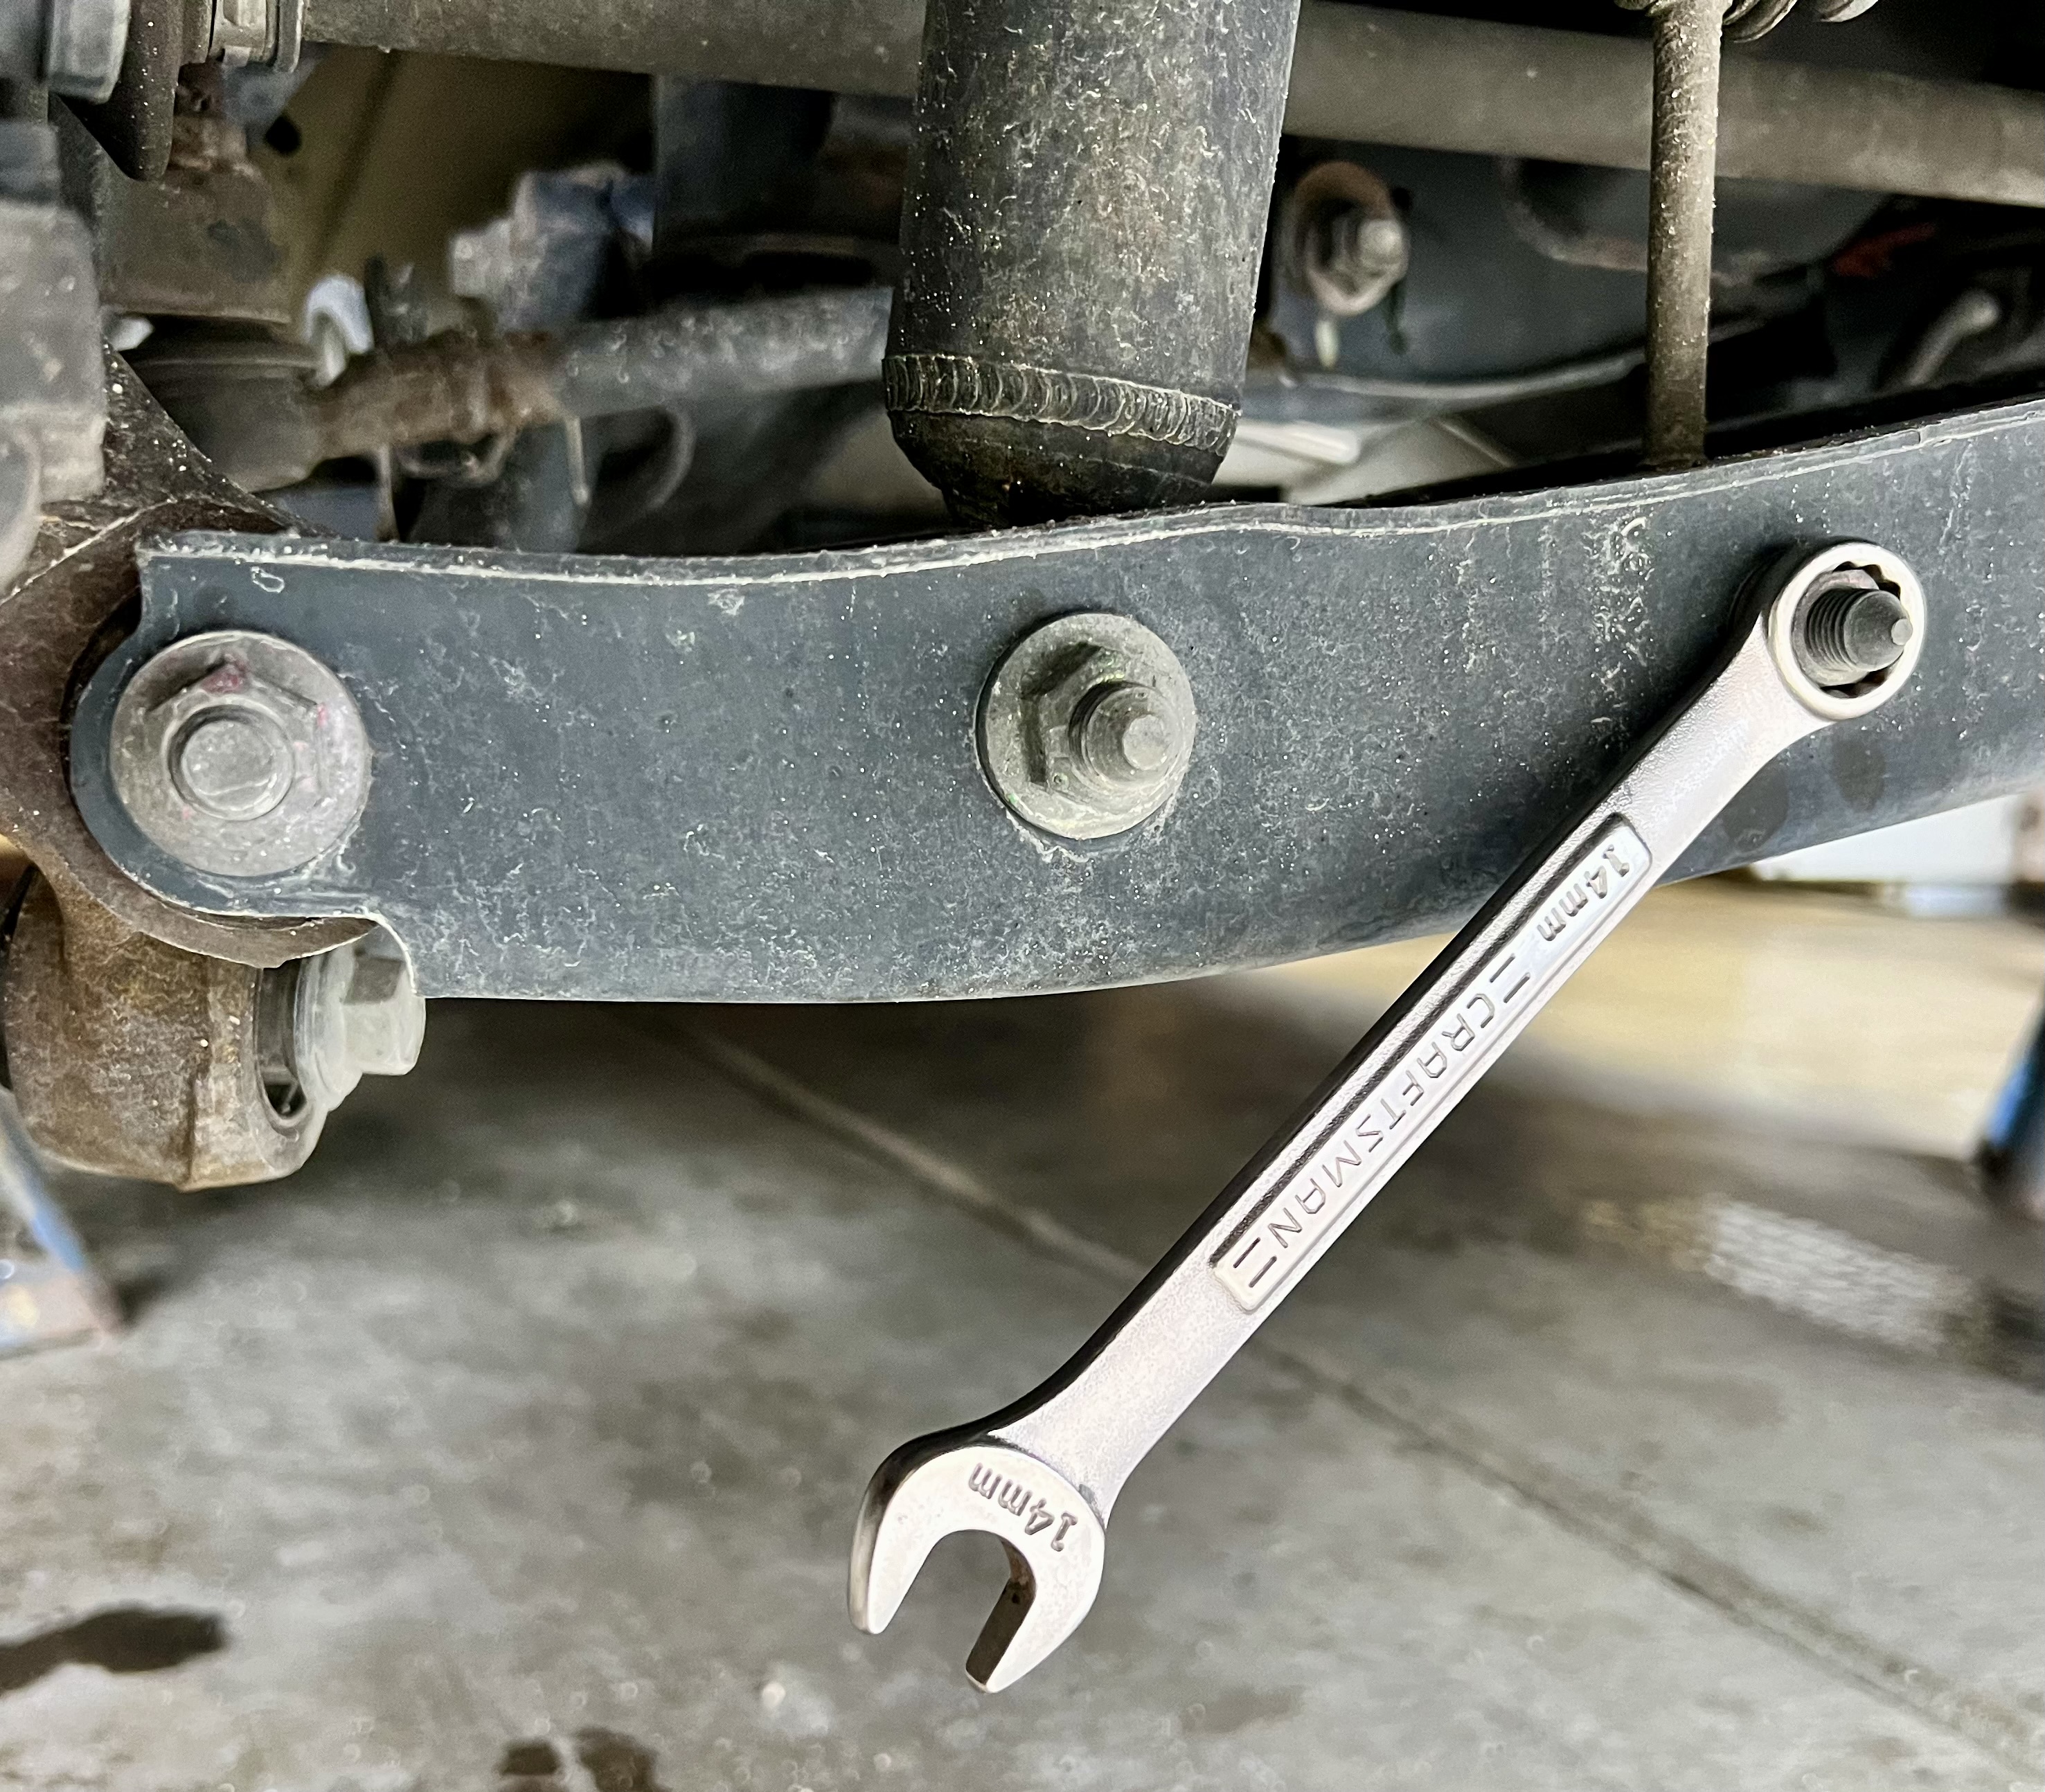
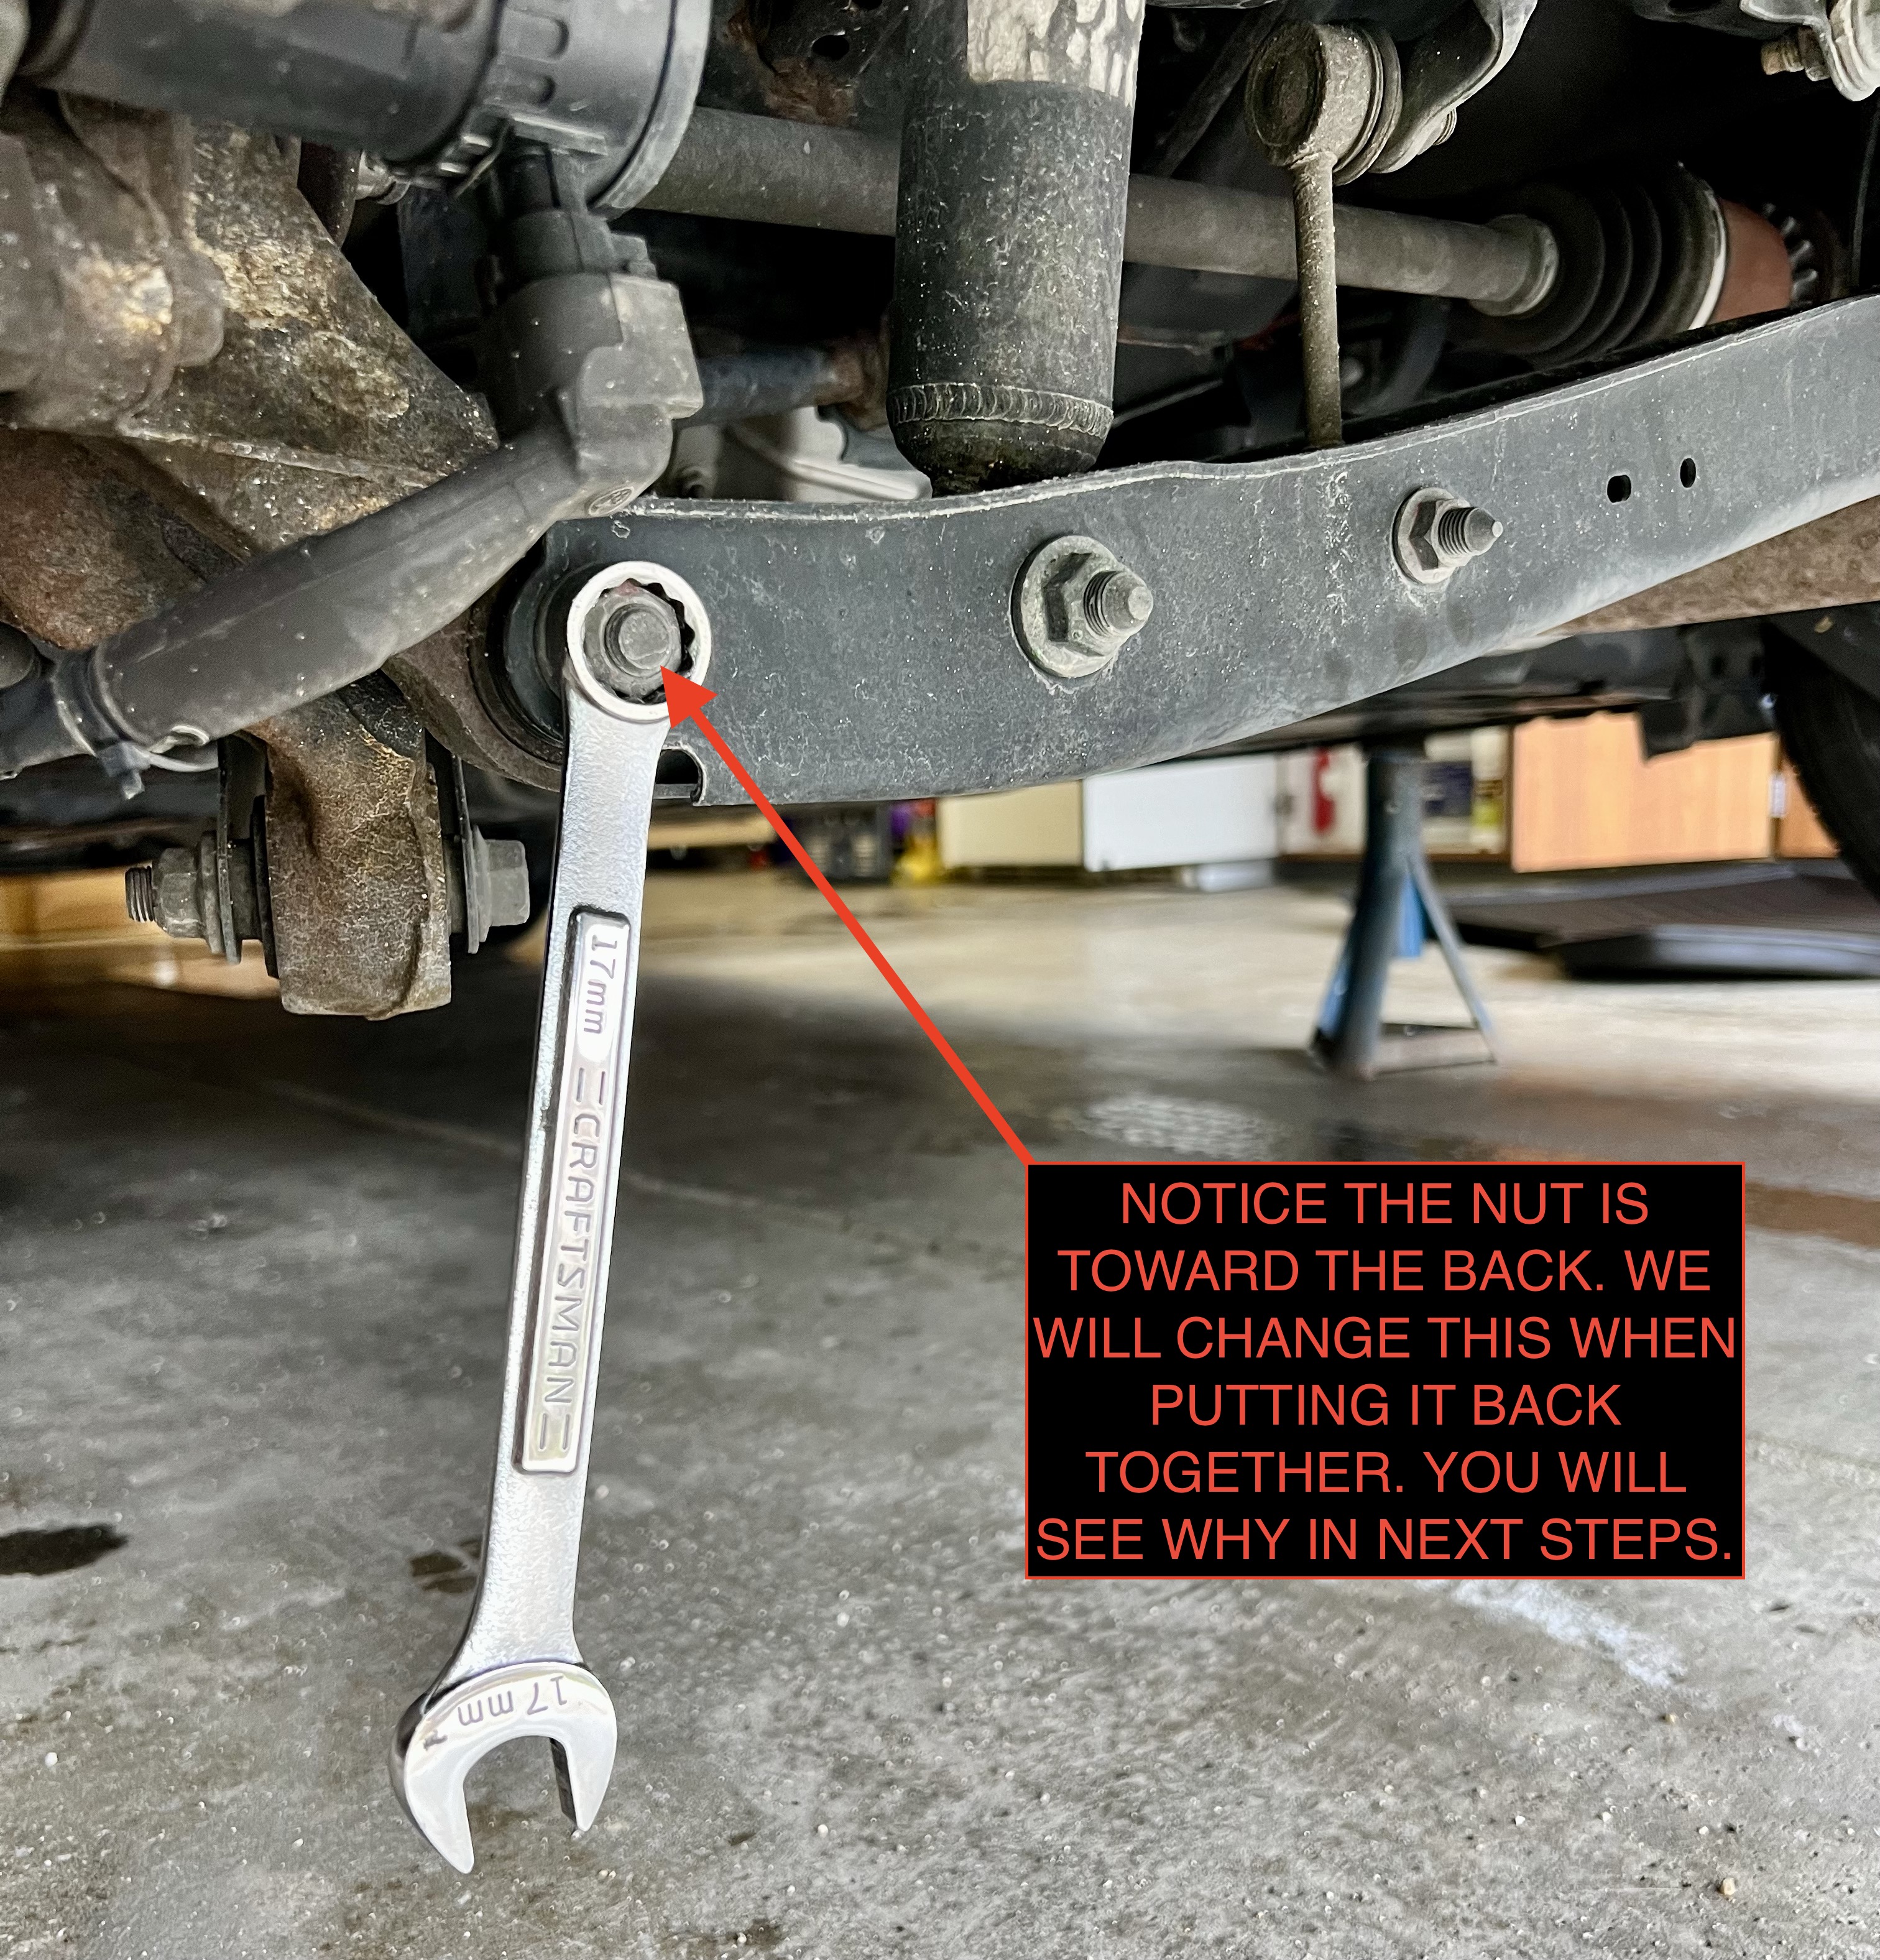
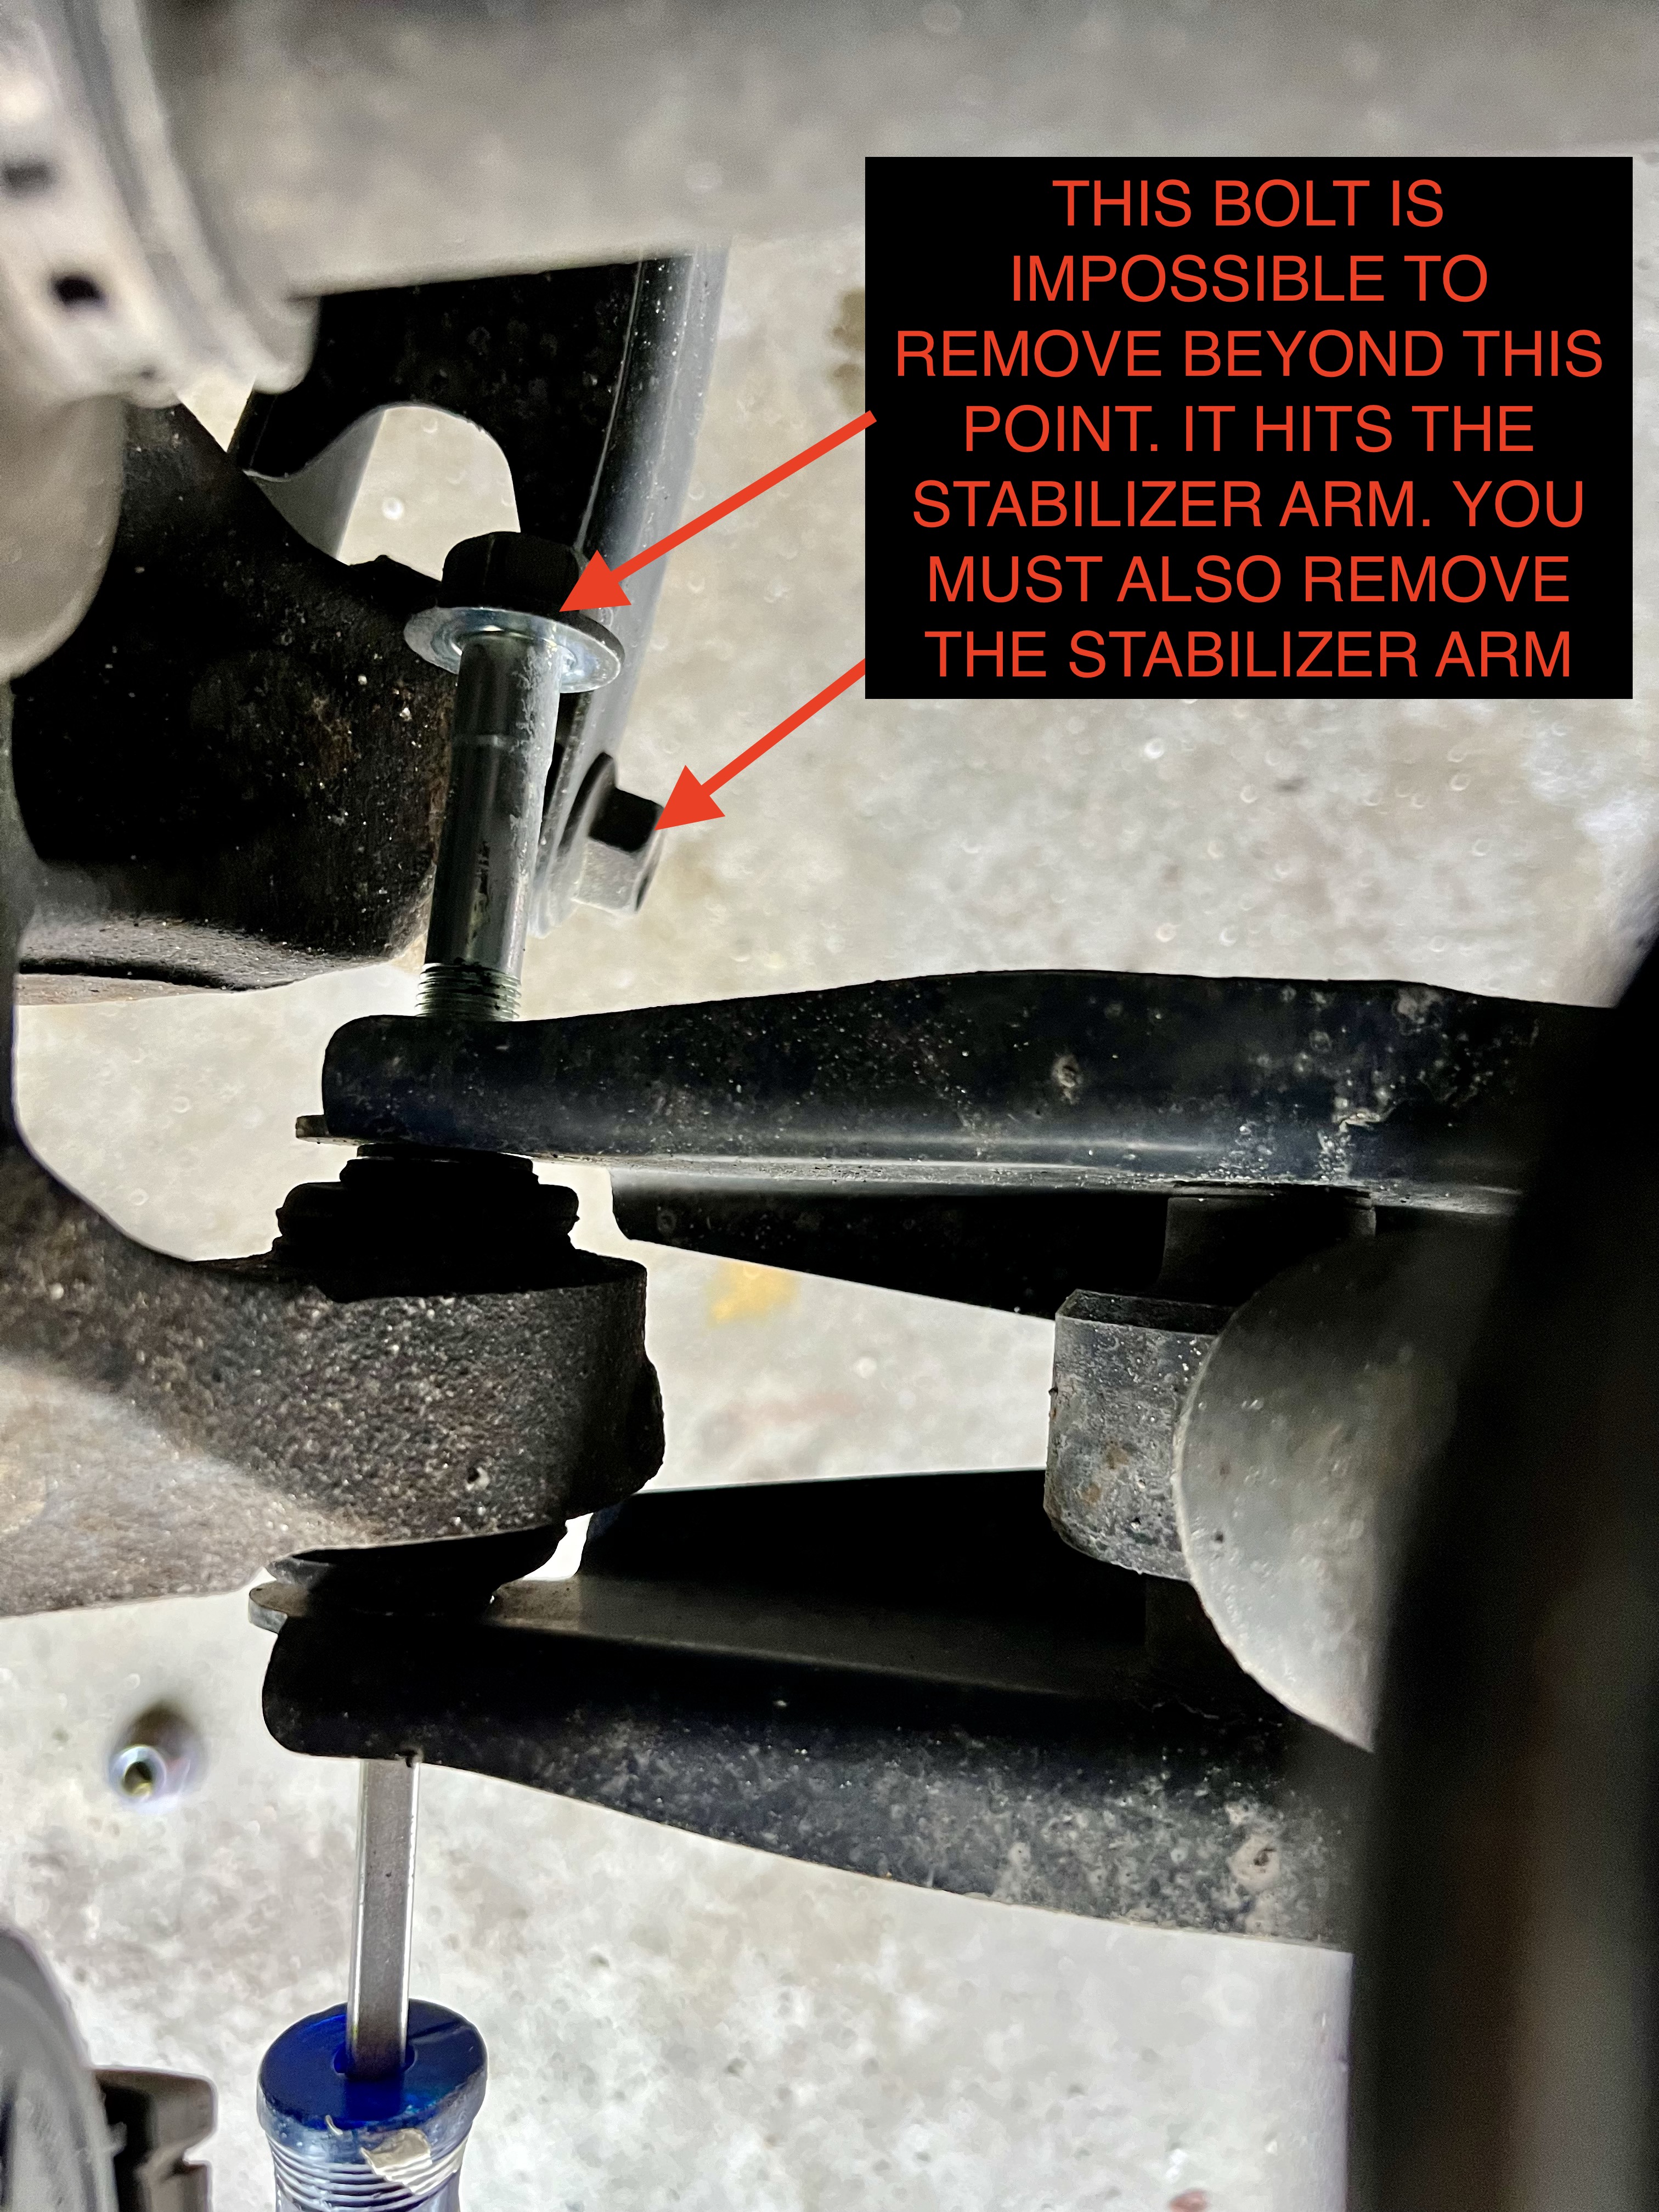
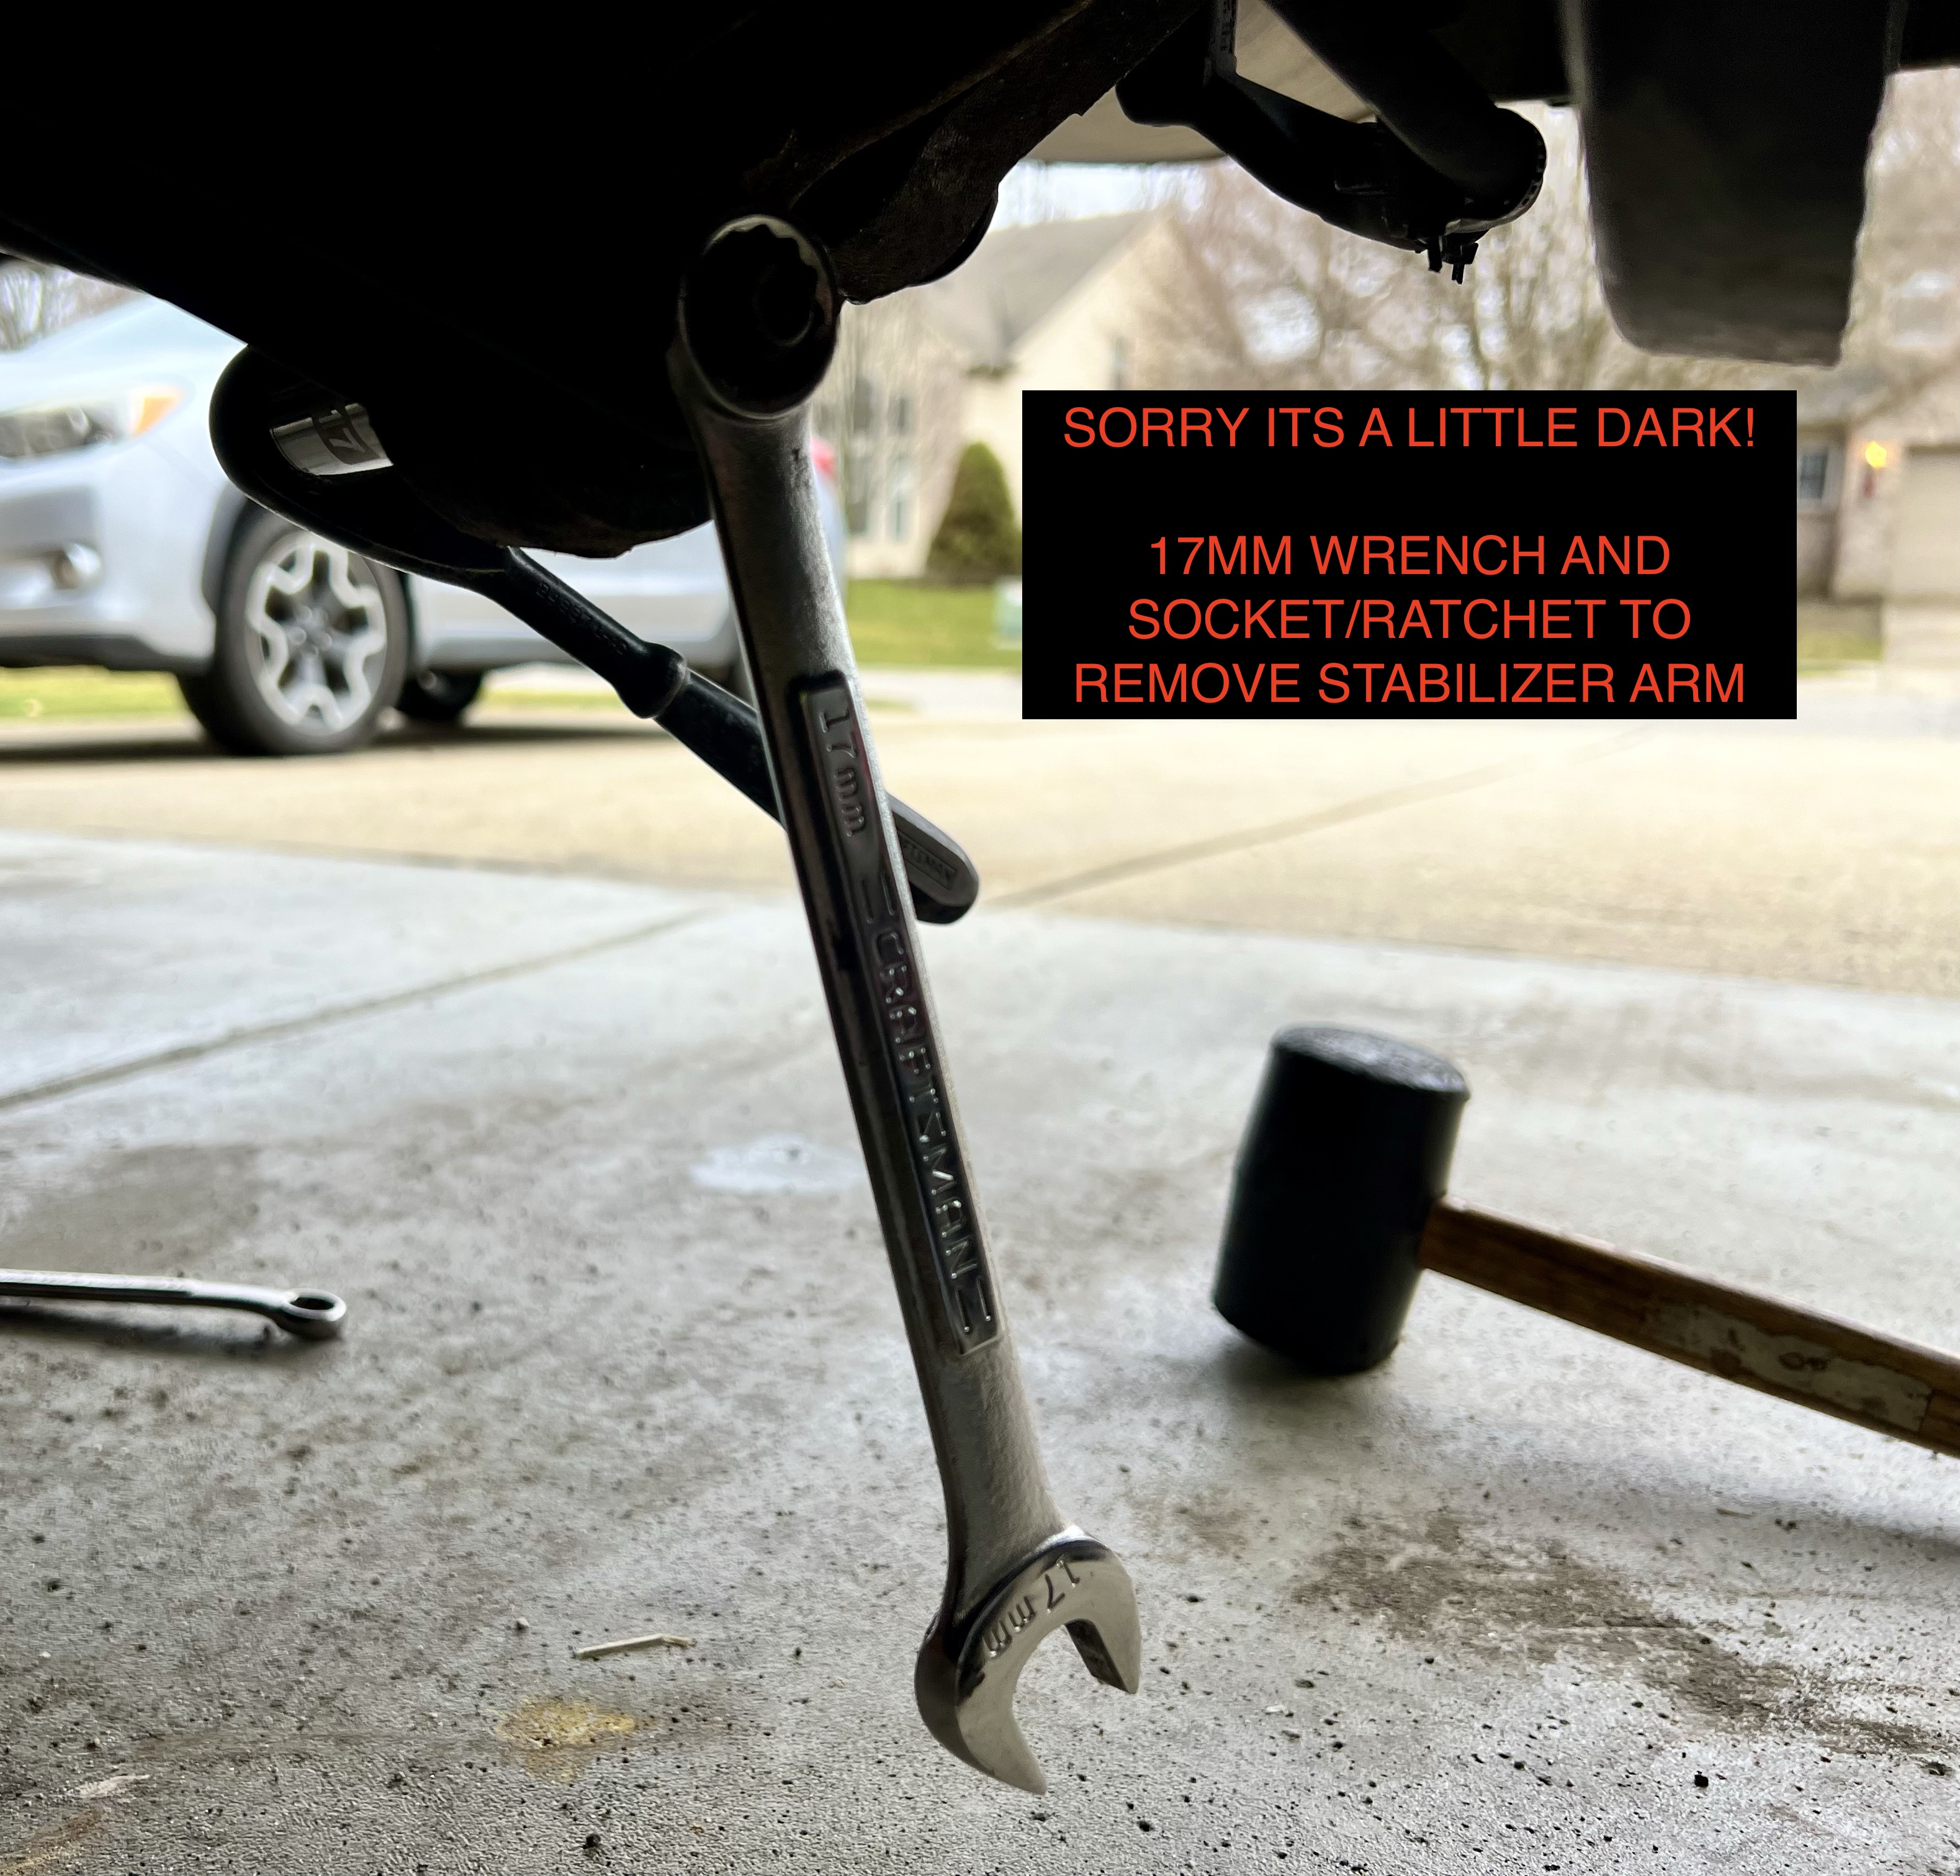
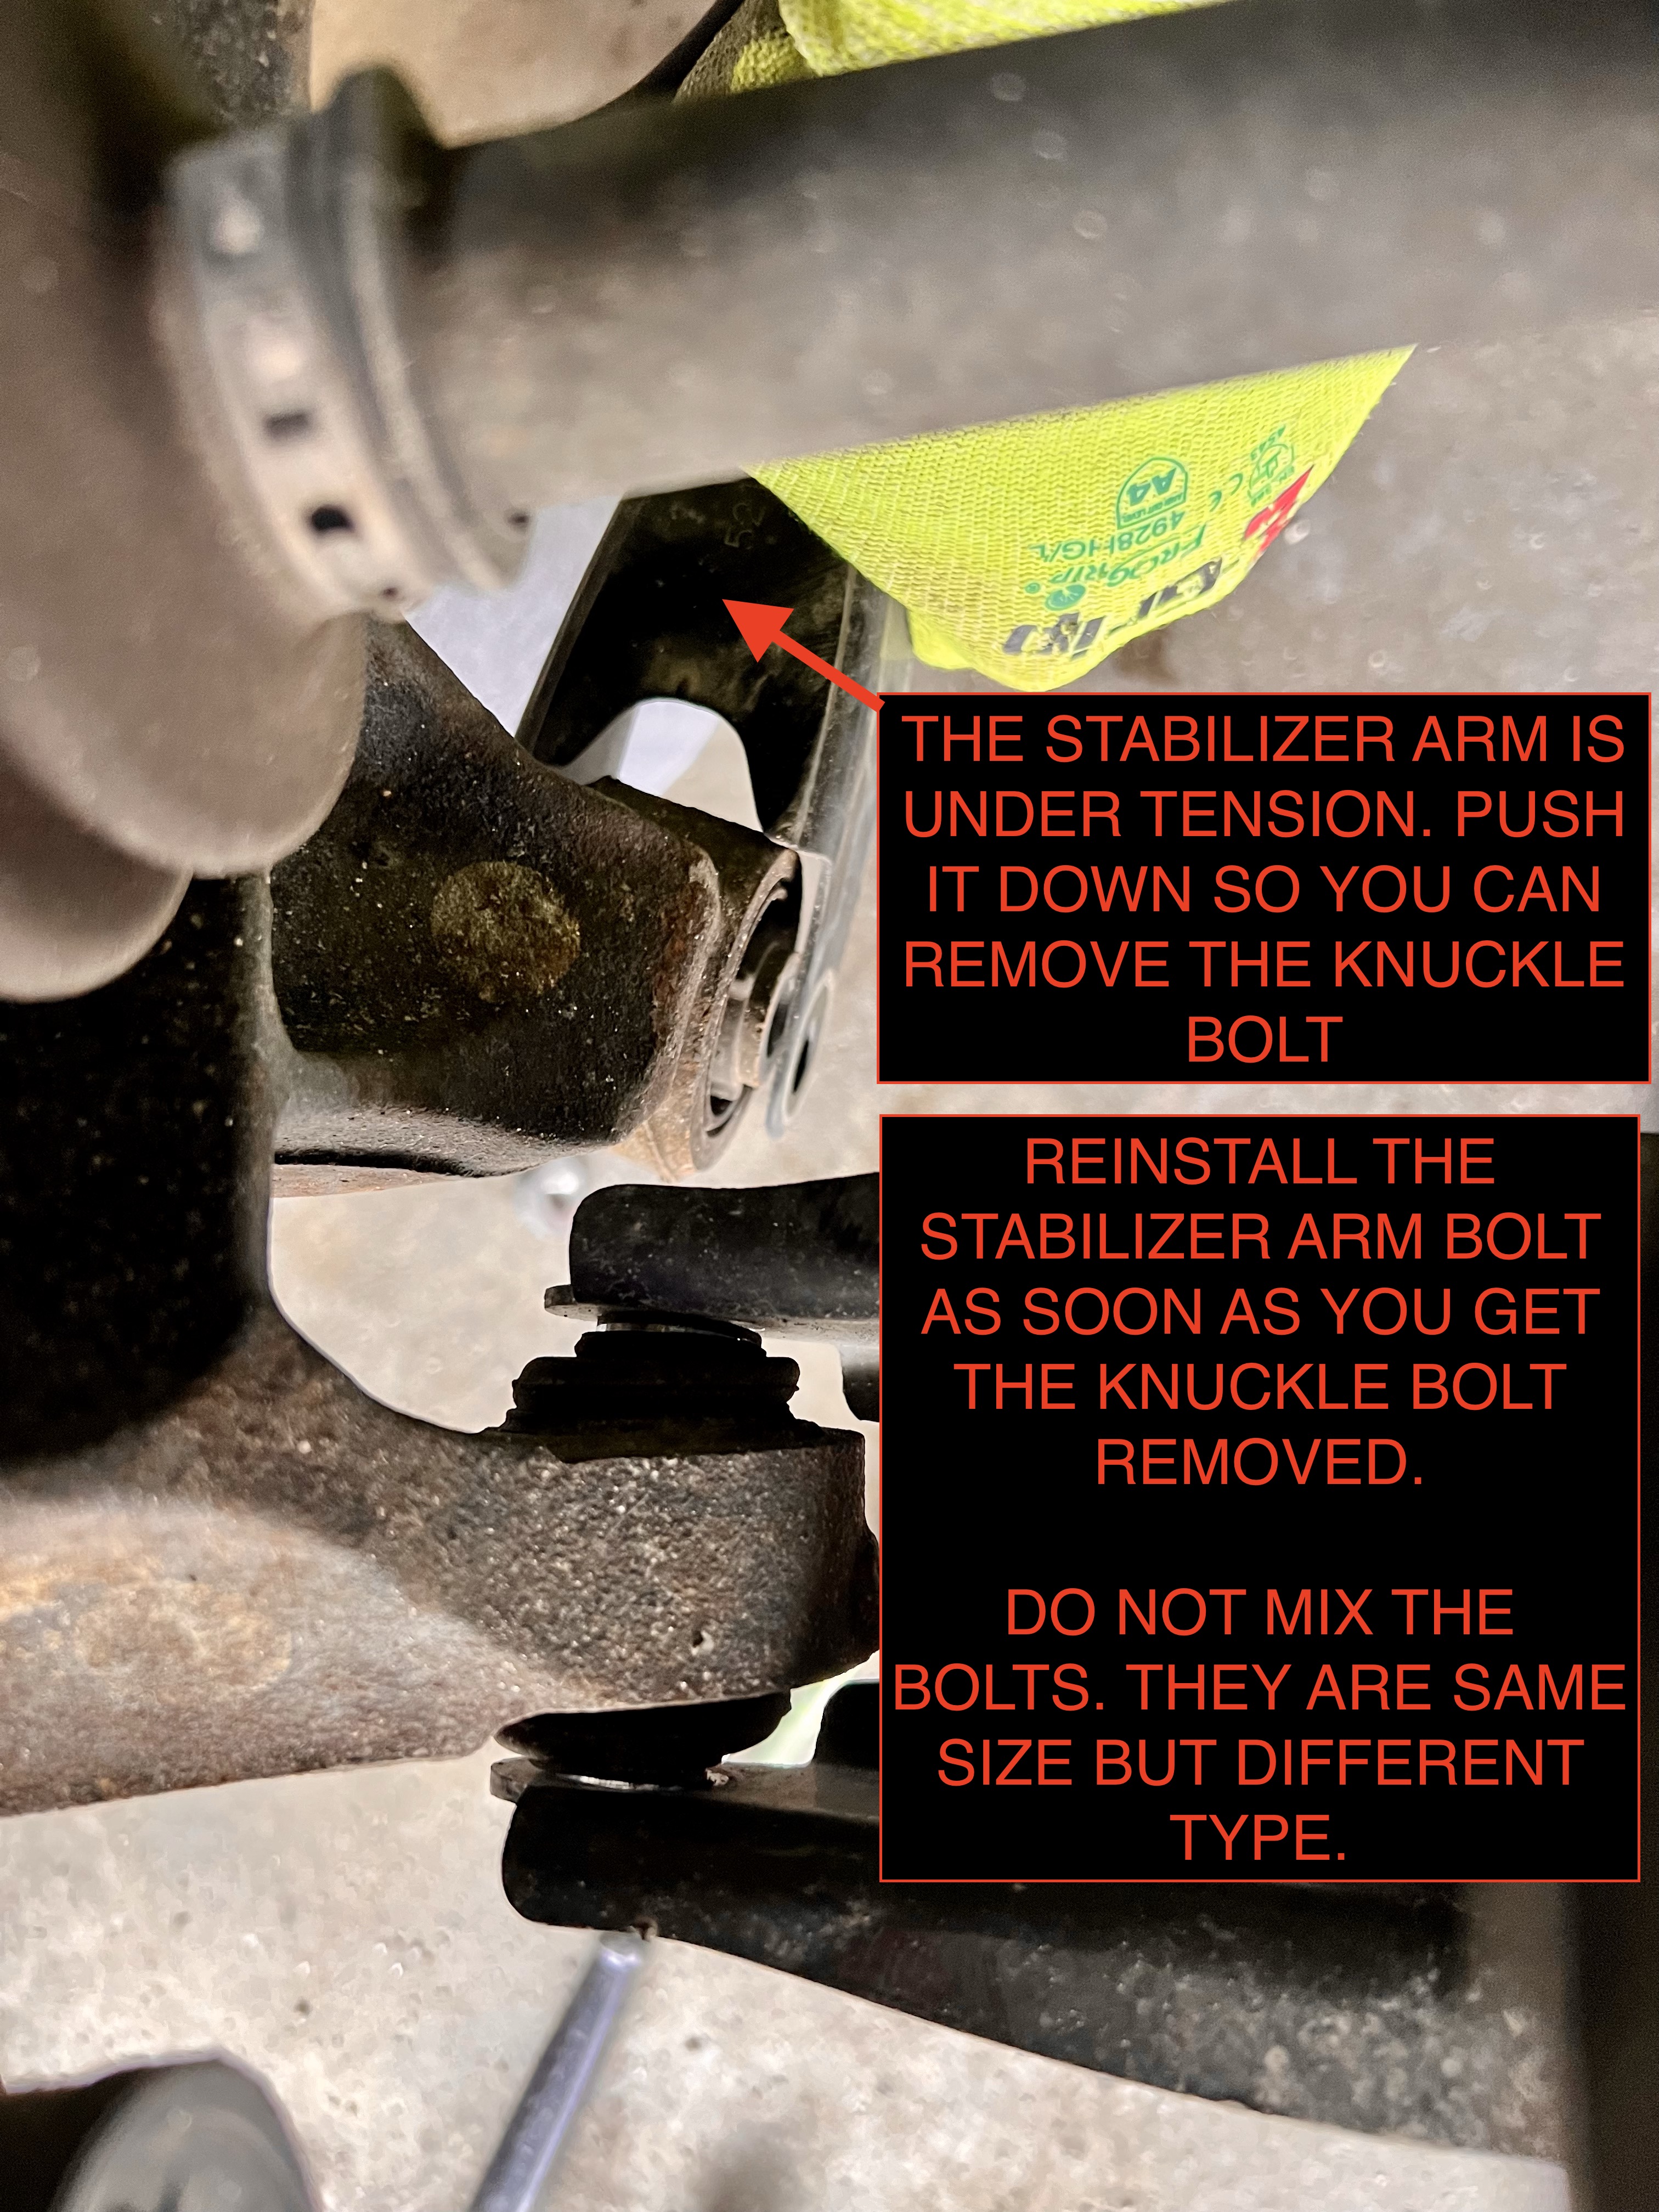
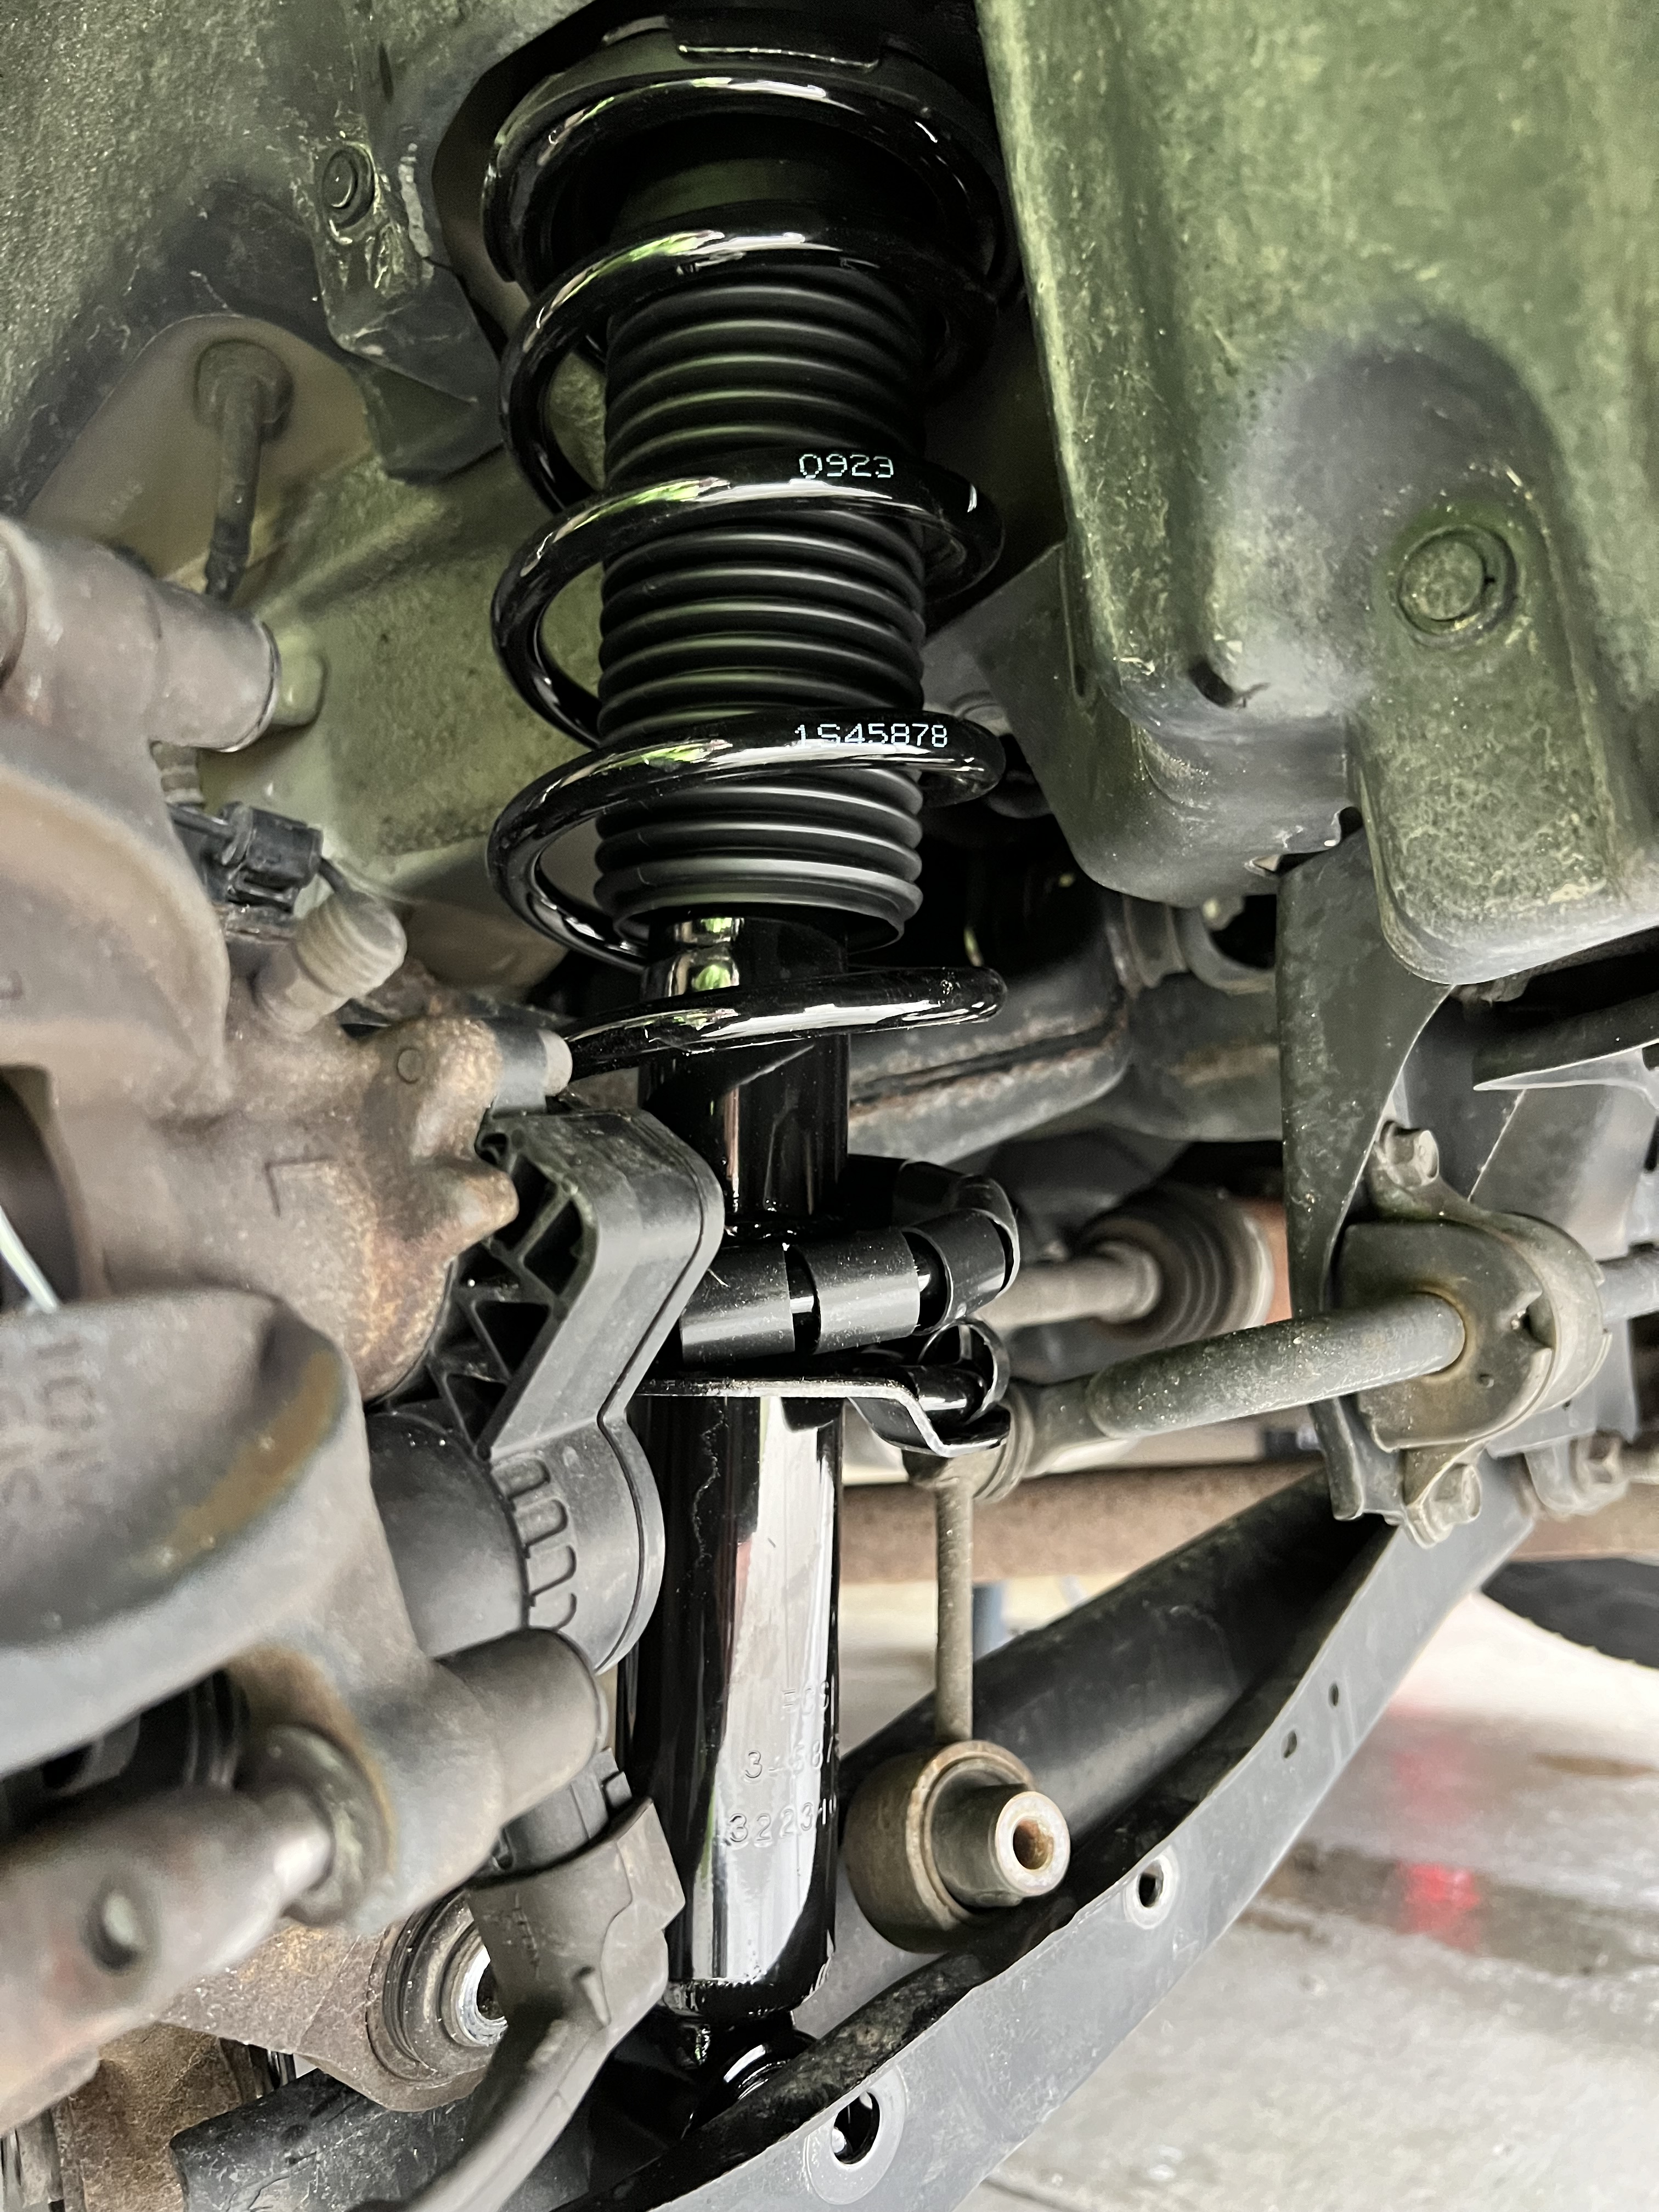
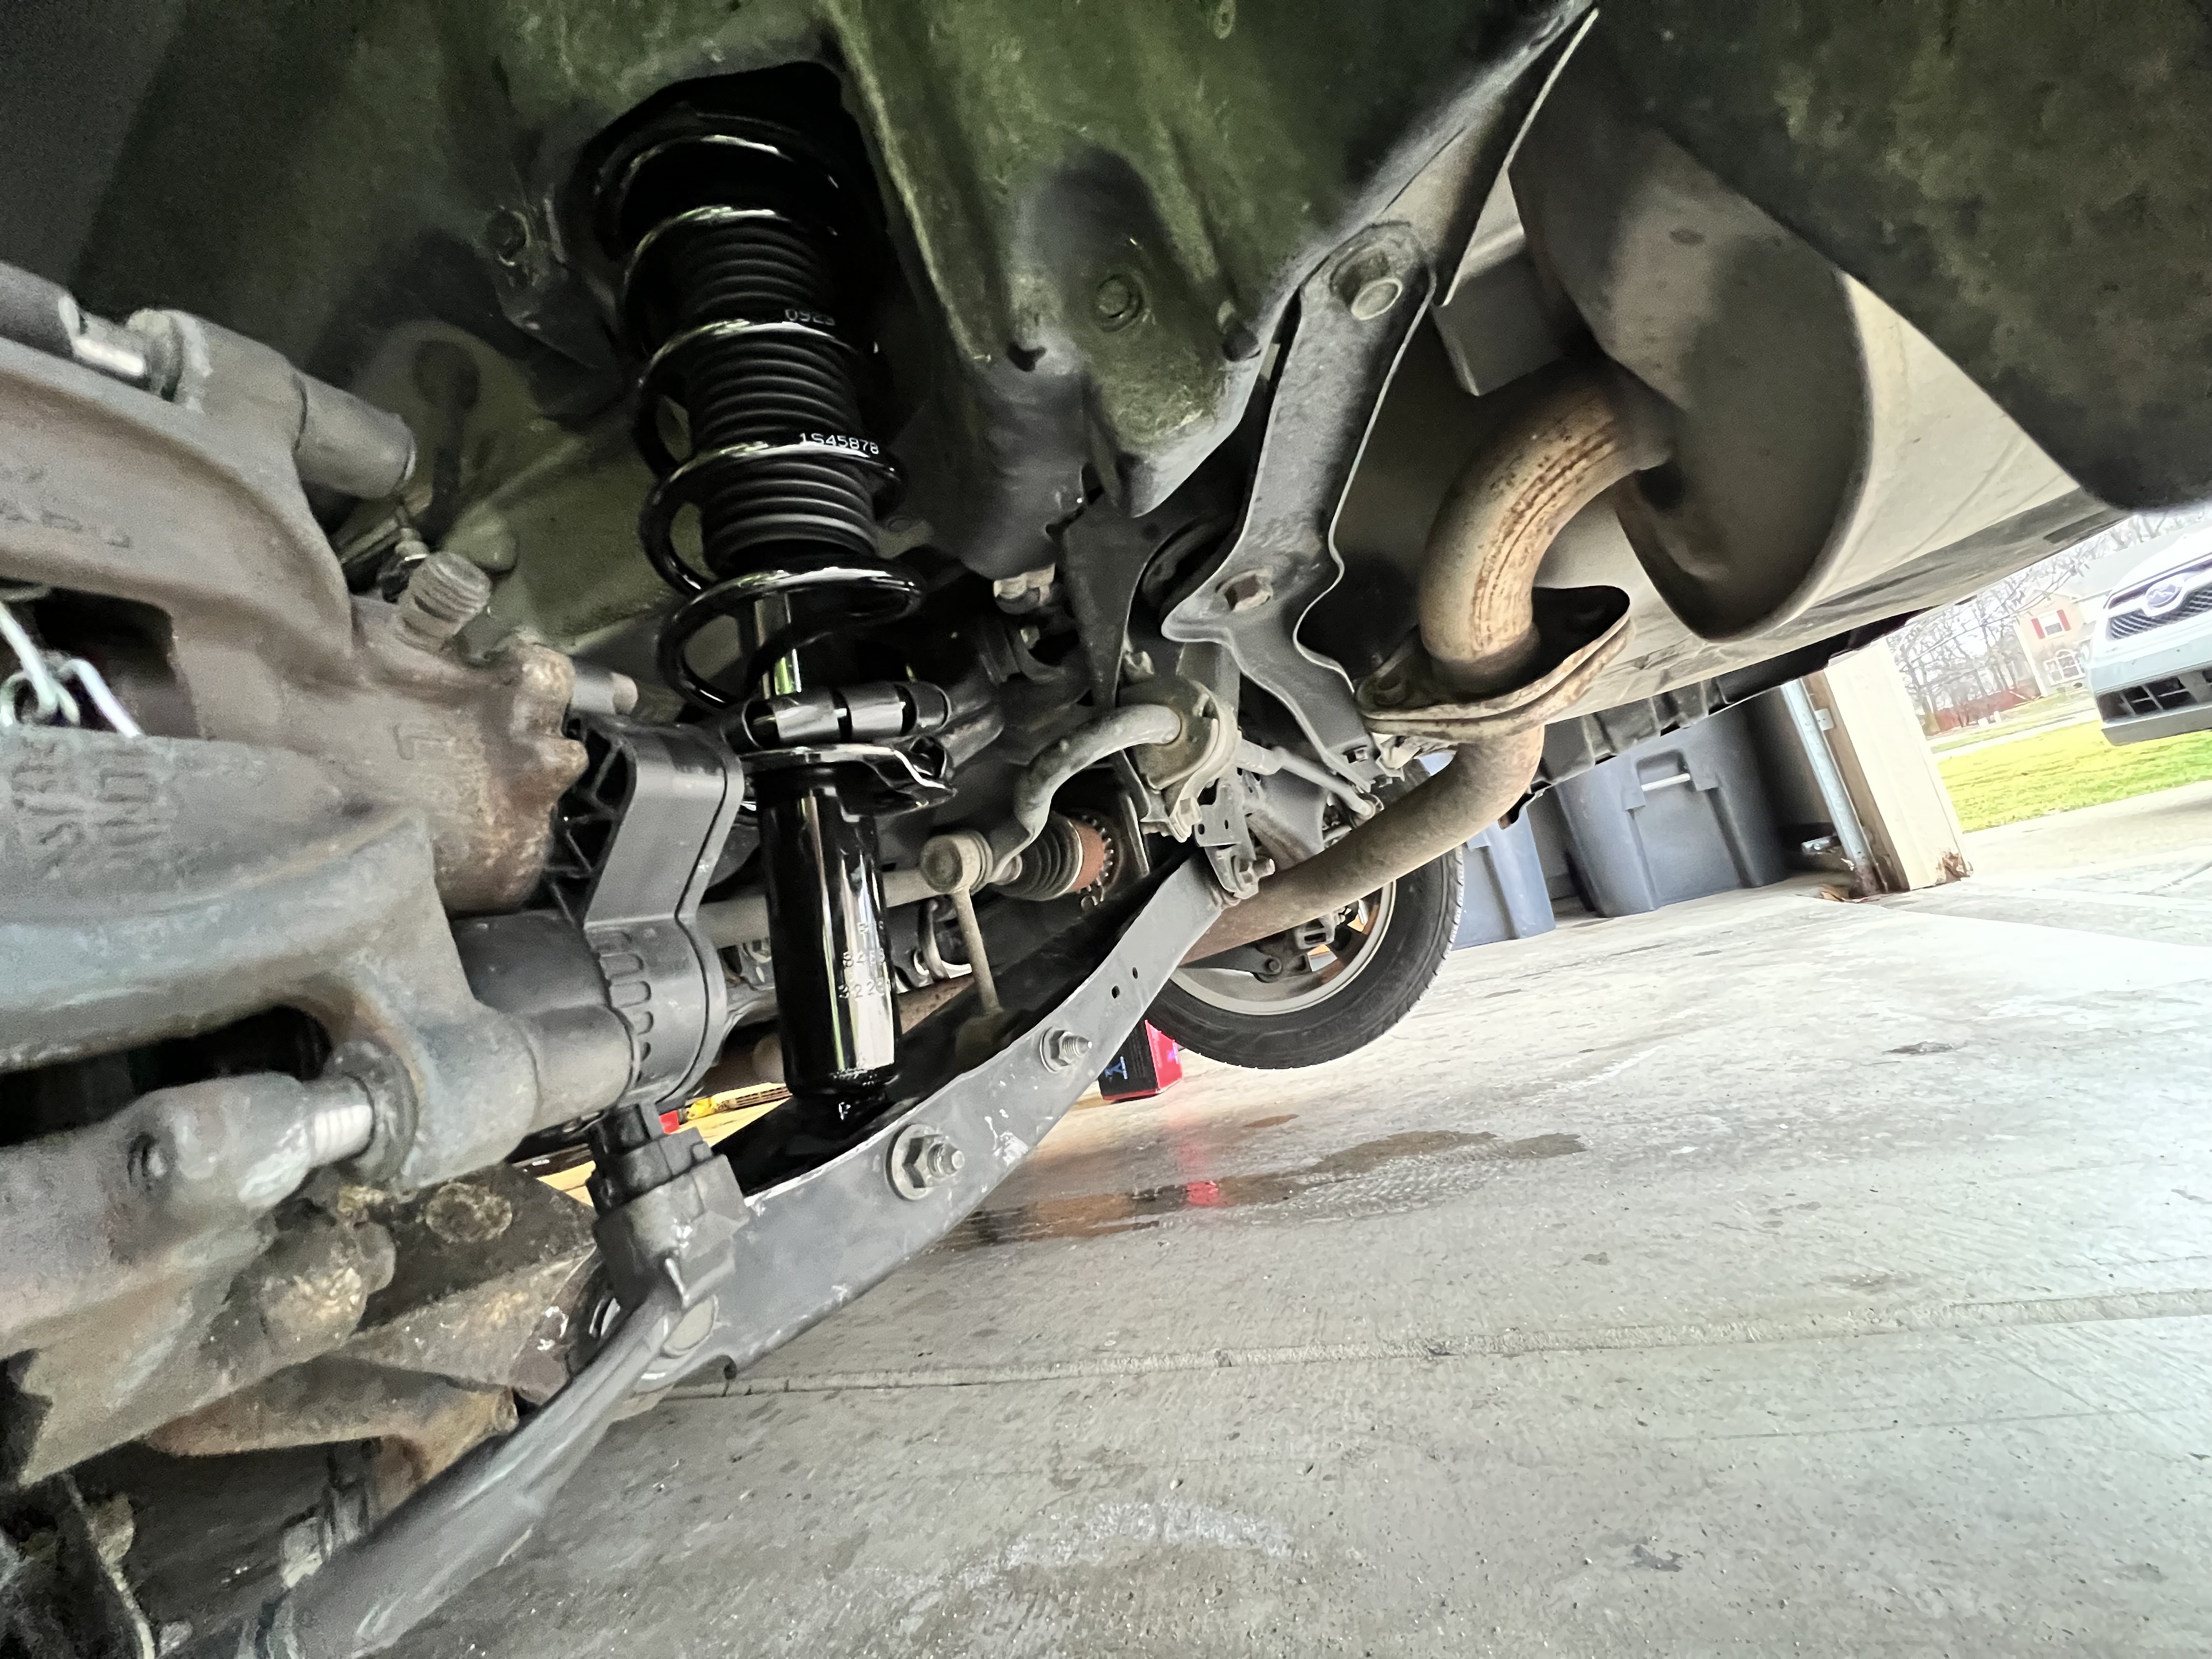
Now remove the bolts from the bottom of the strut and from the sway bar link. Use a rubber mallet or hammer to tap the bolts out. I needed a screwdriver (I know it’s not what they are made for!) to tap them through.

Now the control arm will lower and you should be able to pull out the old strut.

I always compare parts to confirm it will fit.
Fit the new strut in place. Slide the upper bolts into the holes in the trunk. There was enough tension on the control arm to hold it in place for me.
No need to fully tighten yet.
I put anti-seize on my bolts. Especially bolts that will not be taken apart for a while. I may never do this again but it will be easier if I do. Once finished take note of how many things are now turning silver because you got it all over your hands! It’s all part of the experience.
Reinstall the bolts in the control arm and torque to specs. I did them in the order shown here. I did not need to jack up the control arm for the first two bolts but the new strut holds the arm too low and I could not muscle the knuckle into place. Jacking it up made it much easier. Strut bolt: 88ft-lbs | Sway bar link bolt: 24ft-lbs | Knuckle bolt: 59ft-lbs

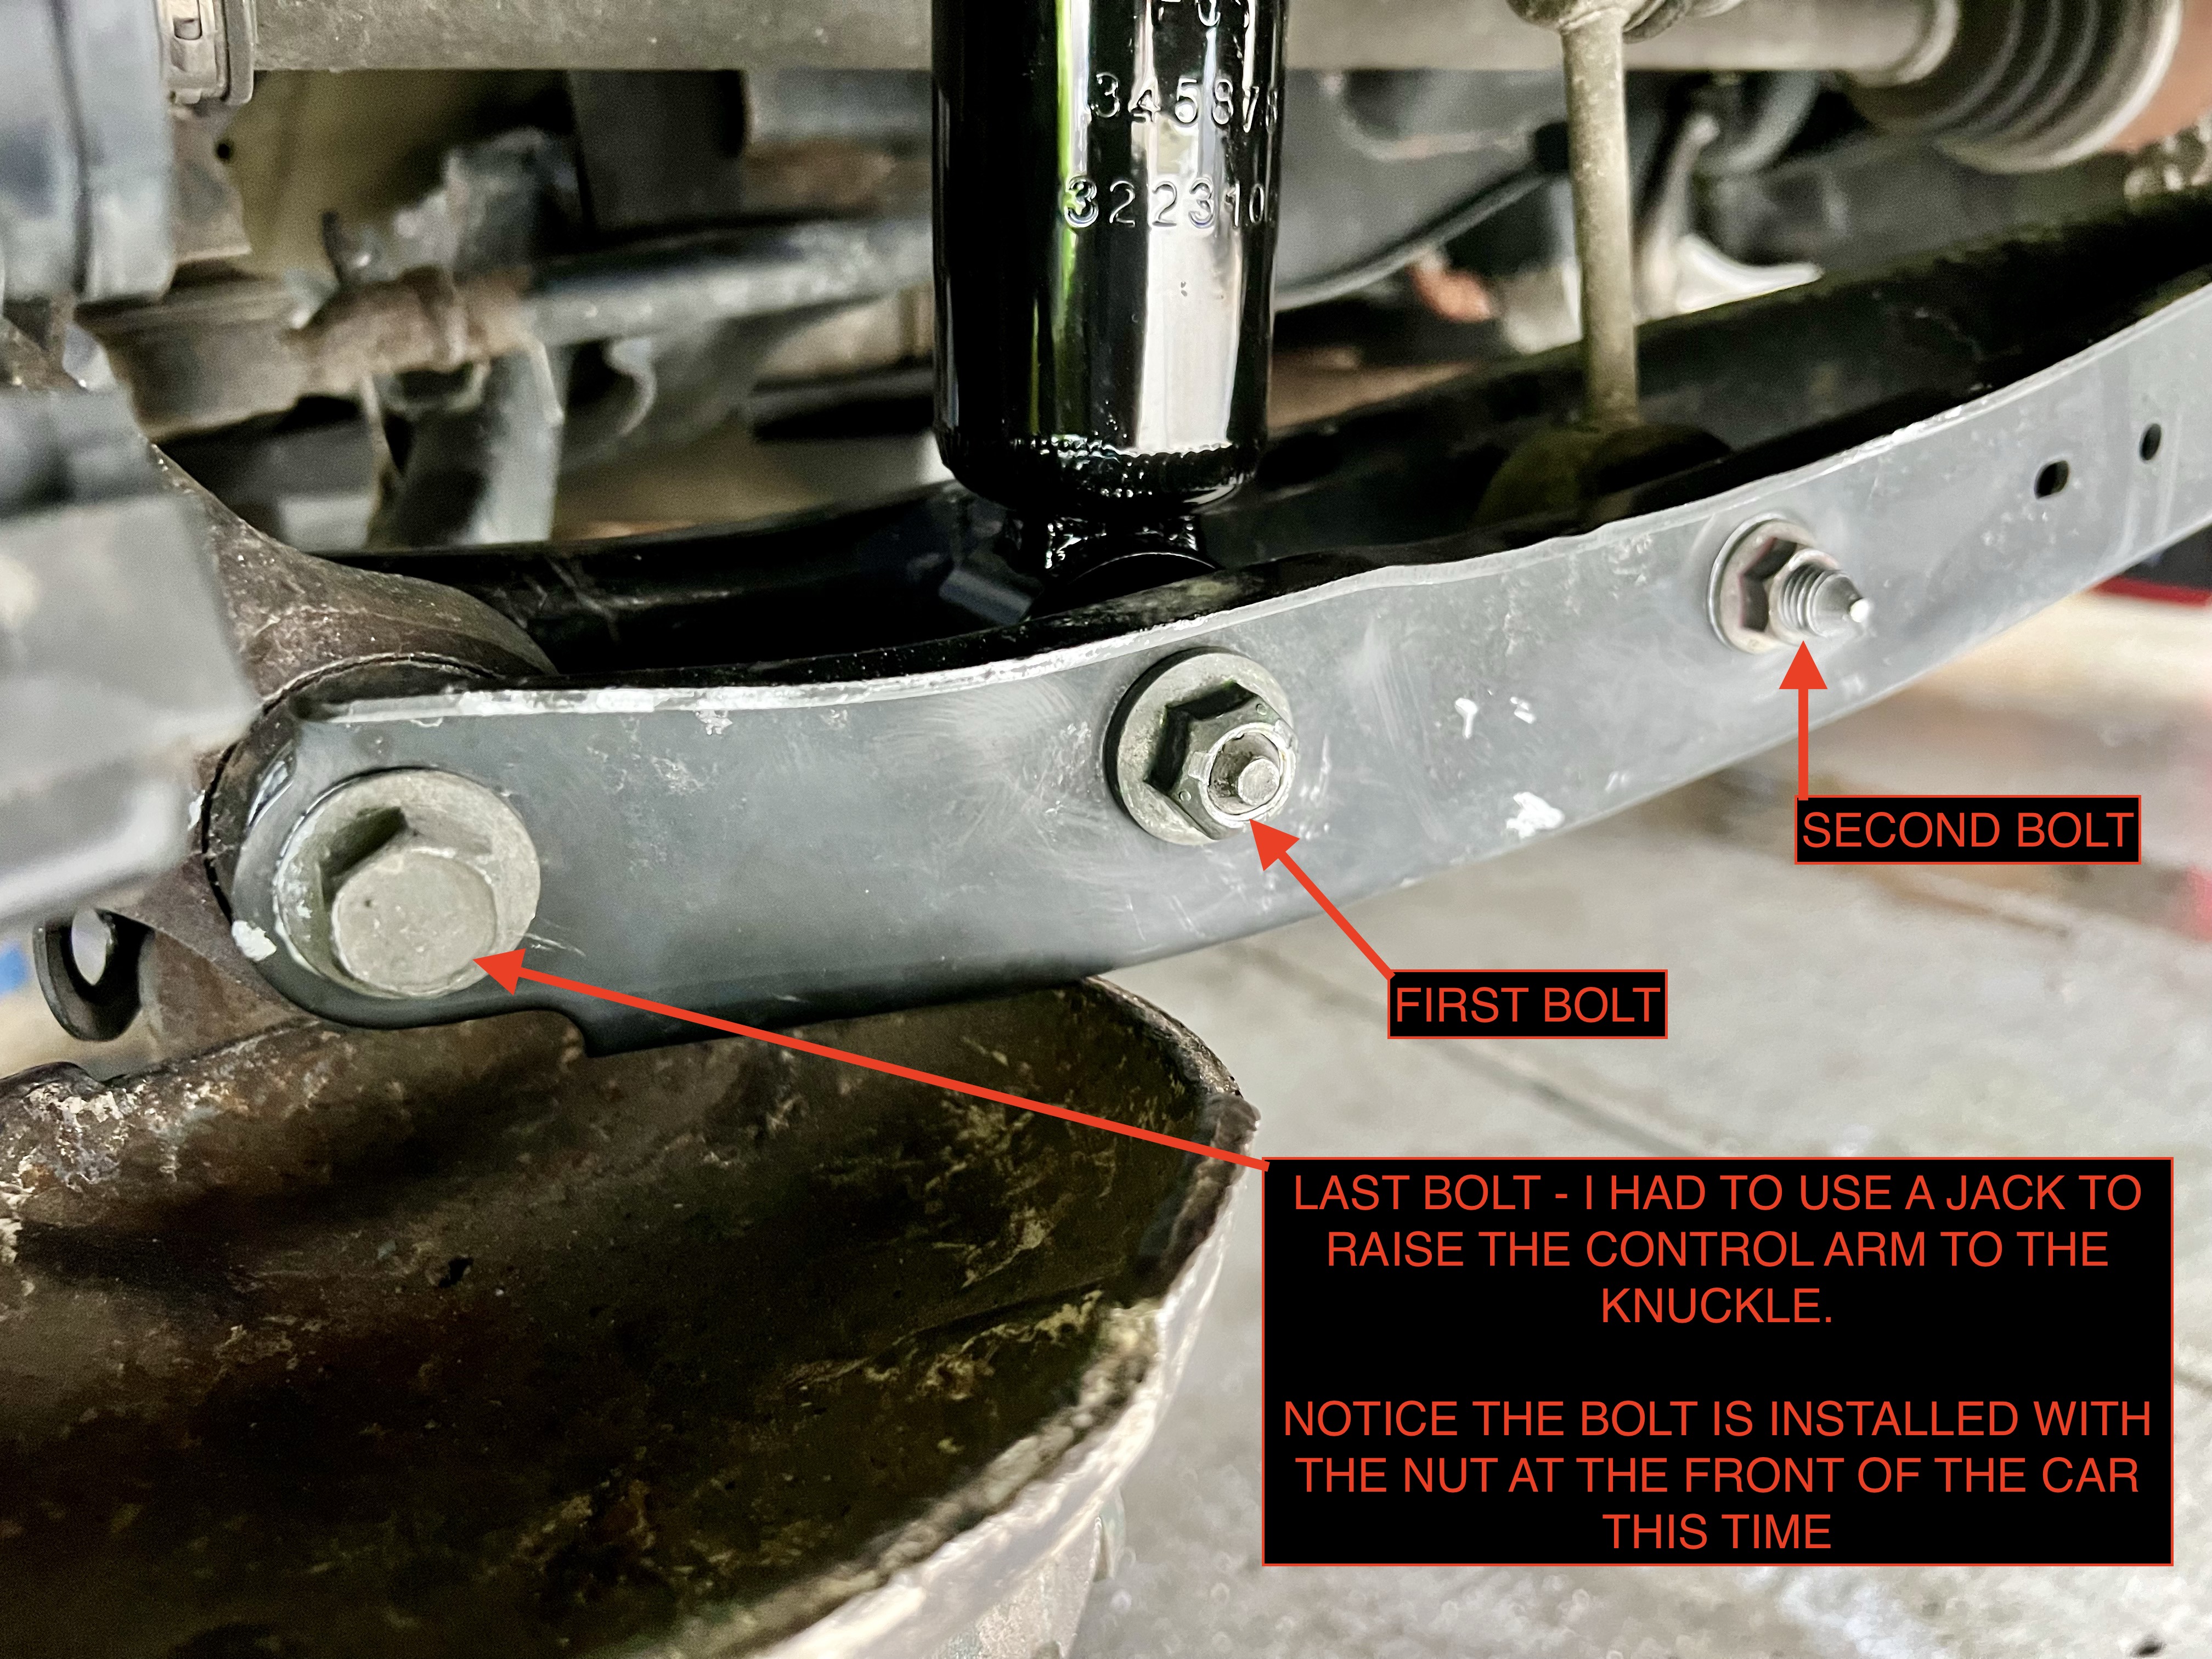
IF YOU FIND IT HARD TO LINE UP THE HOLES: Use a screwdriver on the opposite side you are inserting the bolt to hold it in alignment. Once you get the bolt inserted it will hold it in alignment or well enough you can tap it through with a hammer.

Next tighten the interior bolts. These do not need anti-seize. 22ft-lbs torque
All back together. Double check your work.
A mechanic on YouTube says you need to preload your struts to help them settle and you will get a better alignment from the shop. I don’t know if this is true, but it is quick and easy so I did it. I put the jack under the knuckle and raised the car until it was holding the weight as you see here. Then I let it down and moved on.
Put the wheel back on and hand tighten the bolts in a star pattern. Make as tight as you can while holding the wheel in place.

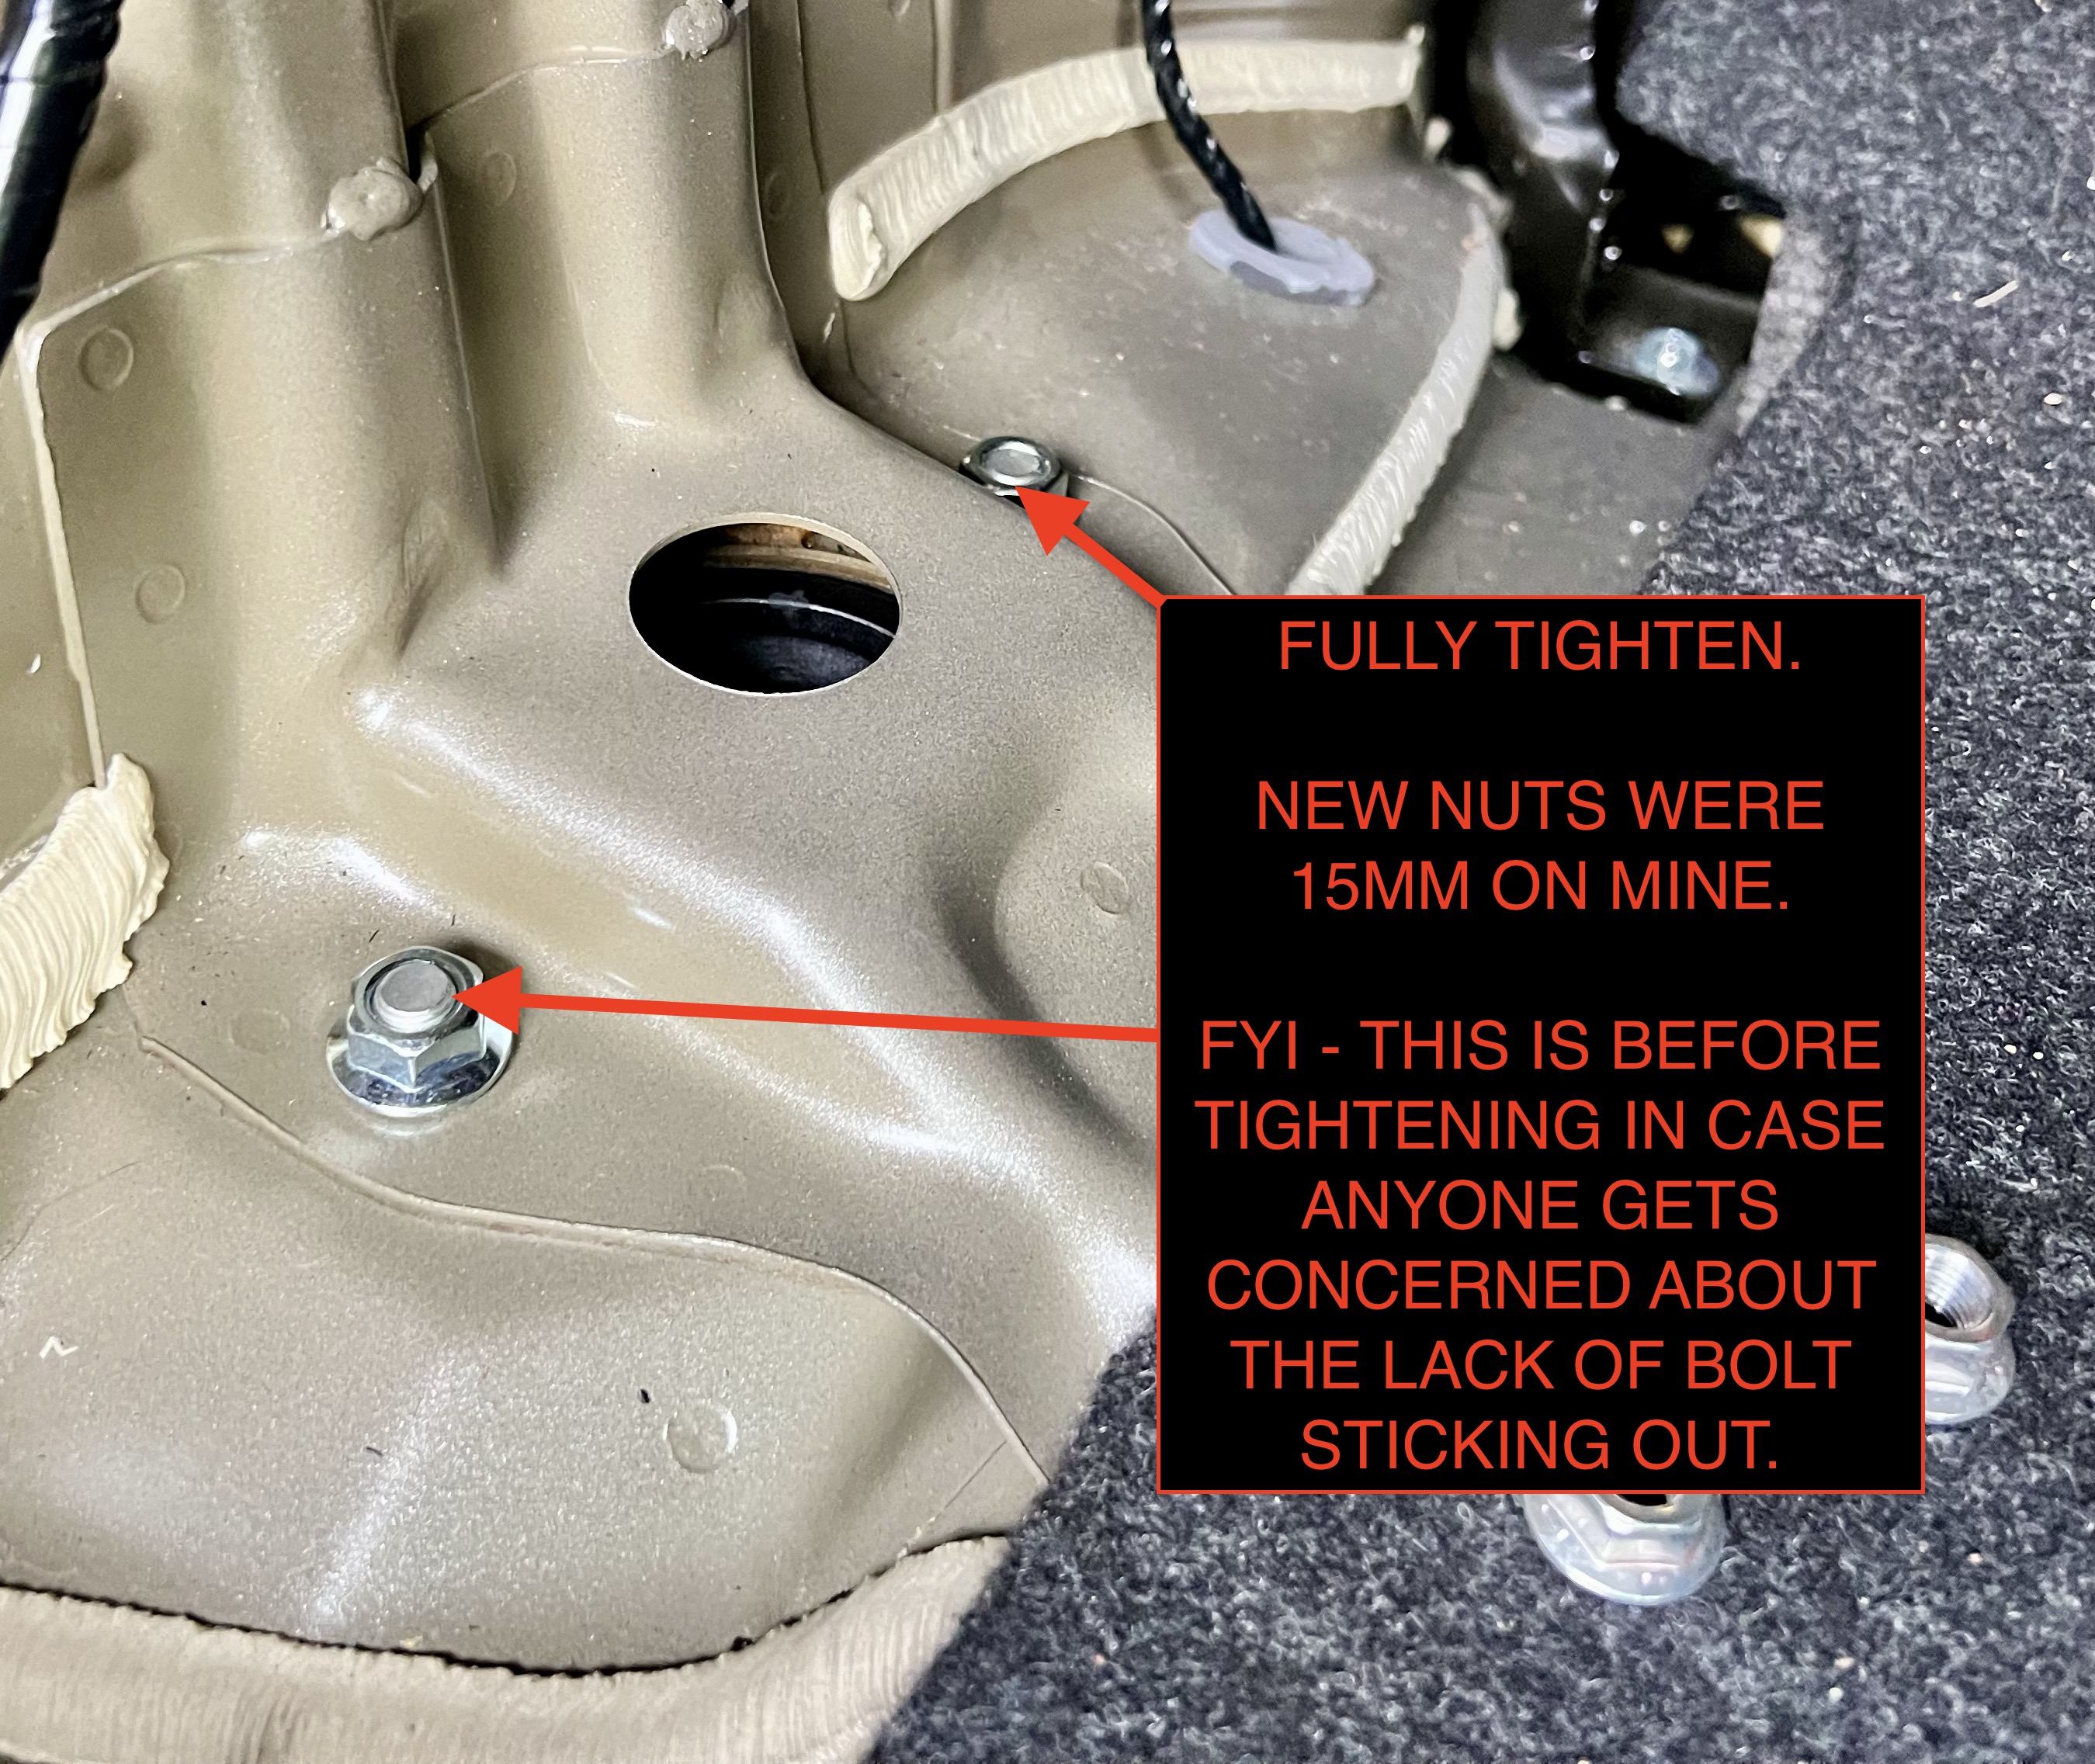
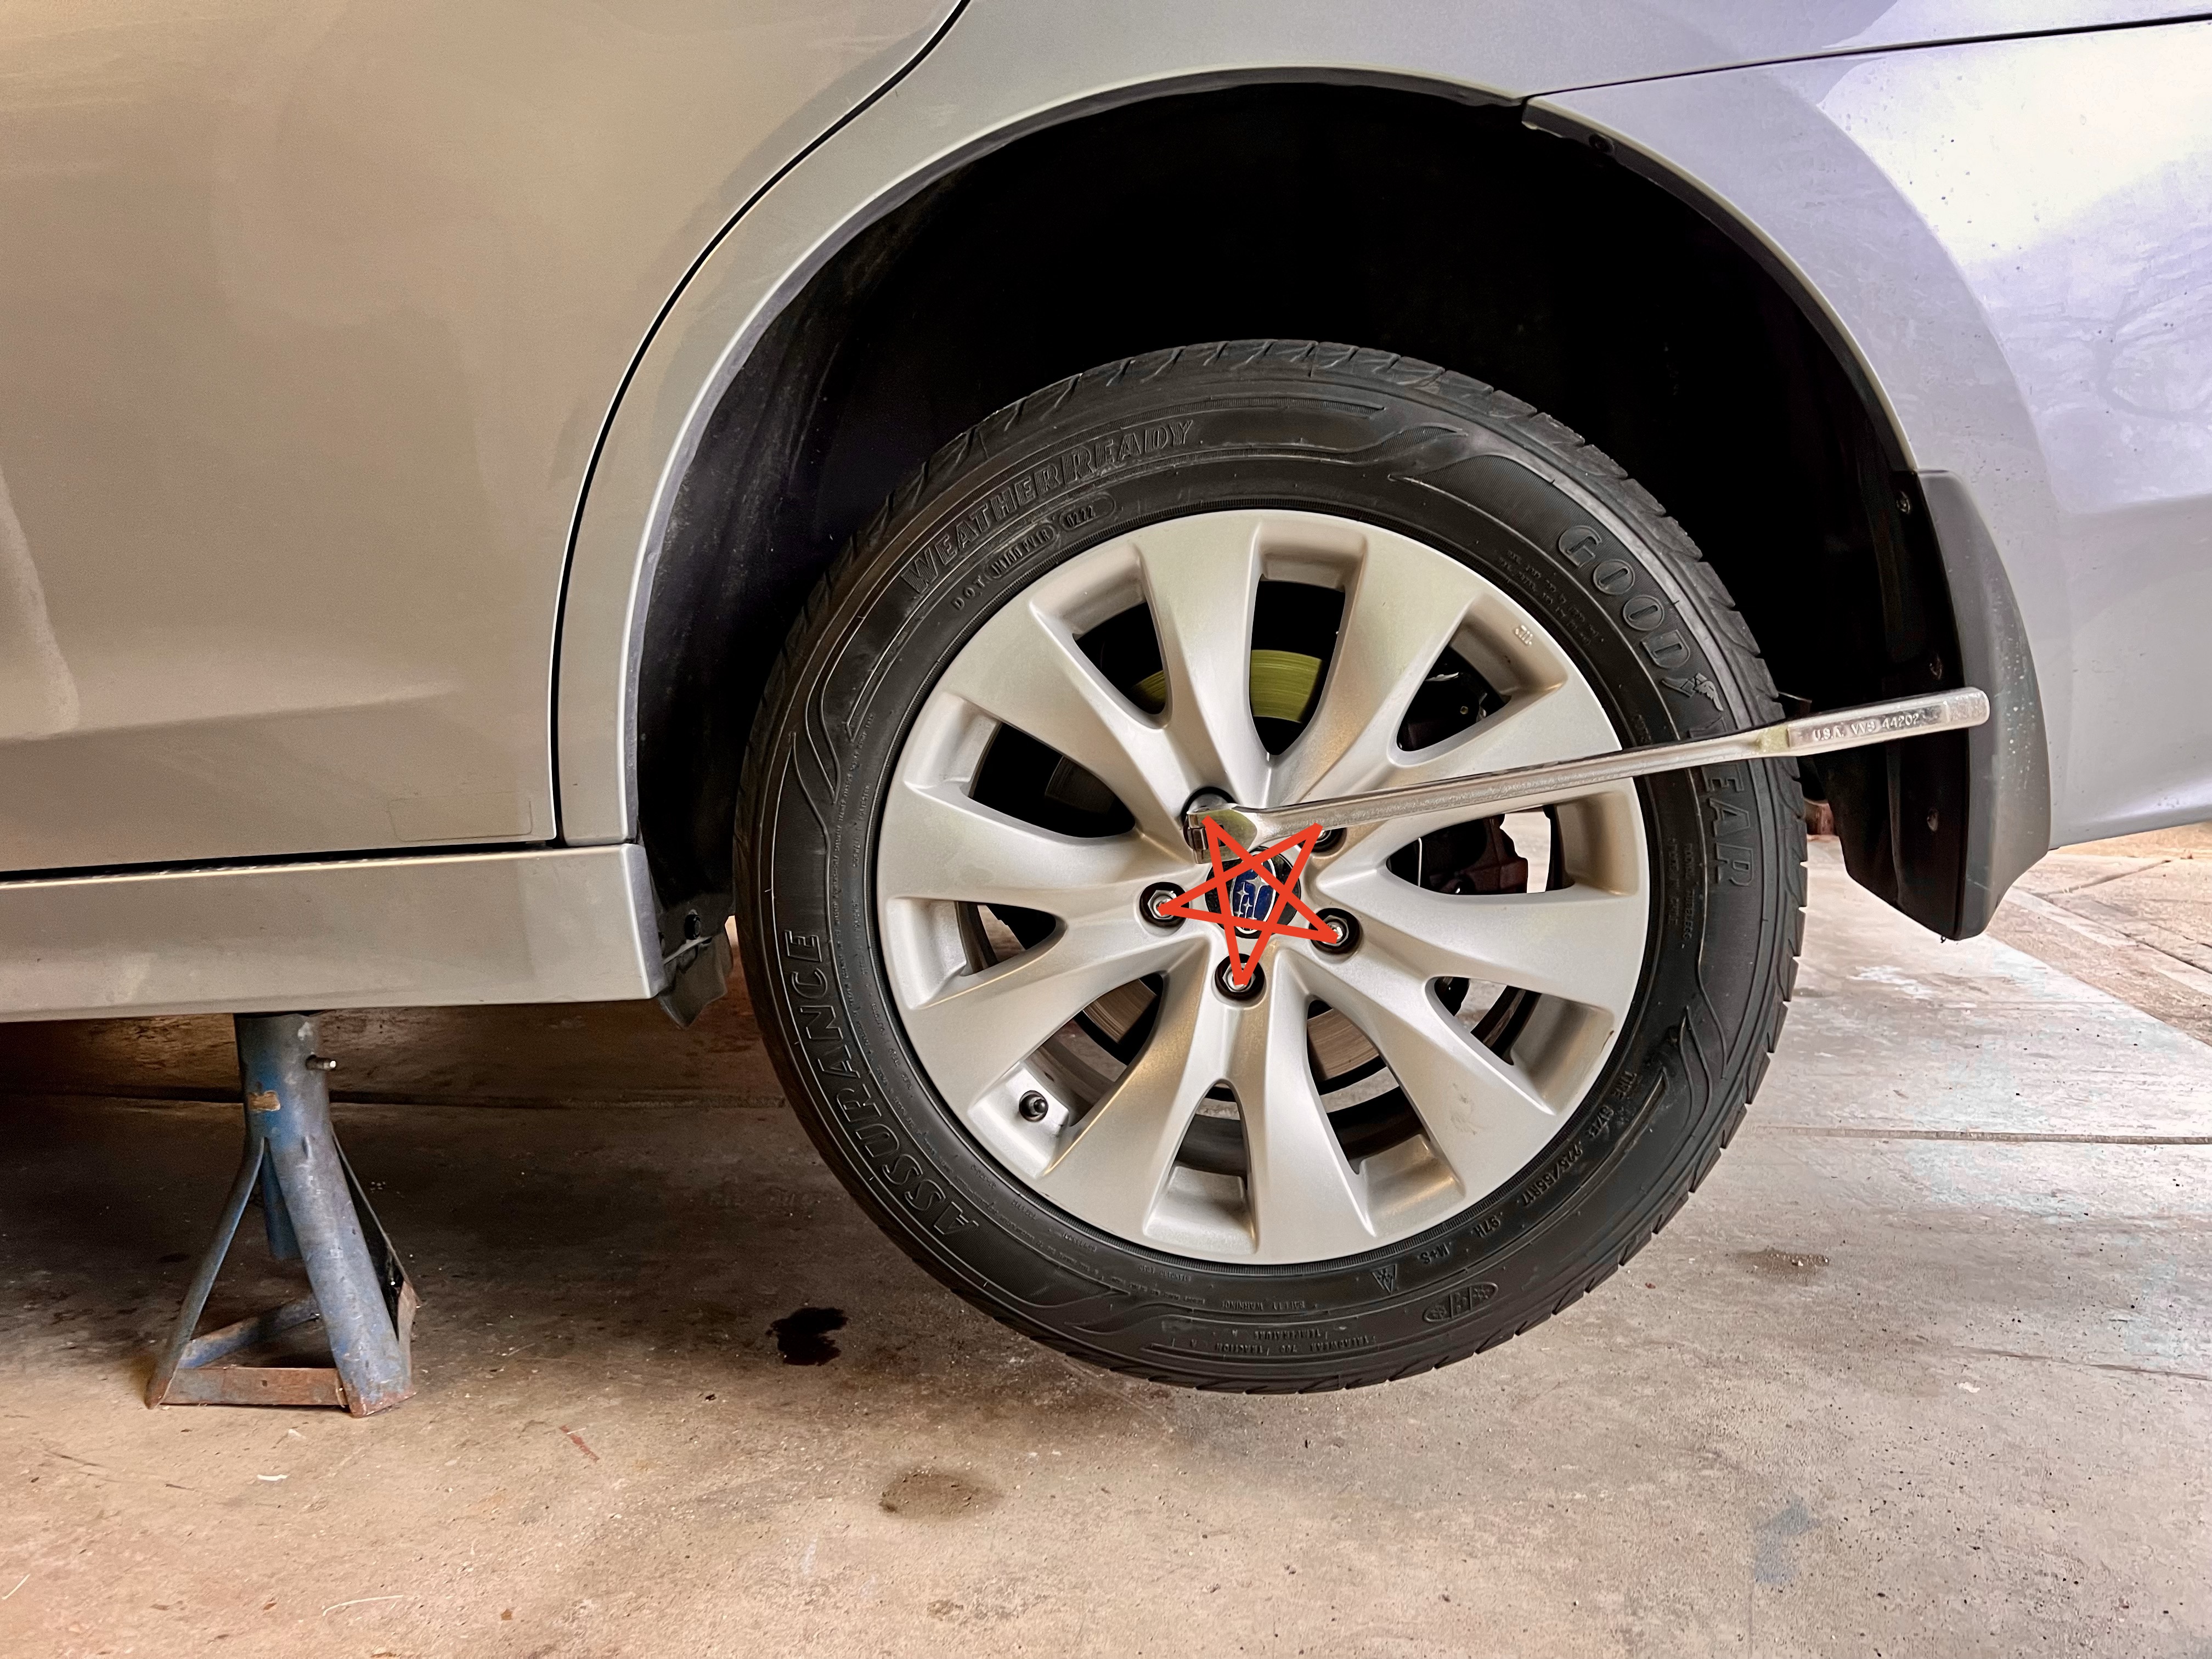
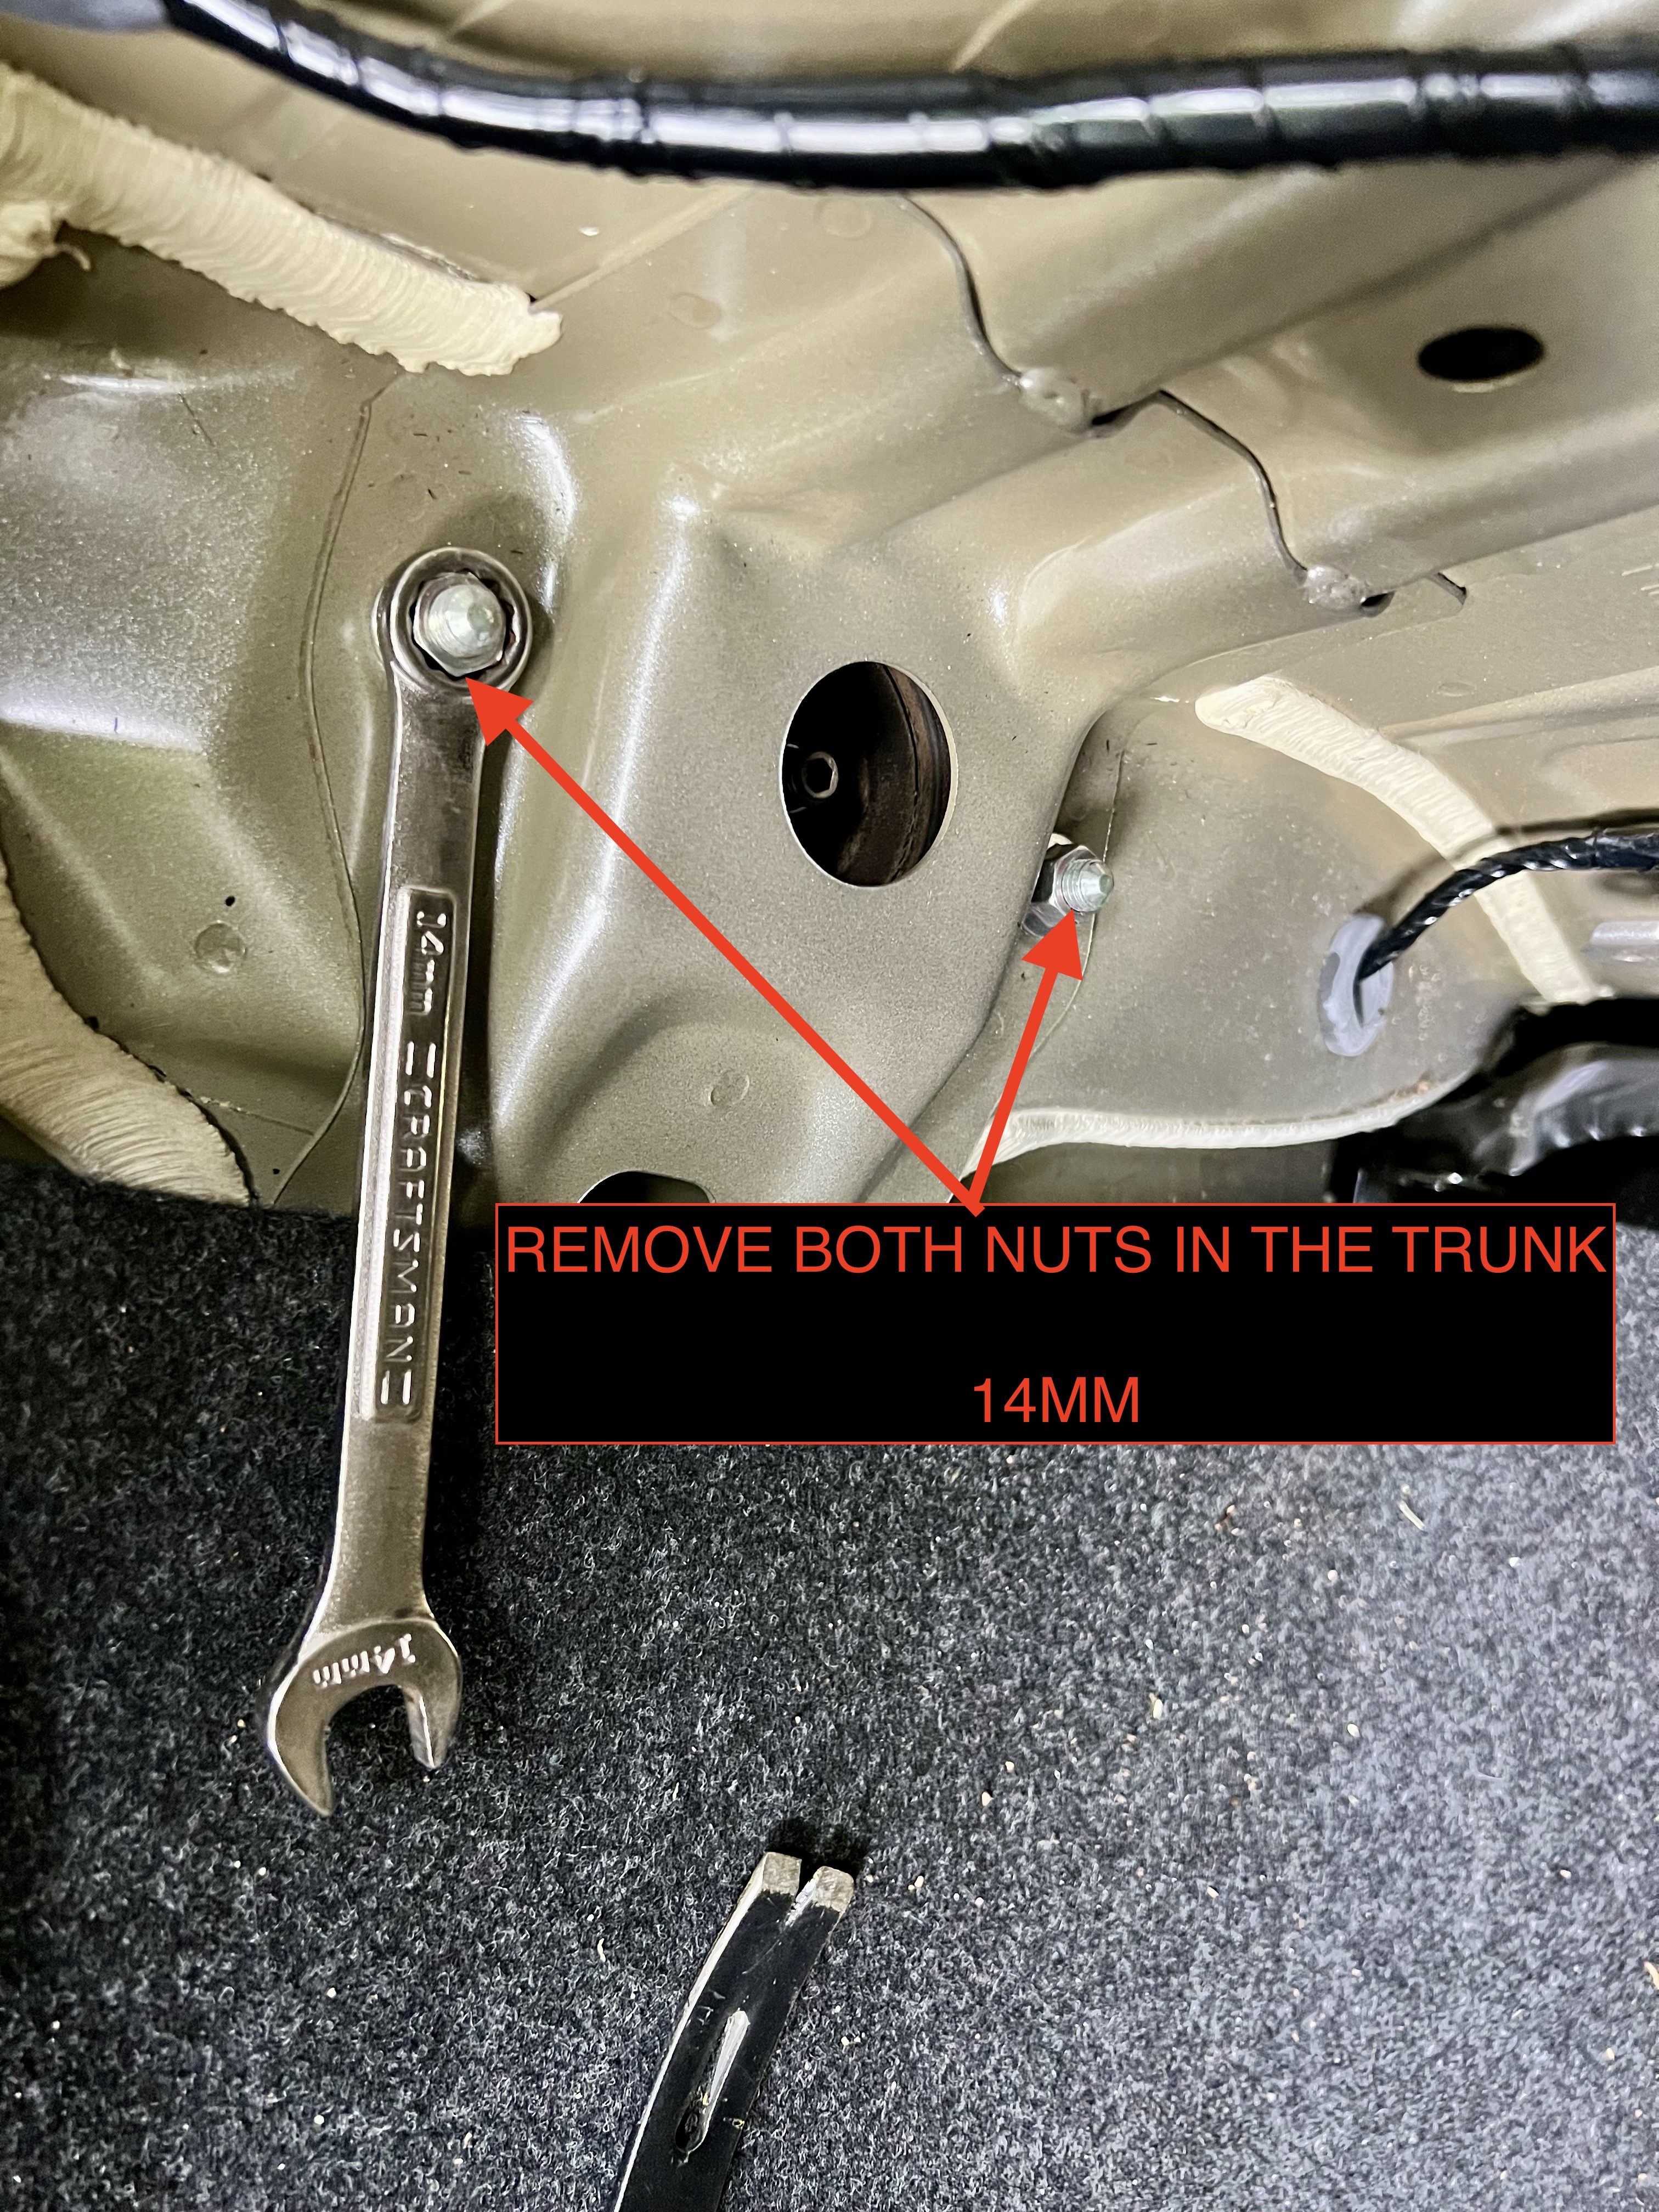
Typically, you replace both struts at the same time. This tutorial assumes you are moving on to replace the other side. DON’T lower the car yet. Start back at the top to replace the other side. When you get back to this point on the other side Lower the car to the ground and move on to torque the lug nuts and finish work in the trunk.

I know it’s a different wheel …but I didn’t take a photo of the rear. Lower the car and torque the lug nuts to spec in a star pattern. This is 88.5ft-lbs on this Legacy.
Put the carpet panel back in place on both sides and fasten with the original plastic anchors.

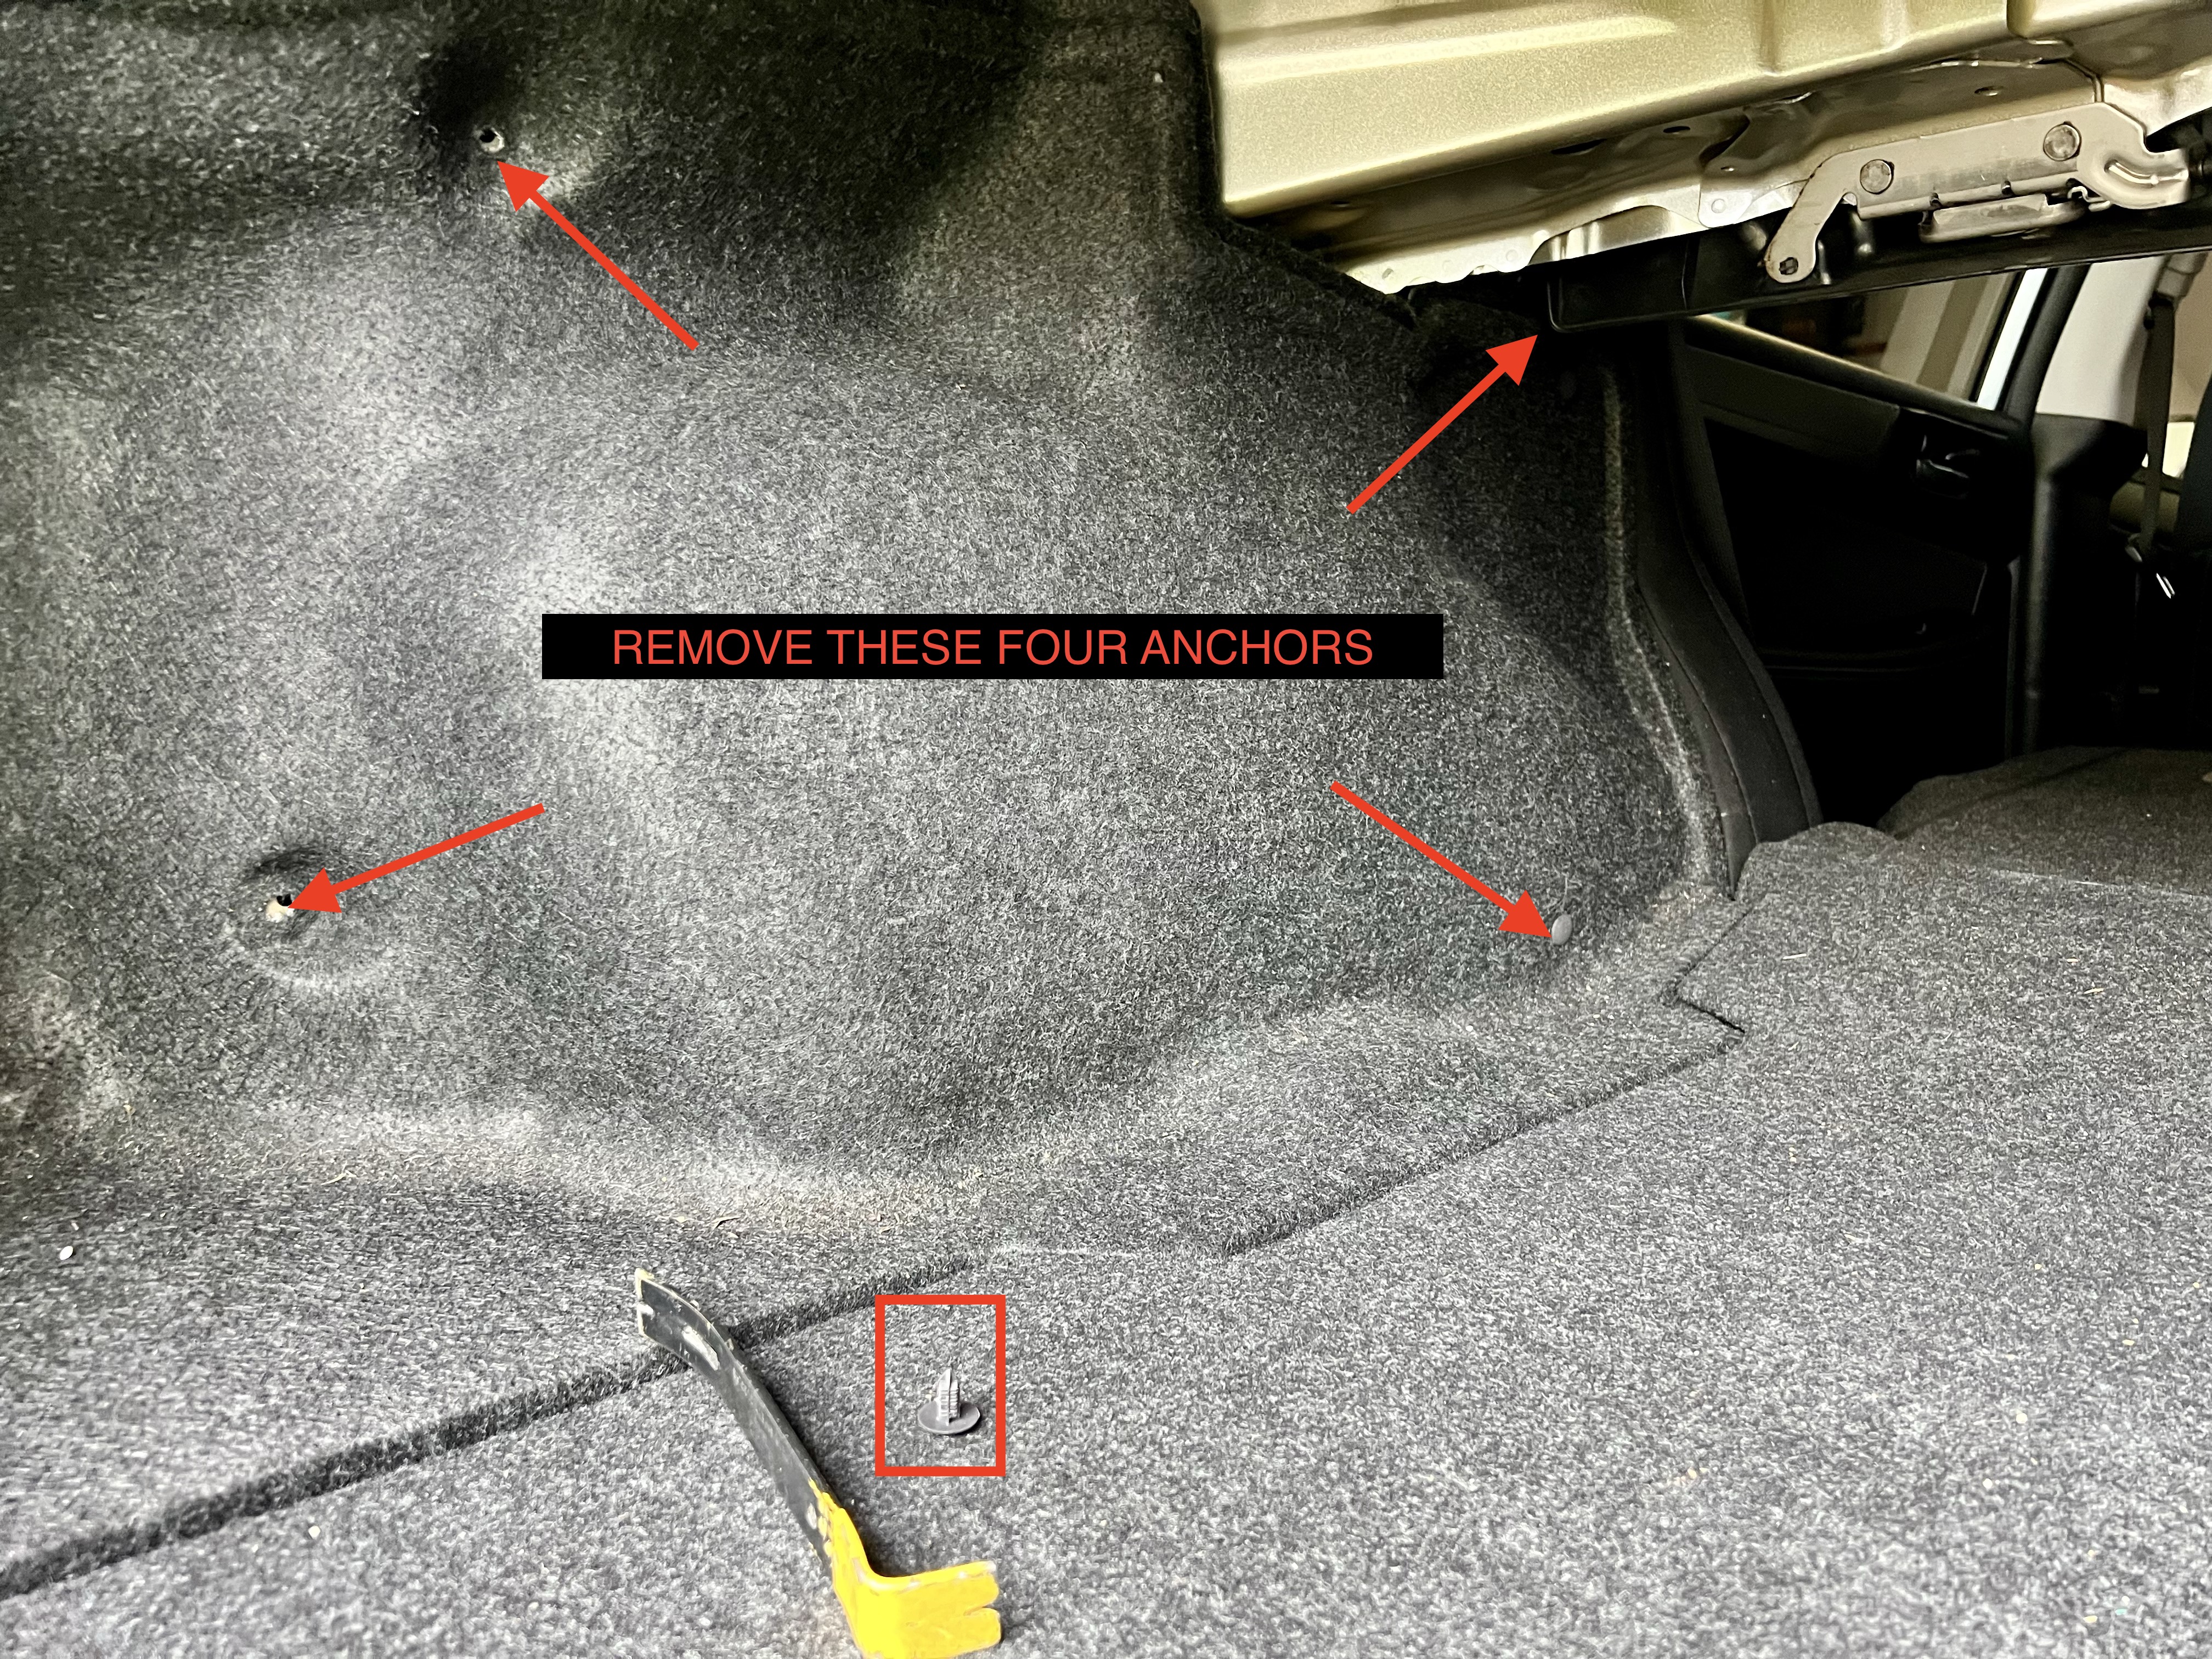
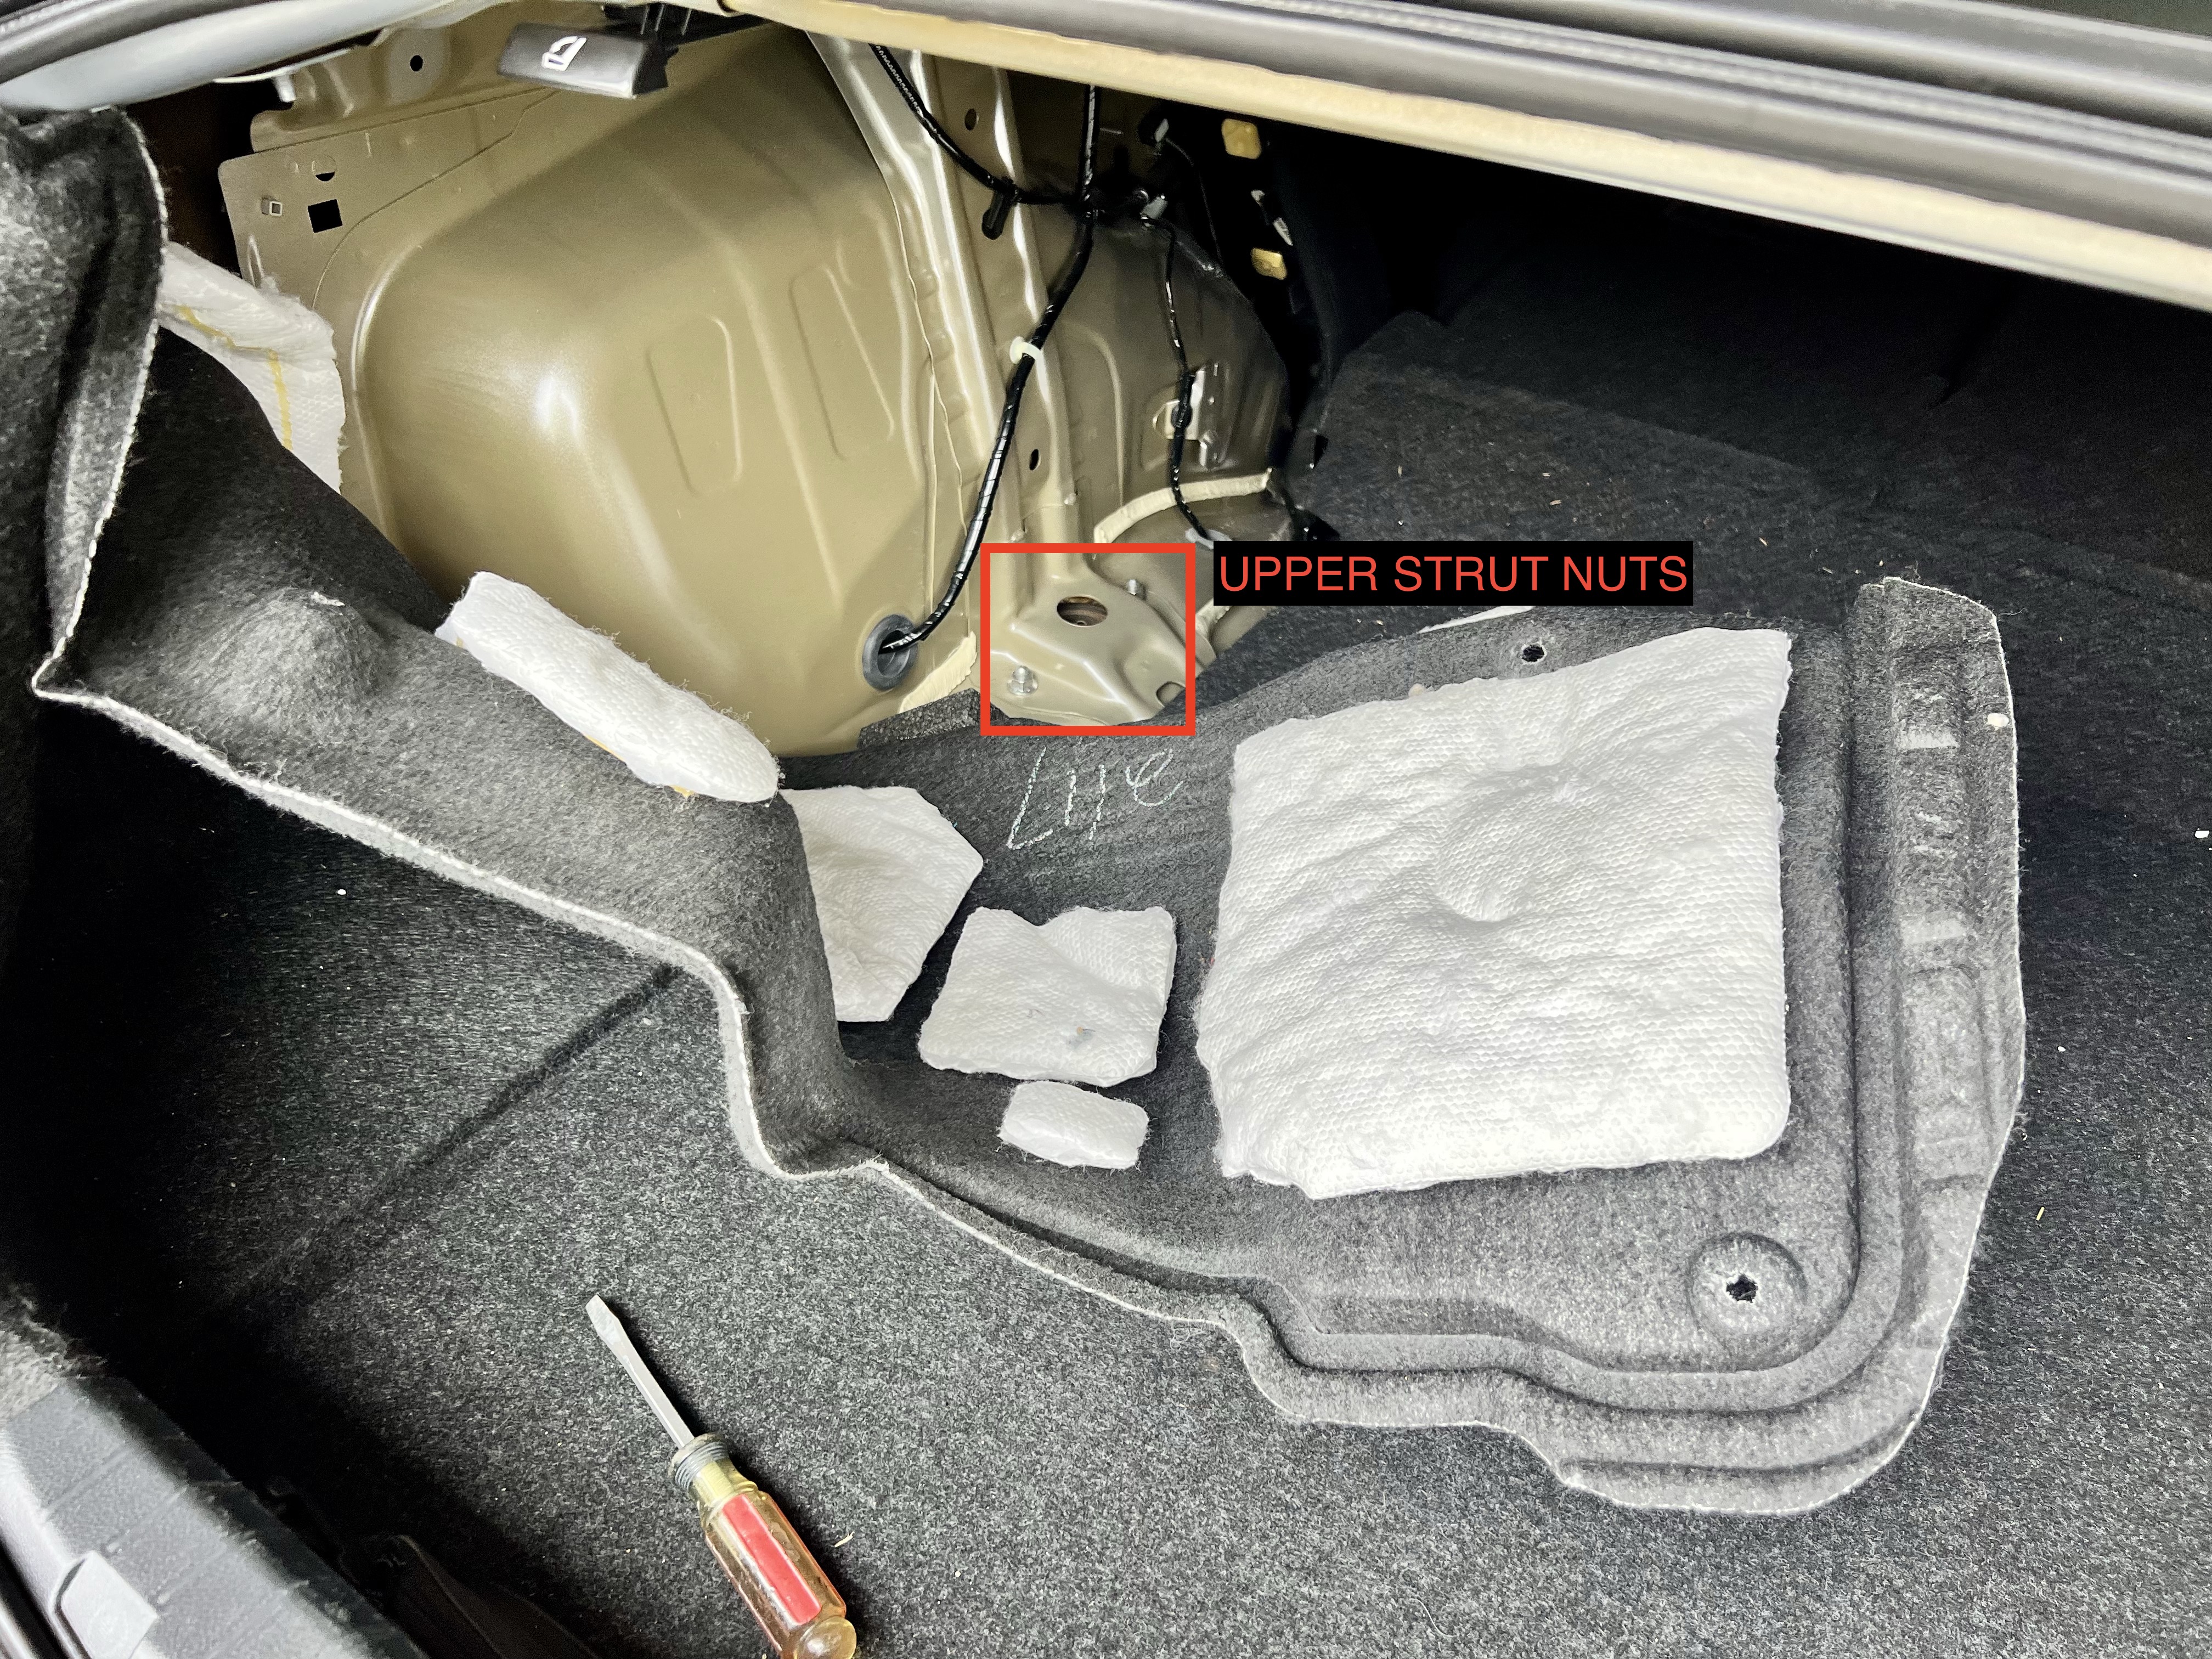
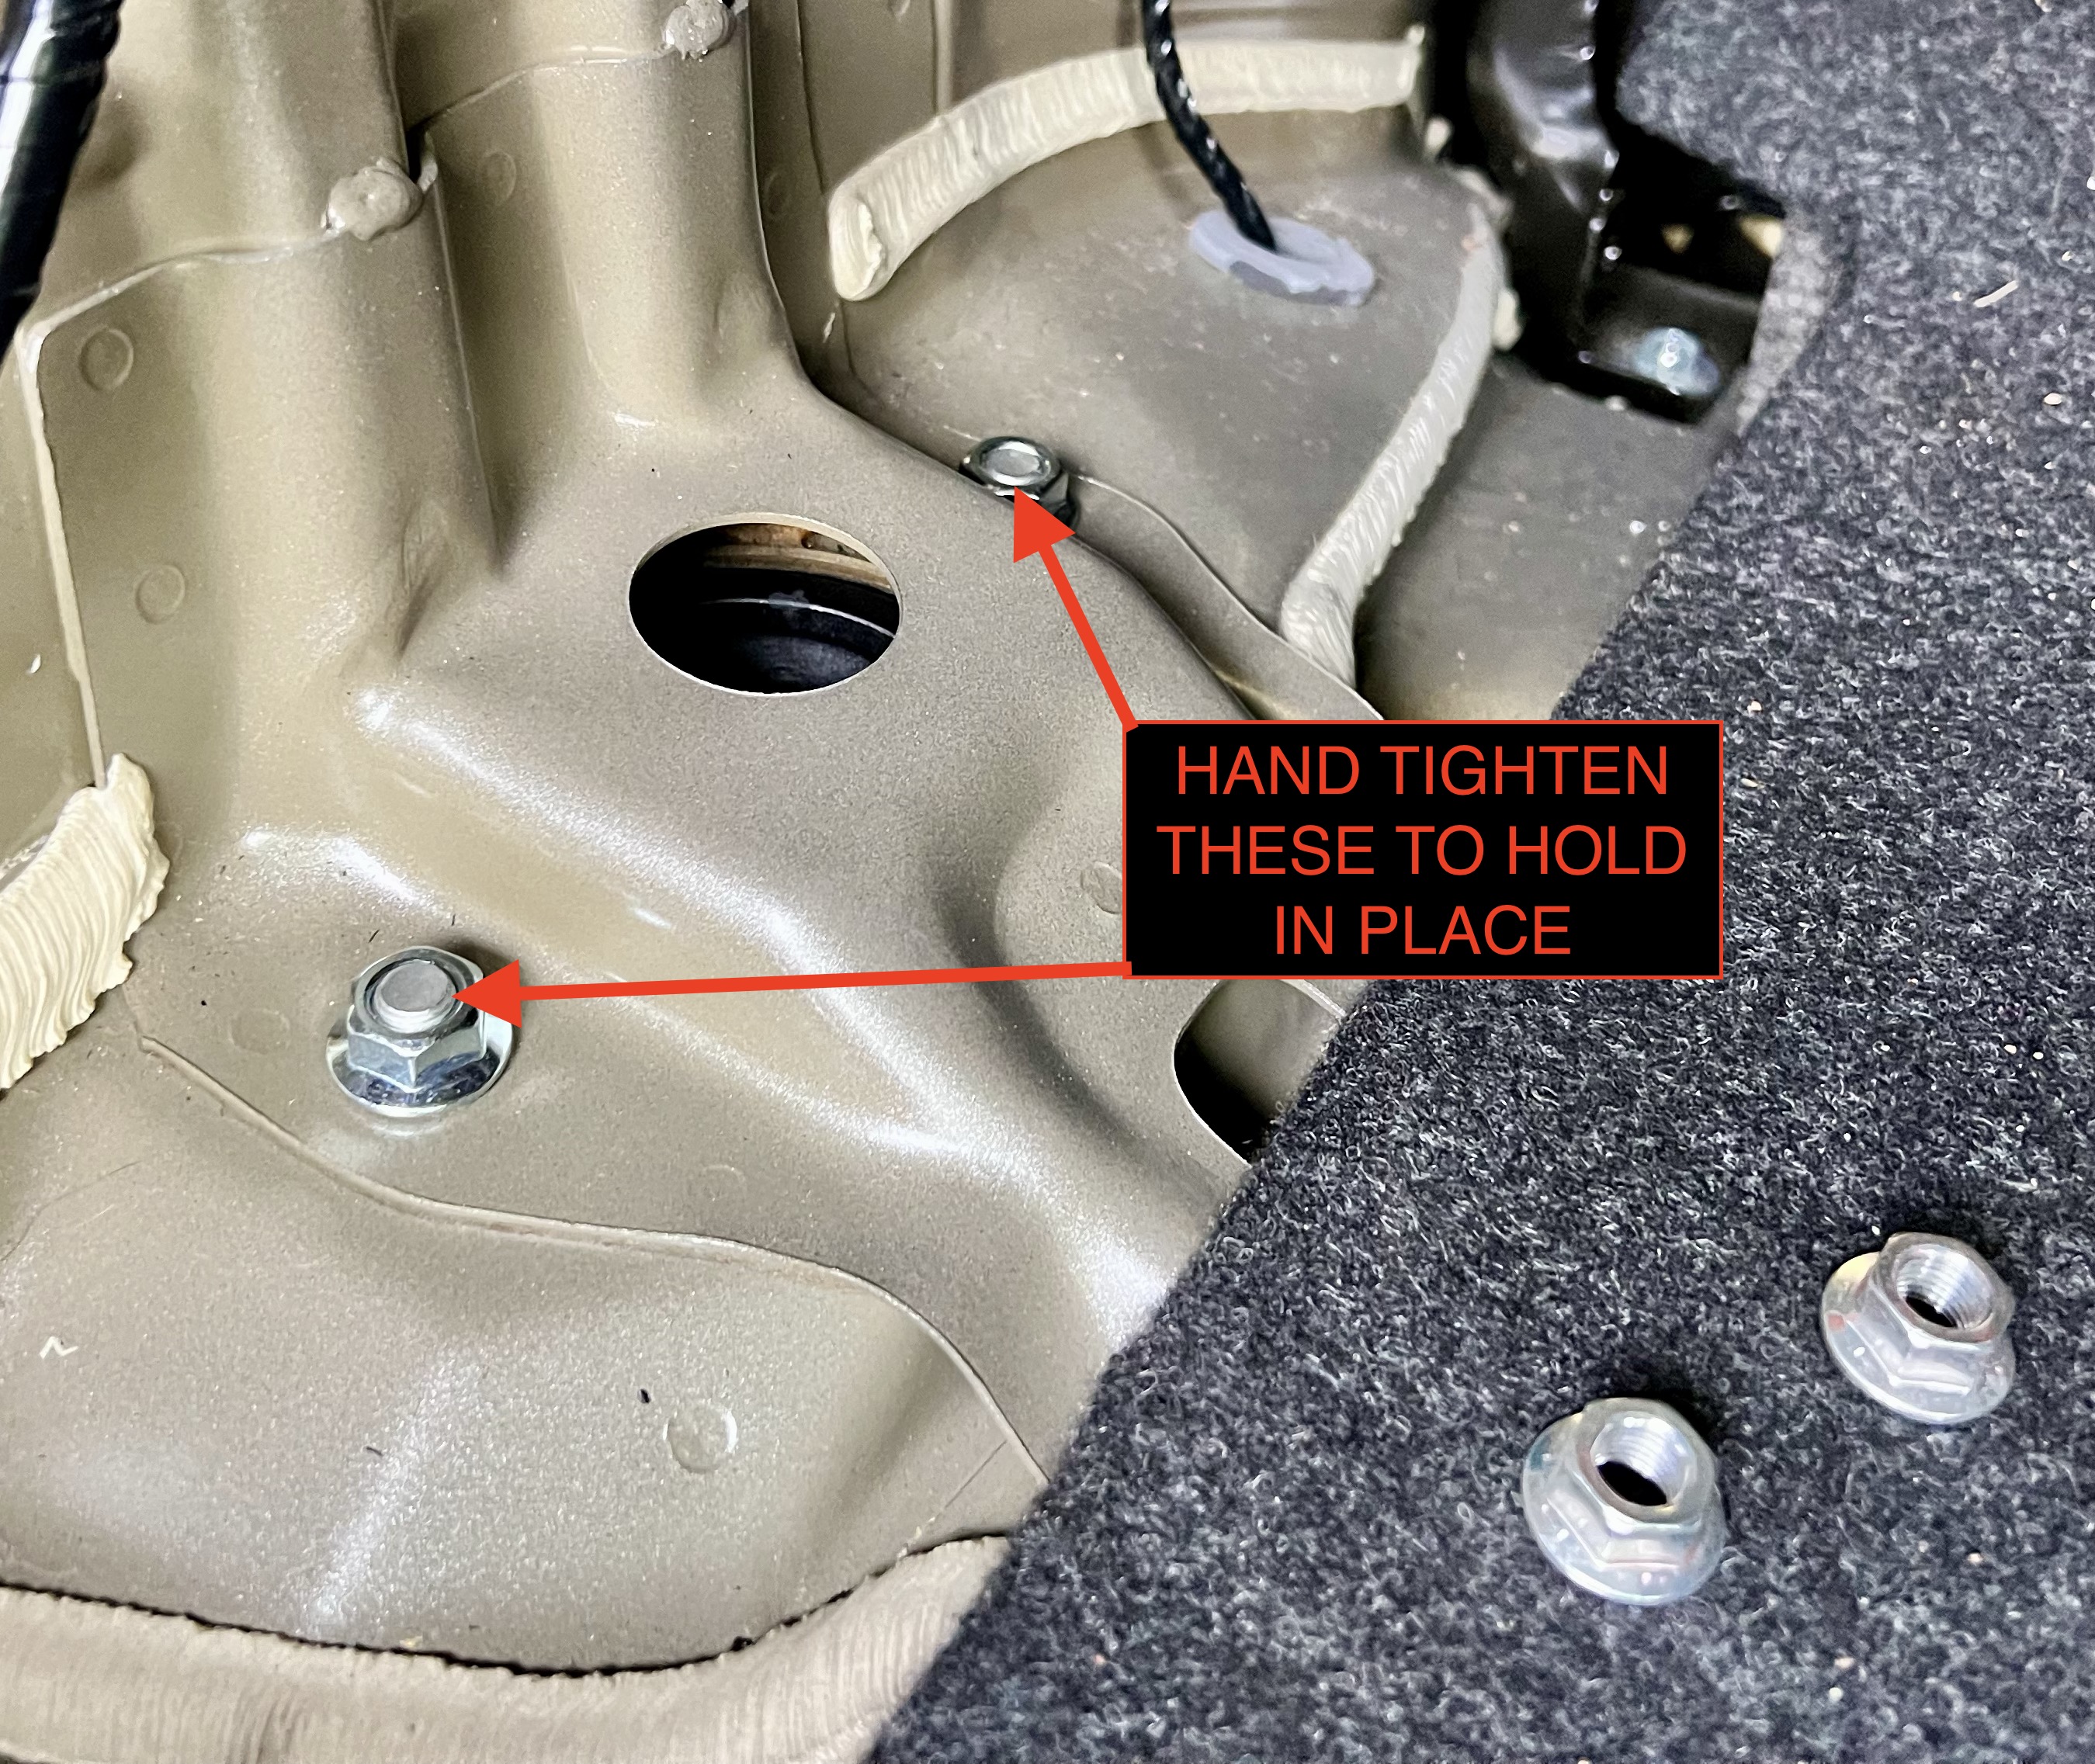
Clean up and you are done. Nice work!

I gained about an inch of clearance with the new struts and the car handles and drives nearly new again.

Leave a comment