
I had some one year pine seedlings ready to put in individual pots so I decided to try growing my own exposed root pines. Looking through several articles I settled on the approach below. This is a fun, fast, and simple project …assuming you already have seedlings!
Materials:
- 8" bulb pans/pots
- Bamboo shish kabob skewers
- 8' section of  flexible 4" perforated drain pipe
- Large pumice or similar material
- Small akadama blend or your preferred soil for black pines
- Ground sphagnum moss topping (explained further below)

NOTE: I buy my pumice and akadama and most all bonsai supplies from Bonsai by Fields.
Tools:
- Soldering Iron with round tip
- Cutting tool to cut ends of bamboo skewers
The Process
I start by plugging in the soldering iron to heat up. Then I get all my supplies laid out for the job. I did not take photos of every step as I believe it is very straight forward, but if anyone would like additional photos of the process please comment or contact me.
I use the end of the soldering iron similar to this one to poke 4 holes for the skewers. I make the holes about 4″ apart (which line up closely with the drainage holes in the pan) and about 1.5″ – 2″ above the bottom of the pan. While I understand this is not the intended use for a soldering iron it works extremely well for making holes in cheap plastic pots. I don’t drill the pots because it can be hard to get the drill started and I typically end up cracking or breaking the pot. Melting the holes works very well and is much faster for me. I also keep nice clean tips in the toolbox for those times I use the soldering iron for real soldering.
You can stick the skewers through the holes to confirm the holes are large enough.
Next I prepare the flexible drain pipe. This particular type of pipe is extendible and flexible just like a drinking straw which has benefits for this particular application as I will show you below. You can choose your own height depending on what you want to achieve, but I went with 12 corrugations which is about 8″. So I cut off the connection ends of the pipe as I only need the corrugated flexible section. Then I cut the quantity of sections I needed for this season (I am only trying 5 this year).
This part gets a little tricky, but you should be able to figure it out pretty quick. Melt four holes in the bottom corrugation of the pipe and install the skewers. Now, you can take your pipe with skewers and work them into one side of the bulb pan. Push them far enough that you can lower the other side of the skewers into the pan and work them out the other side. It is ok if it is not a direct fit and you have to force them through. Cut the long ends of the skewers and you should end up with something like this.
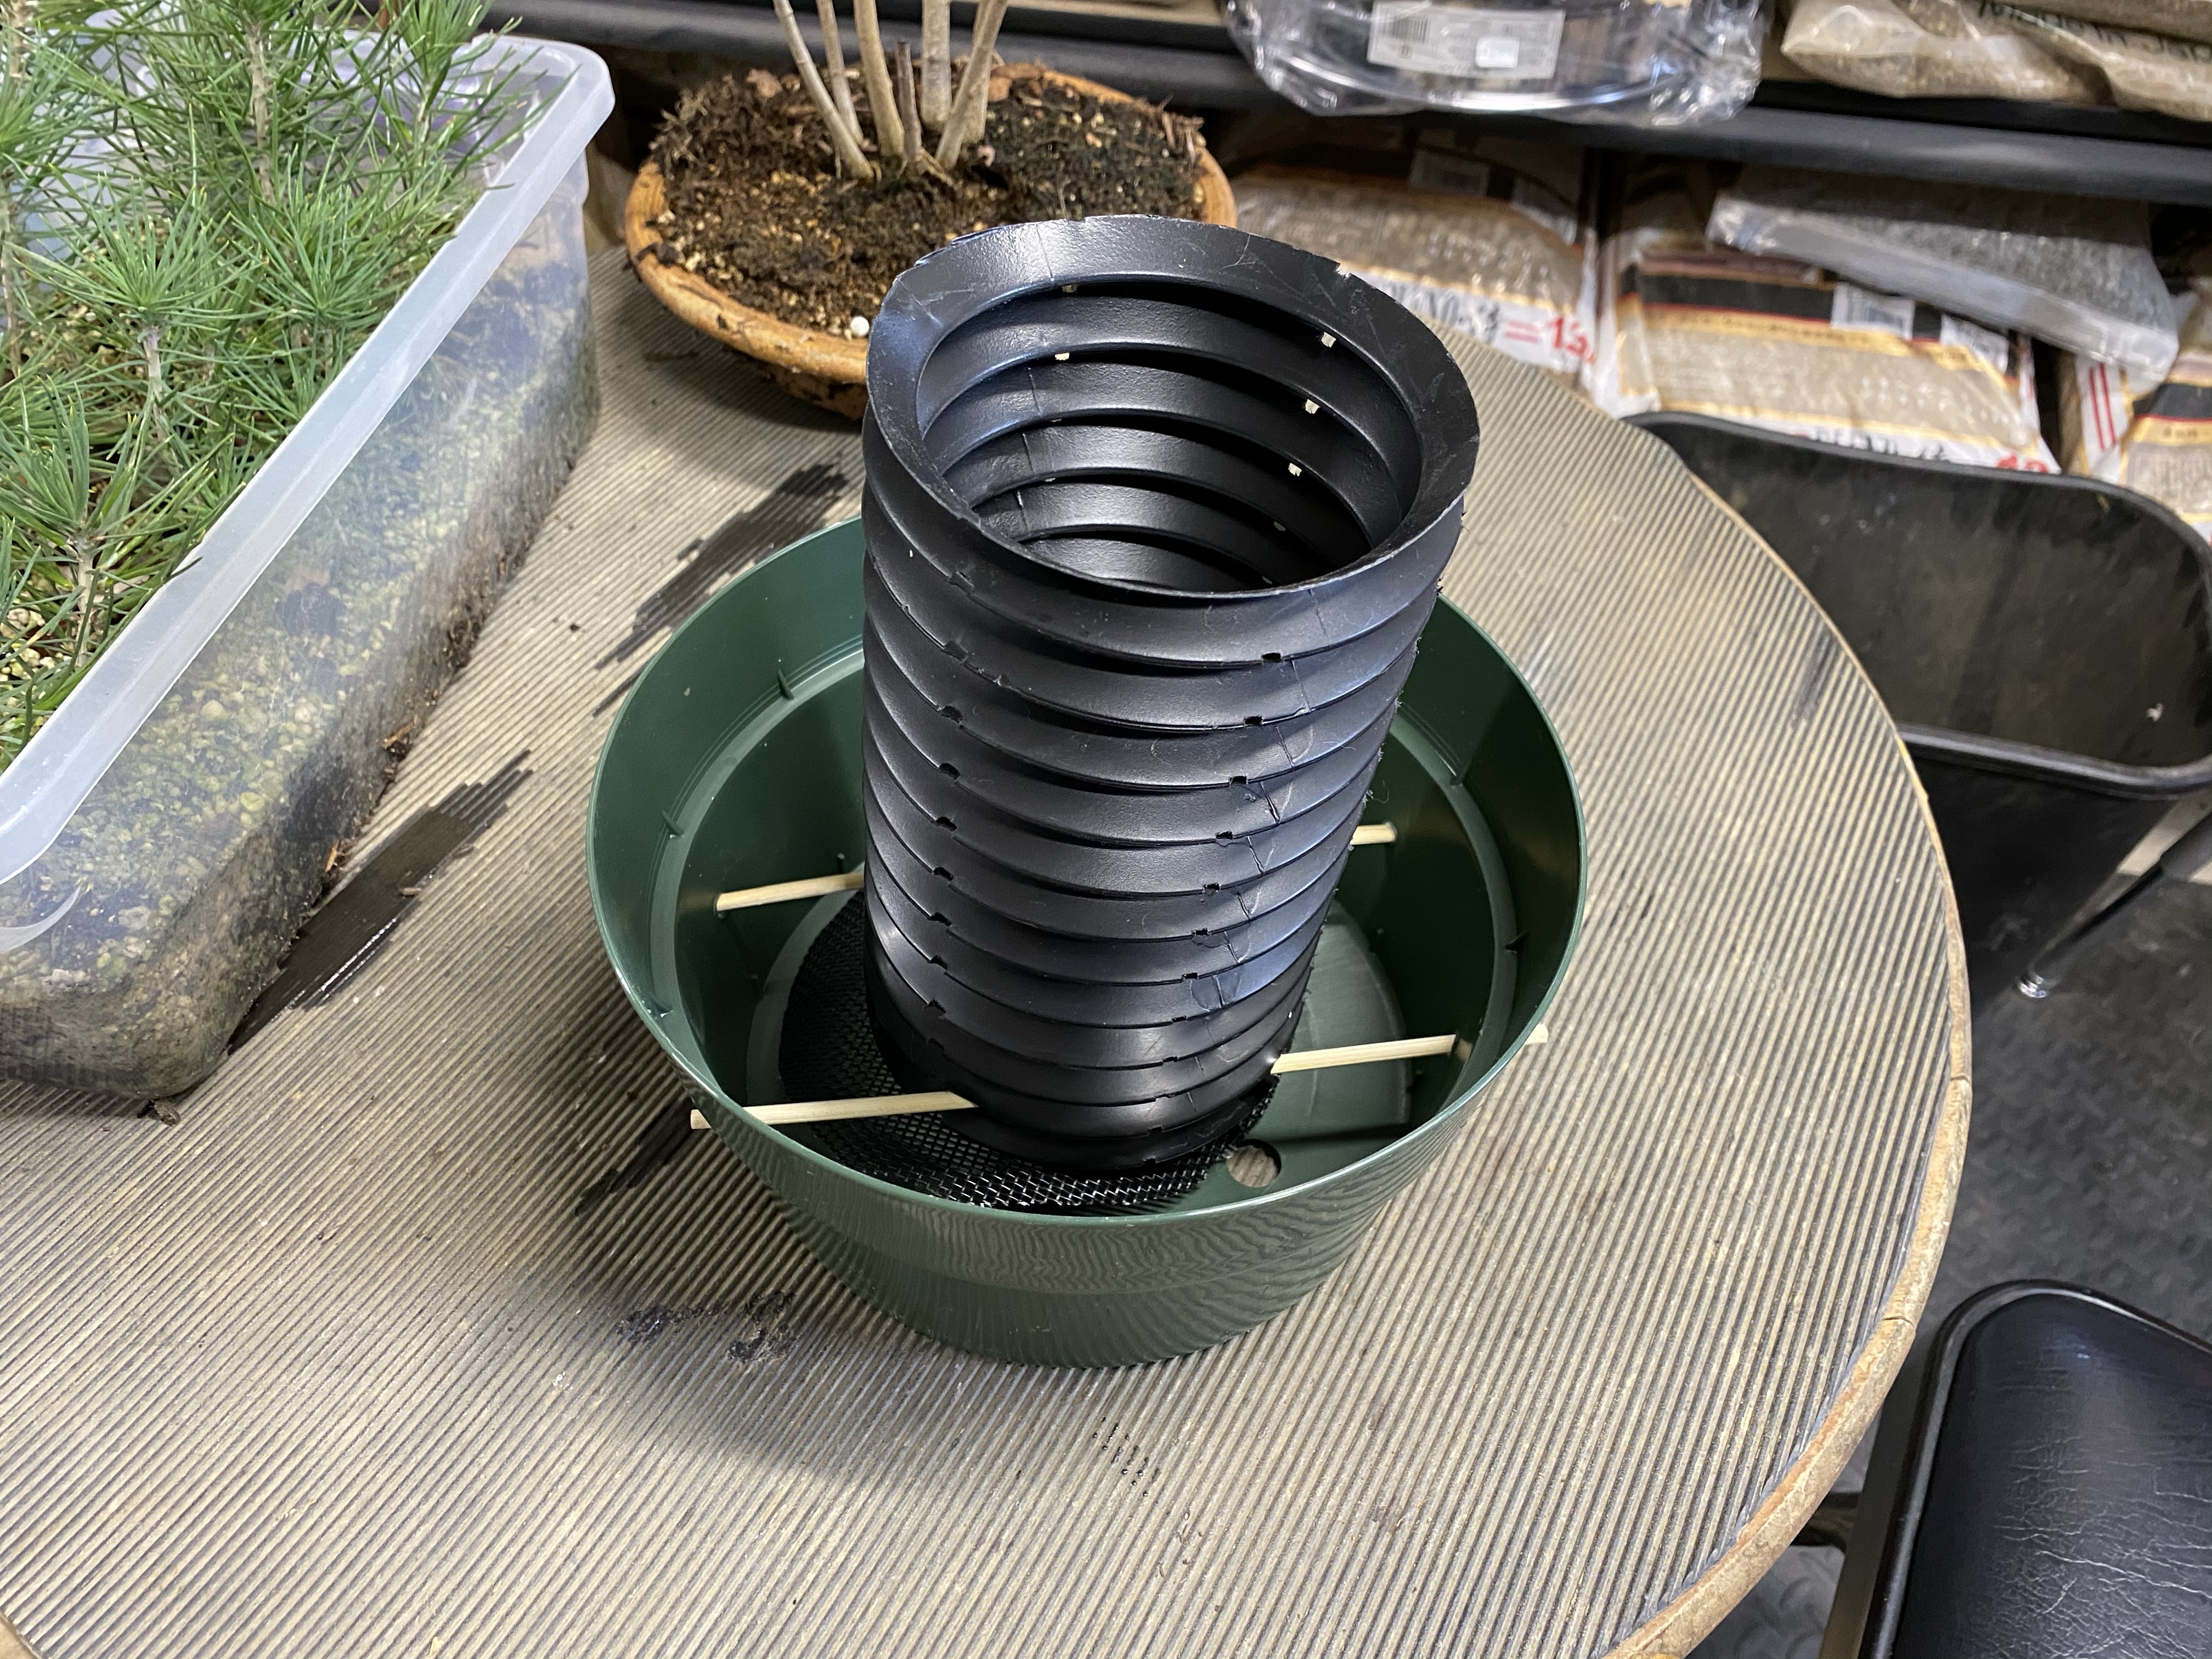
Why do we go to all this trouble of melting holes and trying to line all this up? Because it holds the pipe stably in place.
Why do I use this method with the bulb pan? Because it provides a stable base to hold the pipe and allows you room for soil for the pine roots to extend into. The soil in the bulb pan will eventually be your root base for this tree and you will remove the corrugated pipe slowly to reveal the exposed roots.
Now, you are ready for the next steps.
Bend the corrugated pipe to the configuration you want for the roots. This can provide some very basic flow to the roots. You can also shorten the pipe by pushing the corrugations back together.
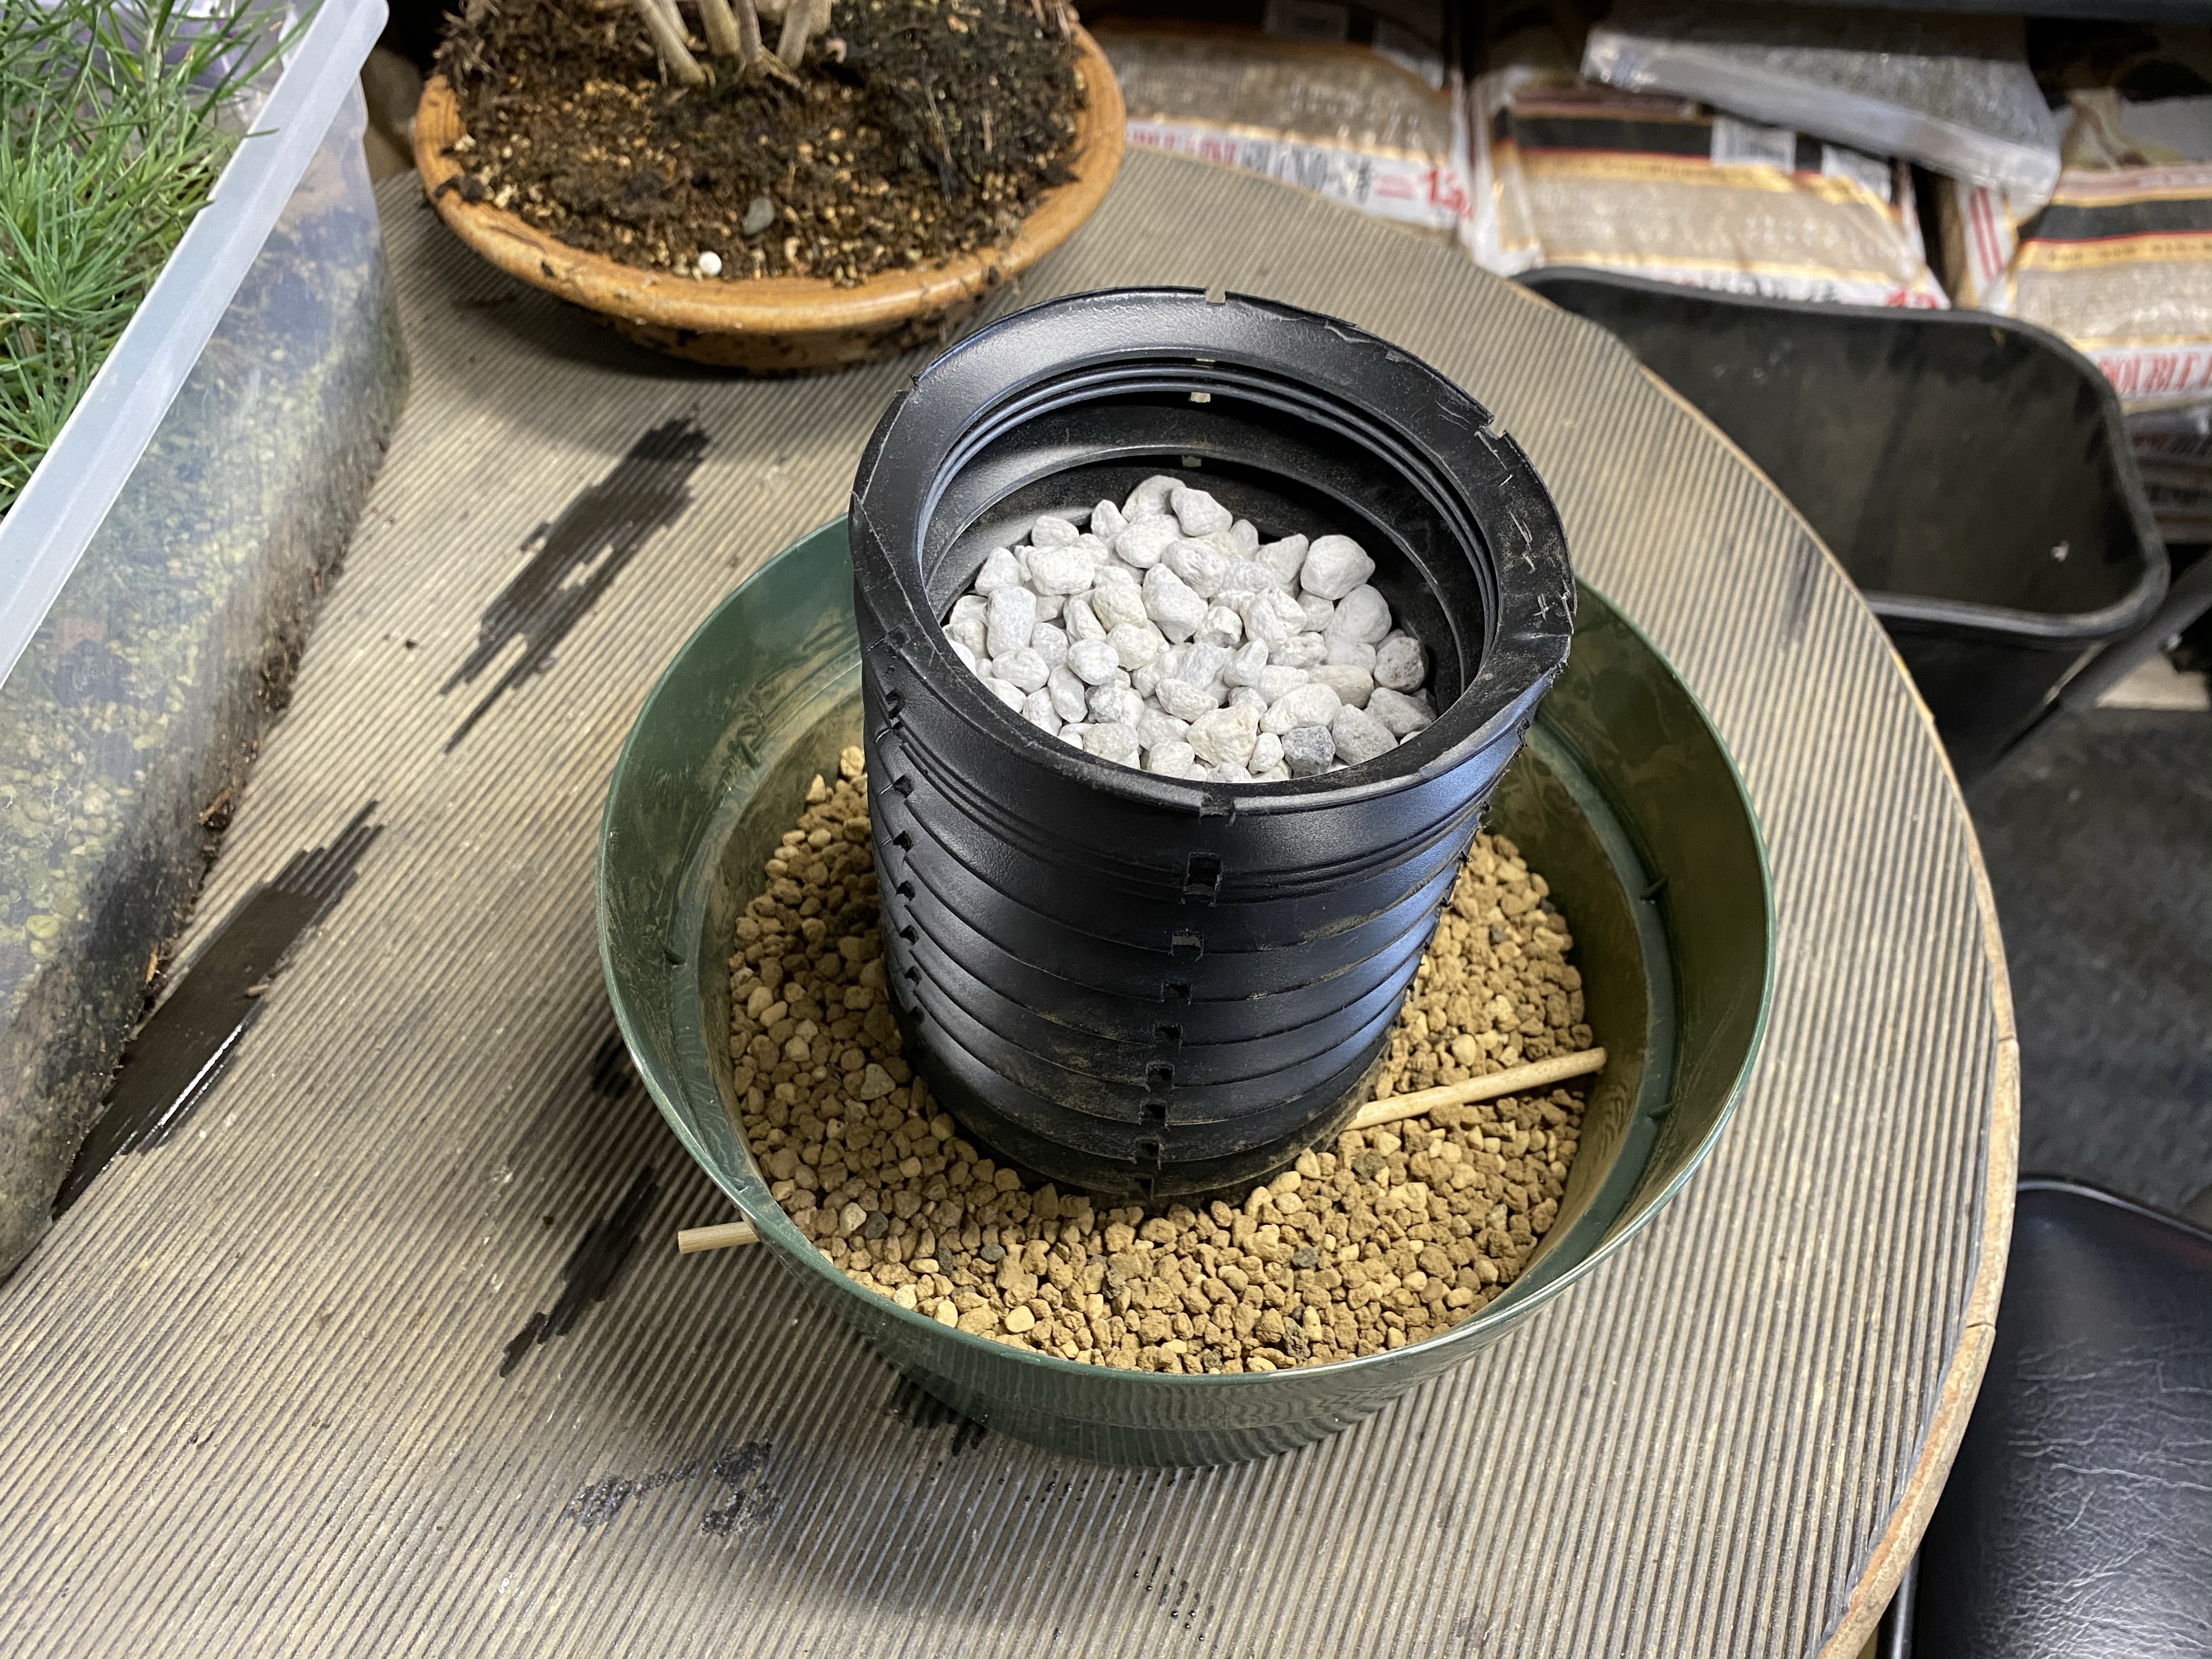
Install a screen or drainage layer of large akadama in the base of the pan. I am using screens this time.
Install your small akadama blend soil until you cover about 1/2″ of the corrugated pipe. Make sure you put soil in the pipe and around the perimeter.
Install the large pumice about 1′ – 1.5″ below the top of the pipe. Large stone is used in the pipe to separate the roots and add interest. You can use larger stone than shown here for a different effect.
Arrange the roots of your pine seedling the way you want and set it on top of the pumice.
Install the last layer of soil …I used the small akadama to cover the roots and hold the seedling in place.
Install your sphagnum moss. Do not use the sphagnum moss straight from the package. It is hard to get coverage with that tangled mess. The easiest way to use sphagnum moss was taught to me by Mark Fields. You grind the moss over a sifting screen into a bucket and it reduces it to a fine blend of moss that is easy to sprinkle on top. You mist with water and it is set in place.
Water your tree thoroughly and let it grow for 1-2 years. I plan to do some basic shaping and wiring next year, but for now, just let them grow.
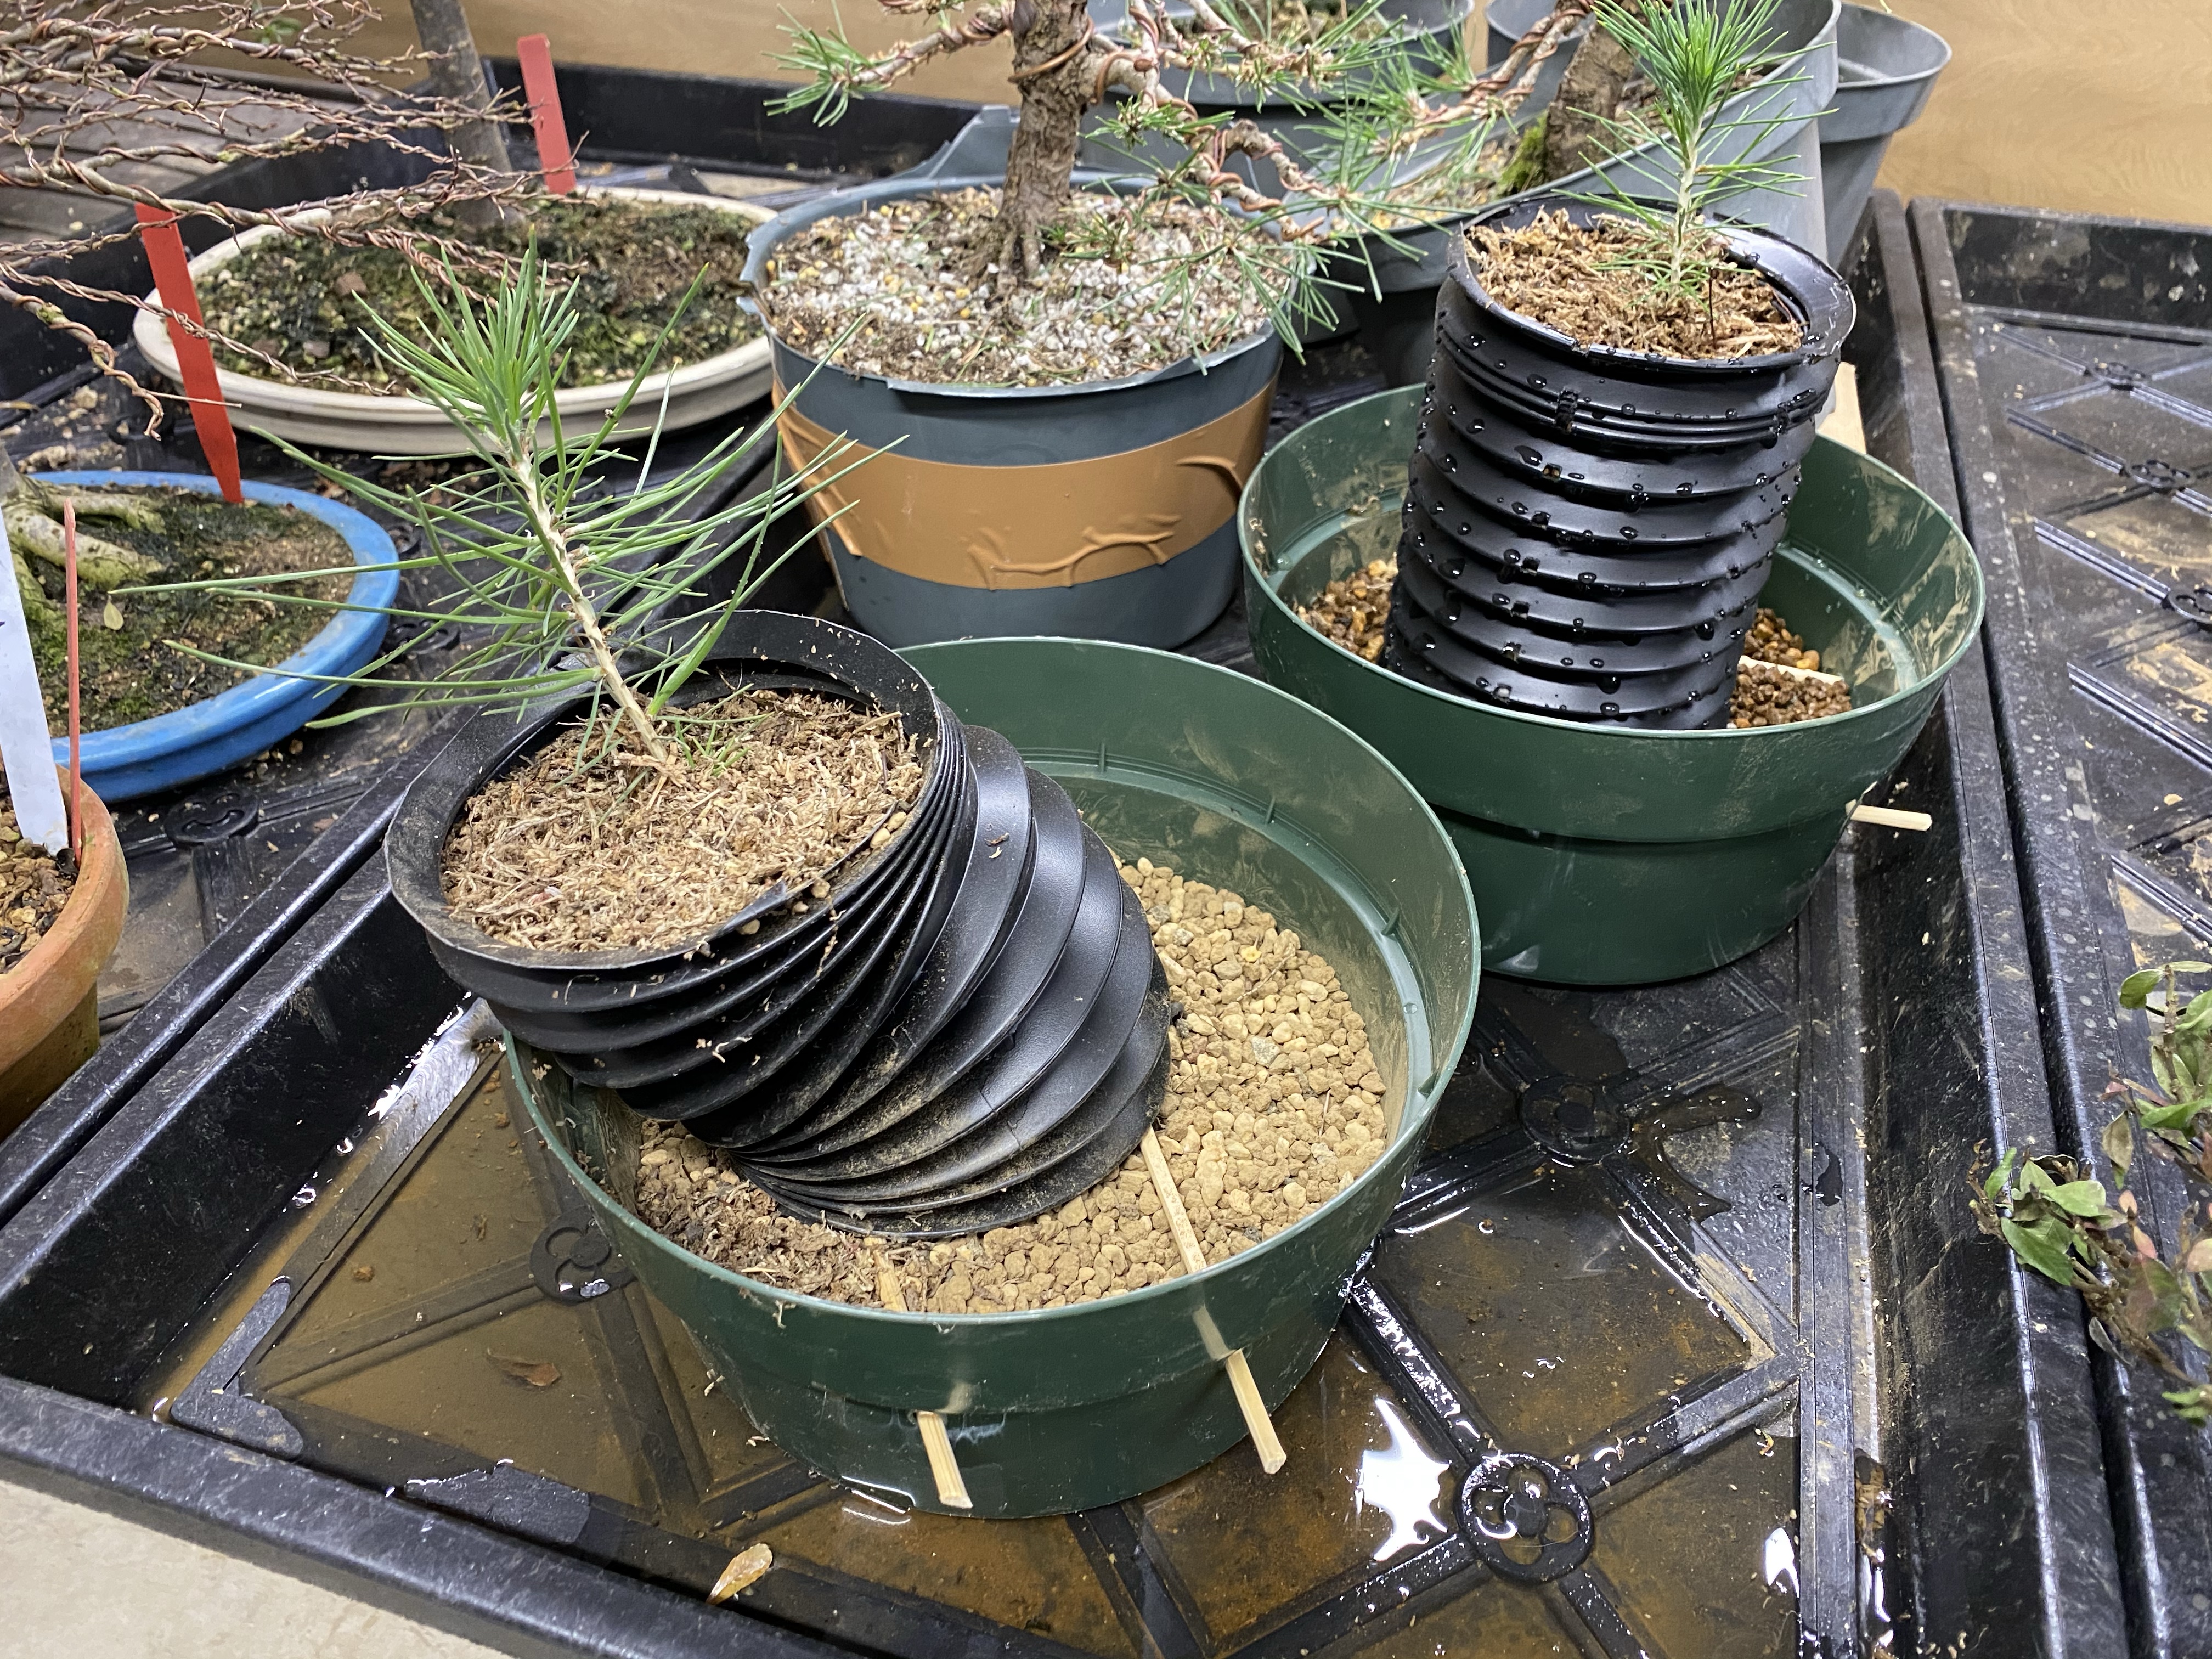
Here are two examples with the seedlings planted …one straight and one curved. I took the photo before thoroughly watering!
I hope you find this helpful and I will do a new post as these seedlings grow.